Back into it, finally!
Page 1 of 2 • 1, 2 ![]()

Back into it, finally!
![]() by slowlylearning Tue 22 Feb 2011, 6:58 pm
by slowlylearning Tue 22 Feb 2011, 6:58 pm
Bought some evergreen stuff, building a 32 topless hotrod with updated running gear, suspension and a scratch made chassy... not gunna be easy, very steep learning curve, dont even think I bought the right size evergreen


slowlylearning- AMCC ADDICT

-
 Number of posts : 1533
Age : 33
Location : Bris
Registration date : 2008-09-28
Re: Back into it, finally!
![]() by slowlylearning Tue 22 Feb 2011, 7:12 pm
by slowlylearning Tue 22 Feb 2011, 7:12 pm


munted chassy


slowlylearning- AMCC ADDICT
- Number of posts : 1533
Age : 33
Location : Bris
Registration date : 2008-09-28
Re: Back into it, finally!
![]() by tezza43 Tue 22 Feb 2011, 7:56 pm
by tezza43 Tue 22 Feb 2011, 7:56 pm
Keep us posted on progress.


tezza43- AMCC ADDICT
- Number of posts : 4318
Age : 80
Location : Mornington, Victoria
Registration date : 2008-03-21
Re: Back into it, finally!
![]() by slowlylearning Tue 22 Feb 2011, 9:02 pm
by slowlylearning Tue 22 Feb 2011, 9:02 pm


haha thanks tezza
Edit- Some 1:1 chassy designs Iv been looking it... want to kinda hide it under the body so i get that awesome bodyline of the rod along the bottom...


slowlylearning- AMCC ADDICT
- Number of posts : 1533
Age : 33
Location : Bris
Registration date : 2008-09-28
Re: Back into it, finally!
![]() by slowlylearning Wed 23 Feb 2011, 10:58 am
by slowlylearning Wed 23 Feb 2011, 10:58 am
that curved tube part is for the end of the tranny tunnel the crappy part next to it was my first attempt... only doing the rails in the large rectangular strips. the rest will be tube, as its easy to bend

EDIT
added some more tube, cutting, throwing it in a pile and gluing!

slowlylearning- AMCC ADDICT
- Number of posts : 1533
Age : 33
Location : Bris
Registration date : 2008-09-28
Re: Back into it, finally!
![]() by zenrat Thu 24 Feb 2011, 11:06 am
by zenrat Thu 24 Feb 2011, 11:06 am
_________________
Fred
Badda Bing Badda Bang

zenrat- Moderator
- Number of posts : 6842
Age : 56
Location : Dank Northern slopes of Mount Martha, Vic
Registration date : 2008-07-17
Re: Back into it, finally!
![]() by slowlylearning Sun 27 Feb 2011, 12:05 am
by slowlylearning Sun 27 Feb 2011, 12:05 am
anyway, decided to make some custom wheels. heres the start on them.


sorry for so many photos. testing out the camera on my phone...
slowlylearning- AMCC ADDICT
- Number of posts : 1533
Age : 33
Location : Bris
Registration date : 2008-09-28
Re: Back into it, finally!
![]() by mopar68 Sun 27 Feb 2011, 12:23 am
by mopar68 Sun 27 Feb 2011, 12:23 am

mopar68- Legend Poster
- Number of posts : 1386
Age : 30
Location : TAS
Registration date : 2011-01-09
Re: Back into it, finally!
![]() by slowlylearning Sun 27 Feb 2011, 4:34 pm
by slowlylearning Sun 27 Feb 2011, 4:34 pm
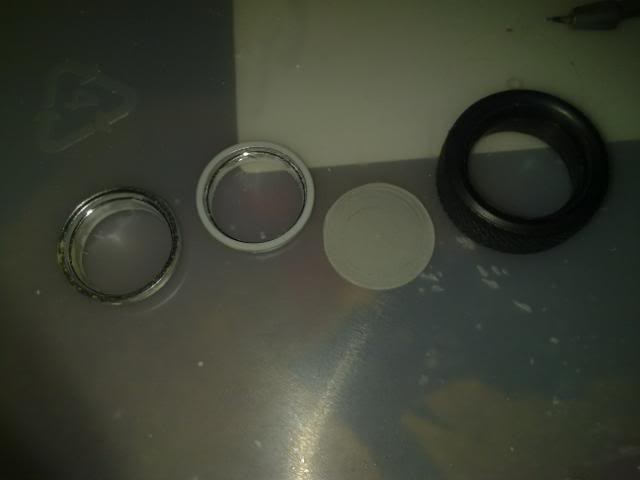
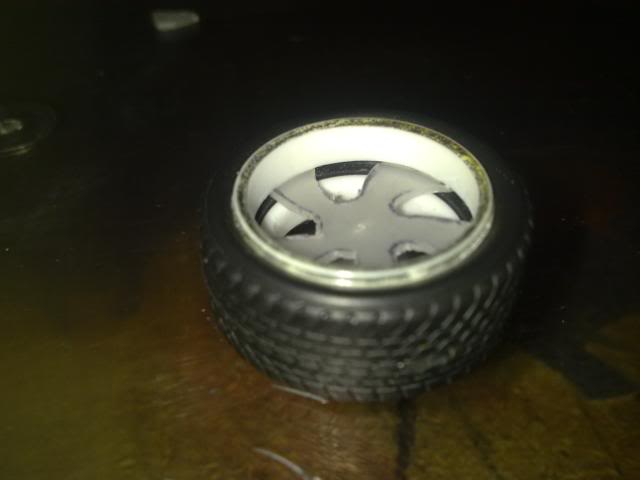
got started on the bigger rear wheel today... took a fidderent approach to removing the existing design, while creating a thinner lip to make more room for the ne wdesign (which i have not figured out how to transfer onto the plastic circles yet... can my regular printer print onto acetate?

front

back

the pieces so far

the great thing about making a new set of wheels is that you can make one of the front and one of the larger back one, and make copies
slowlylearning- AMCC ADDICT
- Number of posts : 1533
Age : 33
Location : Bris
Registration date : 2008-09-28
Re: Back into it, finally!
![]() by slowlylearning Sun 27 Feb 2011, 5:43 pm
by slowlylearning Sun 27 Feb 2011, 5:43 pm
what is the only thing i cannot find?
CLEAR STICKY TAPE.[u]
drew on the design, now i just need tape to hold it still and not smudge off the pen...

slowlylearning- AMCC ADDICT
- Number of posts : 1533
Age : 33
Location : Bris
Registration date : 2008-09-28
Re: Back into it, finally!
![]() by slowlylearning Sun 27 Feb 2011, 6:38 pm
by slowlylearning Sun 27 Feb 2011, 6:38 pm

slowlylearning- AMCC ADDICT
- Number of posts : 1533
Age : 33
Location : Bris
Registration date : 2008-09-28
mopar68- Legend Poster
- Number of posts : 1386
Age : 30
Location : TAS
Registration date : 2011-01-09
Re: Back into it, finally!
![]() by Andrew J Sun 27 Feb 2011, 8:44 pm
by Andrew J Sun 27 Feb 2011, 8:44 pm
i havent developed the patience to try and build my own chassis let alone a set of wheels.
Good luck

Andrew J- I should be working on Models

- Number of posts : 407
Age : 42
Location : Sydney
Registration date : 2010-10-28
Re: Back into it, finally!
![]() by slowlylearning Sun 27 Feb 2011, 9:22 pm
by slowlylearning Sun 27 Feb 2011, 9:22 pm
thinking of making a set of 18s and 20s. might not even use them on this hotrod. Iv got a chevelle wagon begging for the sedan-delivery treatment
slowlylearning- AMCC ADDICT
- Number of posts : 1533
Age : 33
Location : Bris
Registration date : 2008-09-28
Re: Back into it, finally!
![]() by Captain BF Mon 28 Feb 2011, 1:39 am
by Captain BF Mon 28 Feb 2011, 1:39 am
I like the look of it all though. Look forward to seeing how it turns out...
Captain BF- Glue Sniffer

- Number of posts : 54
Registration date : 2011-01-18
Re: Back into it, finally!
![]() by Chris Mon 28 Feb 2011, 3:40 pm
by Chris Mon 28 Feb 2011, 3:40 pm

Chris- I should be working on Models
- Number of posts : 330
Age : 51
Location : Box Hill NSW
Registration date : 2010-03-21 -

Re: Back into it, finally!
![]() by slowlylearning Mon 28 Feb 2011, 8:18 pm
by slowlylearning Mon 28 Feb 2011, 8:18 pm
wont be doing any tonight- i got crap-arse jury duty tomorrow >.>
slowlylearning- AMCC ADDICT
- Number of posts : 1533
Age : 33
Location : Bris
Registration date : 2008-09-28
Re: Back into it, finally!
![]() by slowlylearning Mon 28 Feb 2011, 9:33 pm
by slowlylearning Mon 28 Feb 2011, 9:33 pm
- 1x left wheel insert 19"
-1x right wheel insert 19"
-1x left wheel insert 20"
-1x right wheel insert 20"
-2x 19" sleeve
-2x 20" sleeve
-2x front tyre
-2x rear tyre
-4x hub and lugnut plate
-4x mounting tube
-2x front finned rotors
-2x rear finned rotors
-4x calipers
thats just for my sanity
Plans for the wheel inserts are to make each one individually, since they have to be directional. Shouldnt be too hard, unless I decide to 'dome' them outwards. still, that shouldnt be too difficuly, just pin them to a deodorant lid and slightly heat.
Wheel sleeves are going to be easy. pi x diameter etc.
wheel hub and lugnut plates should be simple enough. might even try to just make one and mould it.
slotted brake rotors- going to get some extremely thin styrene and cut out a circle, cut outwards fron center a bunch af times and twist. then another 2 circles for the outsides.
calipers will be a prick. im terrible at making the small stuff and duplicating it.
Tyres are my biggest problem now. I cant justify buying a set of those pegasus ones, just cause theyre a tad expensive for me. so ill be modifying the ones i already have... the rear and front are different sizes, so it should be easy i guess. I just need a new blade for my exacto. they disappear so quickly!.
slowlylearning- AMCC ADDICT
- Number of posts : 1533
Age : 33
Location : Bris
Registration date : 2008-09-28
Re: Back into it, finally!
![]() by slowlylearning Wed 02 Mar 2011, 8:35 pm
by slowlylearning Wed 02 Mar 2011, 8:35 pm

now the brakes... they look megacrap cause i rushed to see if it was a feecable material to be making them with... the outside bits are, but the vents need to be much thinner... heres the crapness of pics


slowlylearning- AMCC ADDICT
- Number of posts : 1533
Age : 33
Location : Bris
Registration date : 2008-09-28
Re: Back into it, finally!
![]() by mopar68 Wed 02 Mar 2011, 8:48 pm
by mopar68 Wed 02 Mar 2011, 8:48 pm
mopar68- Legend Poster
- Number of posts : 1386
Age : 30
Location : TAS
Registration date : 2011-01-09
Re: Back into it, finally!
![]() by slowlylearning Wed 02 Mar 2011, 9:00 pm
by slowlylearning Wed 02 Mar 2011, 9:00 pm
slowlylearning- AMCC ADDICT
- Number of posts : 1533
Age : 33
Location : Bris
Registration date : 2008-09-28
mopar68- Legend Poster
- Number of posts : 1386
Age : 30
Location : TAS
Registration date : 2011-01-09
Re: Back into it, finally!
![]() by sports850 Wed 02 Mar 2011, 9:02 pm
by sports850 Wed 02 Mar 2011, 9:02 pm

sports850- Legend Poster
- Number of posts : 1065
Age : 53
Location : Red Rock NSW
Registration date : 2009-08-07
Re: Back into it, finally!
![]() by slowlylearning Wed 02 Mar 2011, 10:23 pm
by slowlylearning Wed 02 Mar 2011, 10:23 pm
tried a different material, heres the method and results...


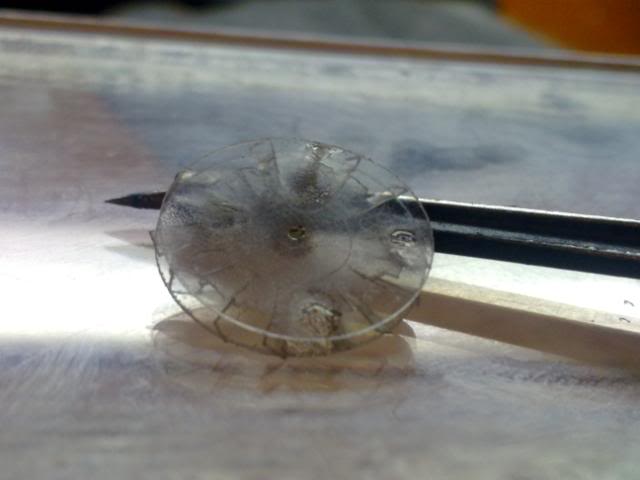
as you can see its really crappy, a few of a fanned bits layed back down when i glues it together, and one fell off when i twisted it >.>
for my next attempy ill be using the same material, but a different method
slowlylearning- AMCC ADDICT
- Number of posts : 1533
Age : 33
Location : Bris
Registration date : 2008-09-28
Re: Back into it, finally!
![]() by slowlylearning Wed 02 Mar 2011, 11:53 pm
by slowlylearning Wed 02 Mar 2011, 11:53 pm


slowlylearning- AMCC ADDICT
- Number of posts : 1533
Age : 33
Location : Bris
Registration date : 2008-09-28
Page 1 of 2 • 1, 2 ![]()
» Finally got one finished.
» Police Academy 4 Van
» 59 Chev ...another update
» RX-7 outside shotz.....Finally....sum sunlight....
|
|
|