Black Magic
+4
tezza43
allan
aussie muscle
doorslammerfan
8 posters
Page 1 of 2
Page 1 of 2 • 1, 2 
 Black Magic
As you can see from the following image
http://images107.fotki.com/v67/photos/1/177223/5536490/drm318-vi.jpg
the Kit Vegas are quite different see following

So the chopping commences . I had already the body (which was quite twisted) in primer with front and rear panels attached to look for any nasty surprises , also helps to have a contrasting color when you're scribing parts out.First up off came the hood scoop
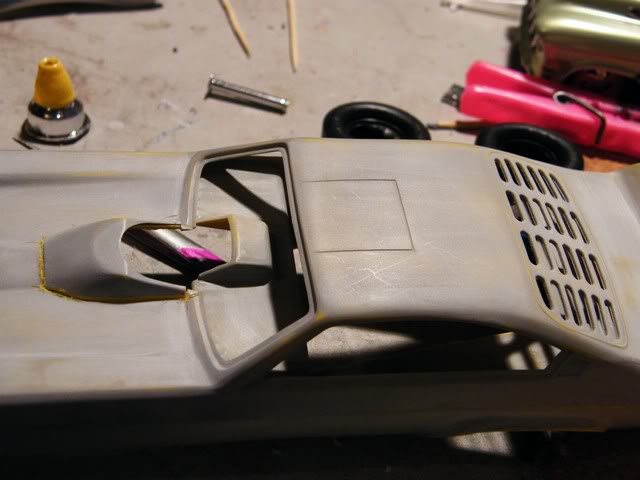
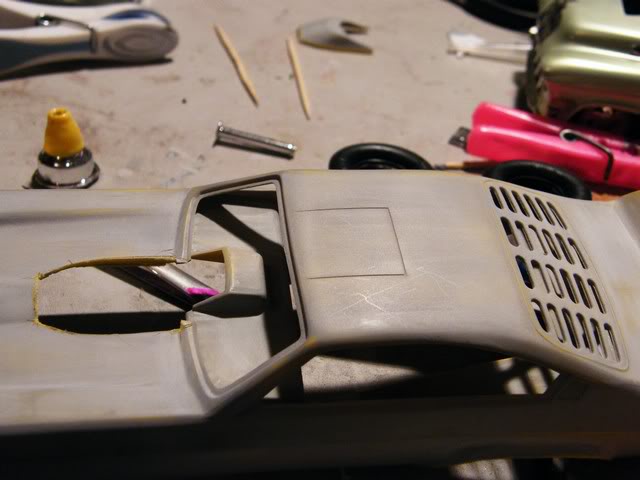
then the patch panel
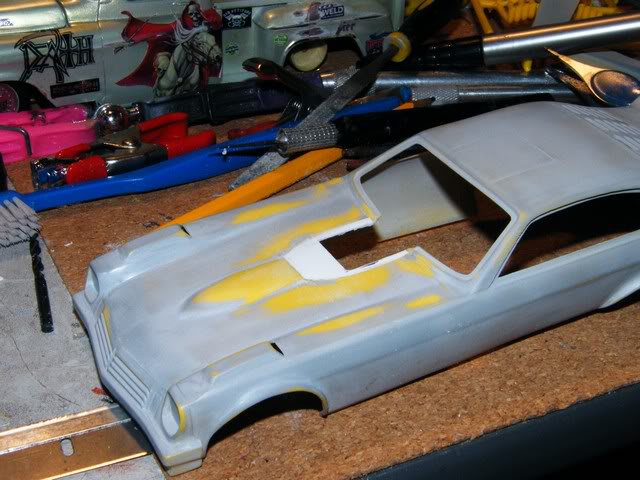

Then while that was drying I realized the motor would have to be move forward much like Chris's Army Vega. But not wanting to go to as much effort :unsure: I decided to move the engine mounts and lengthen the drive shaft

so I cut the mount brackets off and re glued them on the opposite sides on the other side of the frame uprights

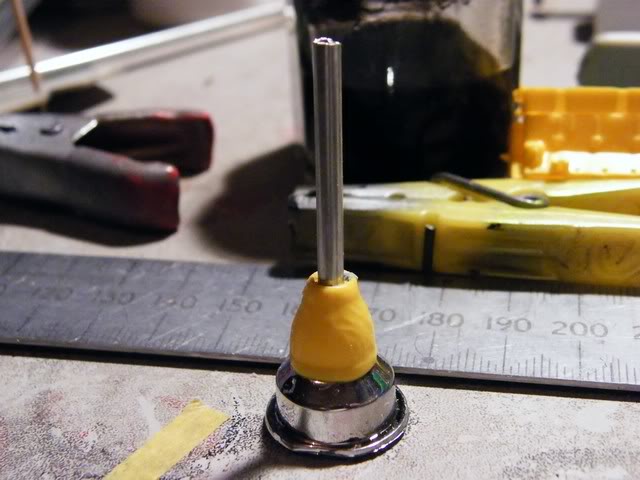
Drive shaft has a nasty seem as well as been to being too short now

so replaced with aluminum rod
http://images107.fotki.com/v67/photos/1/177223/5536490/drm318-vi.jpg
the Kit Vegas are quite different see following

So the chopping commences


then the patch panel


Then while that was drying I realized the motor would have to be move forward much like Chris's Army Vega. But not wanting to go to as much effort :unsure: I decided to move the engine mounts and lengthen the drive shaft

so I cut the mount brackets off and re glued them on the opposite sides on the other side of the frame uprights

Drive shaft has a nasty seem as well as been to being too short now

so replaced with aluminum rod

 Re: Black Magic
So while the frame's drying I started ( and finished) removing the rear window louvers and making up a new rear window

As you can see I installed a thin frame for the new window to sit in


The new body work has a thin smear of putty over the joins which I'll sand back tonight
Changed a couple bars so the bell housing isnt sitting in no frames land


body as it sits now

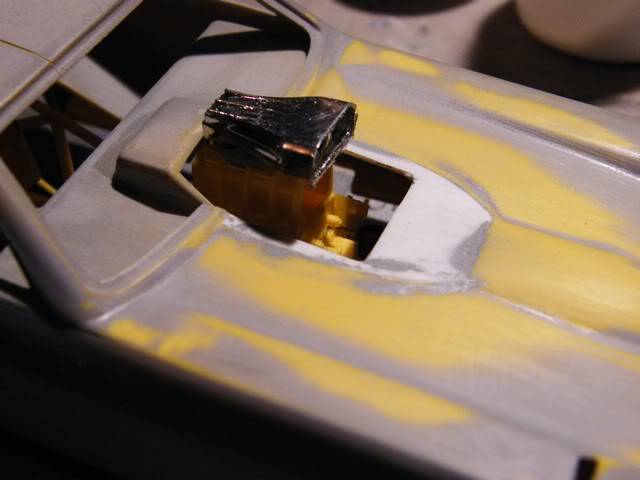
and as the reference pic I extended the rear spoiler a little, may knock a bit off the top but it looks about right to me
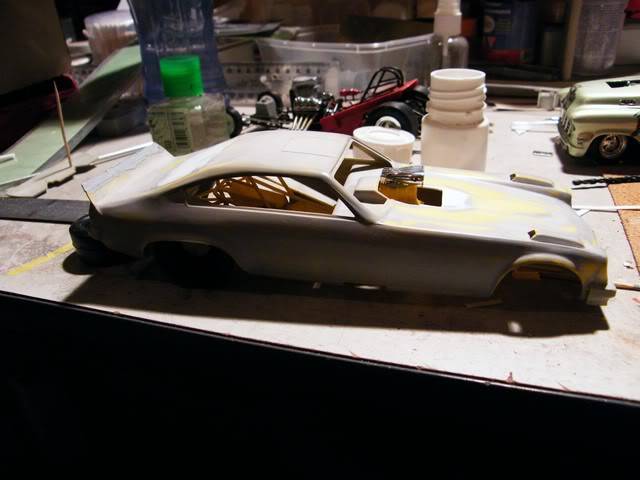

As you can see I installed a thin frame for the new window to sit in


The new body work has a thin smear of putty over the joins which I'll sand back tonight
Changed a couple bars so the bell housing isnt sitting in no frames land


body as it sits now


and as the reference pic I extended the rear spoiler a little, may knock a bit off the top but it looks about right to me


allan- AMCC ADDICT

-
 Number of posts : 10406
Age : 67
Location : East Maitland
Registration date : 2008-03-31
 Re: Black Magic
What a difference a shave makes.  Looking good so far - loving every bit of it.


tezza43- AMCC ADDICT

-
 Number of posts : 4318
Age : 81
Location : Mornington, Victoria
Registration date : 2008-03-21
 Re: Black Magic
the link to the other photo worked this time so I could see what you are making,that's going to be a wild vega once done. 


allan- AMCC ADDICT

-
 Number of posts : 10406
Age : 67
Location : East Maitland
Registration date : 2008-03-31
 Re: Black Magic
Wow mate looking good, I believe I've said it before, but you have some serious skill 

mopar68- Legend Poster

-
 Number of posts : 1386
Age : 30
Location : TAS
Registration date : 2011-01-09
 Re: Black Magic
Thats gonna be wild mate, looking forward to this build, ( like i do with all of your builds)! 


DeeCee- AMCC ADDICT

-
 Number of posts : 3772
Age : 58
Location : Launceston Tas
Registration date : 2011-08-07
 Re: Black Magic
Thanks guys,Well I put some primer on and l took some primer off sanded for high low spots) then I put some primer on and when I sanded it back off I was pretty happy with it (dang there goes my song). In between primer drying times I painted a few bits and started engine detailing. Oil lines

Yes I know the sumps not painted but I dont want the paint to rub off with all the handling
Blower manifold plumbed and plug wires done


test fits one and two

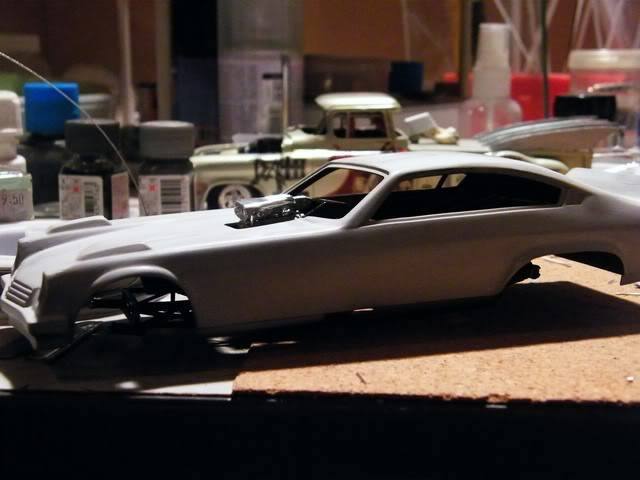
tomorrow I will mock the headers up for the body cutouts then start laying some colors down as That will be the most time consuming job of the whole build

Yes I know the sumps not painted but I dont want the paint to rub off with all the handling
Blower manifold plumbed and plug wires done


test fits one and two


tomorrow I will mock the headers up for the body cutouts then start laying some colors down as That will be the most time consuming job of the whole build
 Re: Black Magic
Looking good so far DSF 

Adam Clark- Legend Poster

-
 Number of posts : 1063
Age : 27
Location : Launceston
Registration date : 2011-07-11
 Re: Black Magic
Thanks Adam, Put some paint on , yellow was done yesterday masked for the orange last night.

Orange was sprayed this morning did the masks about lunchtime then sprayed the black


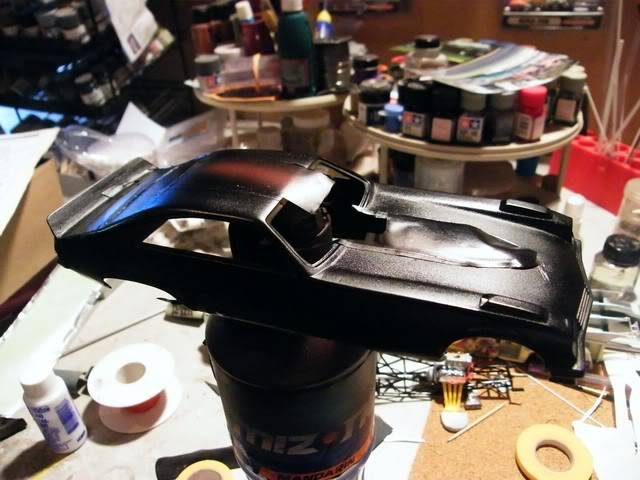

Orange was sprayed this morning did the masks about lunchtime then sprayed the black


 Re: Black Magic
Cleaned the airbrush then started removing the masks. Few little touch up spots but overall I'm pretty happy with it. Will let it dry and then give it a light west sand then go from there.


 Re: Black Magic
Cool paint job

mopar68- Legend Poster

-
 Number of posts : 1386
Age : 30
Location : TAS
Registration date : 2011-01-09
 Re: Black Magic
Really taking place now. Loving it 
Better get on those touch ups, a little noticable
Better get on those touch ups, a little noticable

Adam Clark- Legend Poster

-
 Number of posts : 1063
Age : 27
Location : Launceston
Registration date : 2011-07-11
 Re: Black Magic
Those colours definately POP against the black mate, gonna look good when done. 


DeeCee- AMCC ADDICT

-
 Number of posts : 3772
Age : 58
Location : Launceston Tas
Registration date : 2011-08-07
 Re: Black Magic
thanks guys, Well I know why I dont do low riders now. 2hrs of masking to do the yellow pin strips and looks like another 2 to do the orange ones : . Anyways pretty happy with how they've come out and gave free handing the name a go as my mask didnt work.


little bit more work on the name I think it will be fine, hope you all have a safe and merry xmas


little bit more work on the name I think it will be fine, hope you all have a safe and merry xmas
 Re: Black Magic
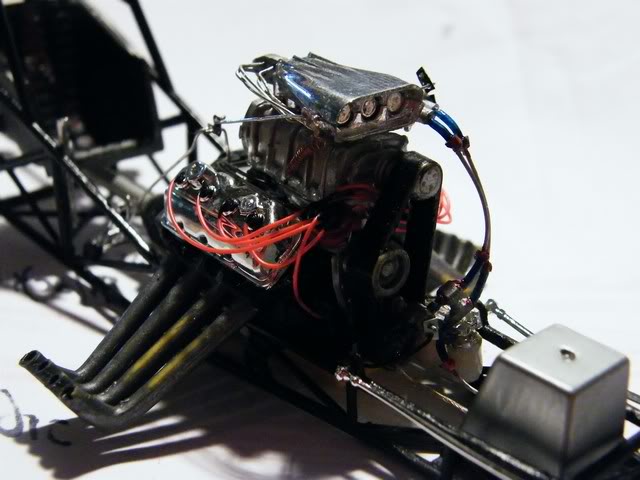
nearly made myself go blind today (no not like that you sickos) I did the rest of the engine detailing (well most of it ). All A/N fittings are scratch built out of toys twist ties and hex styrene drilled then rounded off ends. Fuel shut off and throttle linkages are bits of coke can.

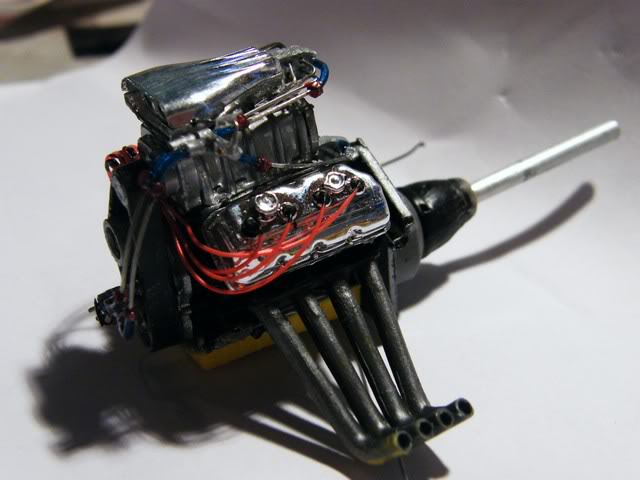

test fit

as you can see the body's being remasked for the orange pinstirping and tiding up some of the orange bits,
all hooked up in the chassis


still need to do the accelerator linkages and spring paint the sump and redo the headers in flat black.
Thanks for checking in


test fit

as you can see the body's being remasked for the orange pinstirping and tiding up some of the orange bits,
all hooked up in the chassis


still need to do the accelerator linkages and spring paint the sump and redo the headers in flat black.
Thanks for checking in
 Re: Black Magic
 to the
DeeCee- AMCC ADDICT

-
 Number of posts : 3772
Age : 58
Location : Launceston Tas
Registration date : 2011-08-07
 Re: Black Magic
 looking good so far


allan- AMCC ADDICT

-
 Number of posts : 10406
Age : 67
Location : East Maitland
Registration date : 2008-03-31
 Re: Black Magic
Thanks guys, installed the brake lines

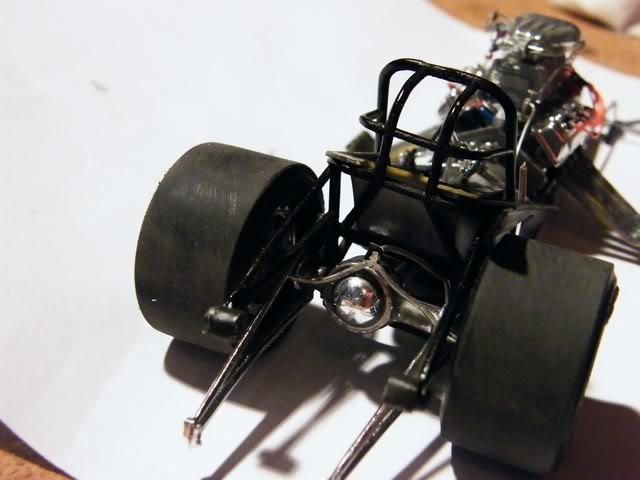
replaced the kit rear tires on the left

with some parts box ones , a little wider but same height.Couldn't go any taller without interfering with the interior tin. Engine detailing is done, just need to go back and do a bit of paint touchup now
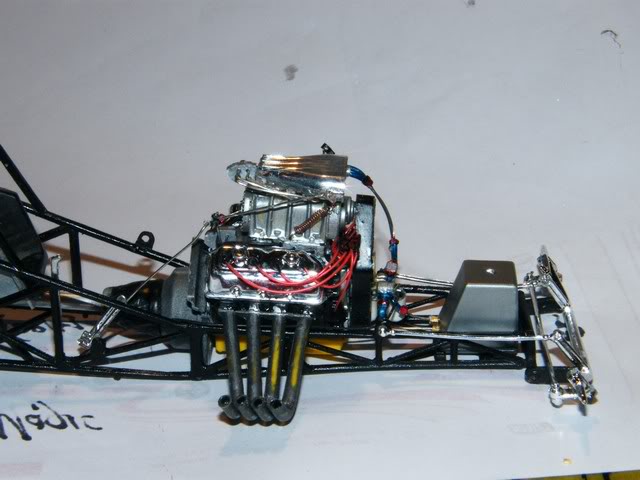


replaced the kit rear tires on the left

with some parts box ones , a little wider but same height.Couldn't go any taller without interfering with the interior tin. Engine detailing is done, just need to go back and do a bit of paint touchup now


 Re: Black Magic
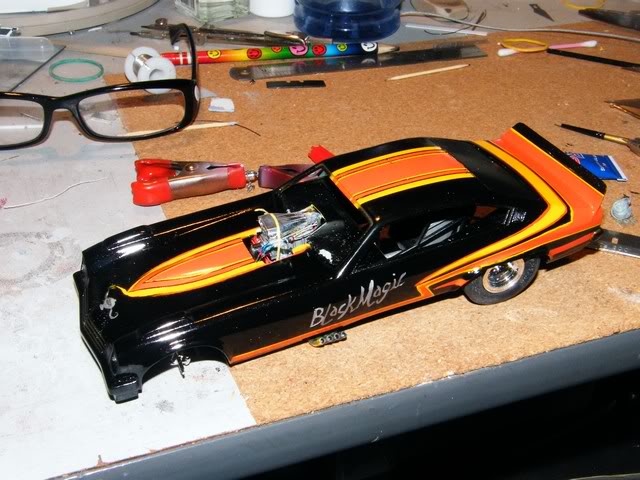
Now the paint, its far from perfect but I am pretty happy with it. Not the easiest job to get symmetrical, but huge thanks go to 1320 Wayne for sending me a scan of the old kit decals, they hadnt scanned the best but gave me a pretty good guide for the paint.




 Re: Black Magic
Unbelievable!! That looks great. Good work on the free handing. Man, that engine looks so "turn key" ready.

RetrospectKustoms- AMCC ADDICT

-
 Number of posts : 2475
Age : 44
Location : Barossa Valley, So Aus
Registration date : 2011-12-14
 Re: Black Magic
Looks awsome man, striping turned out very well too, looking forward to the finished product. 


DeeCee- AMCC ADDICT

-
 Number of posts : 3772
Age : 58
Location : Launceston Tas
Registration date : 2011-08-07
 Re: Black Magic
Thanks guys, well I've gone about as far as I can with this one till I can get some 70's contingencies and some white decal paper (for the one I've never seen done). Had to change the windscreen tin,and have added all the chute cables etc including the release cable off the roll cage.


Page 1 of 2 • 1, 2 
Page 1 of 2
Permissions in this forum:
You cannot reply to topics in this forum