Recycled AC Mack
Page 1 of 4 • 1, 2, 3, 4 ![]()

Recycled AC Mack
![]() by Deaf as Sun 26 Oct 2014, 9:03 pm
by Deaf as Sun 26 Oct 2014, 9:03 pm

It's a bit of a two birds with one stone thing as I originally found a photo of another AC Mack in another edition of the logging magazine showing it with a single axle trailer. This build will give me the wheels etc that I need for the logger.
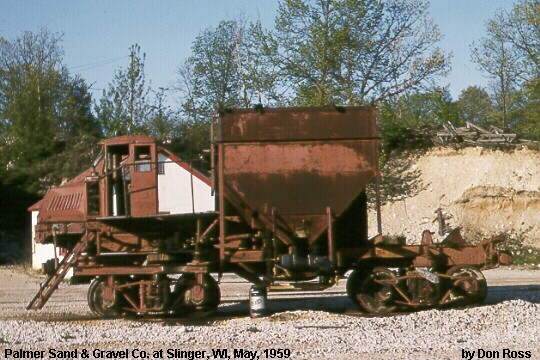
The article didn't say what this did but the side conveyer suggests it did more than just track ballasting. It was self propelled with a chain drive down to the axle on the front bogie. I have a few garden railway bits and pieces to kick off with but think I'll have to hunt around for some of the detail parts.
As long as everyone thinks it's automotive enough, I'll post some more pictures as things progress.

Deaf as- Legend Poster

-
 Number of posts : 1353
Age : 55
Location : Clergate
Registration date : 2013-11-20
Re: Recycled AC Mack
![]() by allan Sun 26 Oct 2014, 9:17 pm
by allan Sun 26 Oct 2014, 9:17 pm

allan- AMCC ADDICT
- Number of posts : 10385
Age : 66
Location : East Maitland
Registration date : 2008-03-31
Re: Recycled AC Mack
![]() by Deaf as Sun 02 Nov 2014, 7:36 pm
by Deaf as Sun 02 Nov 2014, 7:36 pm

I still have to make up the new bracketry for the main sprocket now that it comes forwards. I'll also have to find another gear/sprocket to use on the inside of this one to represent the chain the goes down to the axle on the railway bogie to drive it. Believable chain could be the issue here. The pictures don't show it real well but I also drilled out the holes where the front suspension was mounted. I hope to make it obvious during the painting/weathering stage.
Deaf as- Legend Poster
- Number of posts : 1353
Age : 55
Location : Clergate
Registration date : 2013-11-20
Re: Recycled AC Mack
![]() by scummy Mon 03 Nov 2014, 4:30 am
by scummy Mon 03 Nov 2014, 4:30 am

scummy- AMCC ADDICT
- Number of posts : 1552
Age : 64
Location : Campbelltown
Registration date : 2010-01-15 -

Re: Recycled AC Mack
![]() by checkmate Wed 05 Nov 2014, 10:06 pm
by checkmate Wed 05 Nov 2014, 10:06 pm
_________________

checkmate- Moderator
- Number of posts : 2573
Age : 49
Location : Tumut NSW.
Registration date : 2008-04-16 -
Re: Recycled AC Mack
![]() by Deaf as Thu 06 Nov 2014, 4:46 pm
by Deaf as Thu 06 Nov 2014, 4:46 pm
Deaf as- Legend Poster
- Number of posts : 1353
Age : 55
Location : Clergate
Registration date : 2013-11-20
Re: Recycled AC Mack
![]() by Deaf as Sun 09 Nov 2014, 7:27 pm
by Deaf as Sun 09 Nov 2014, 7:27 pm
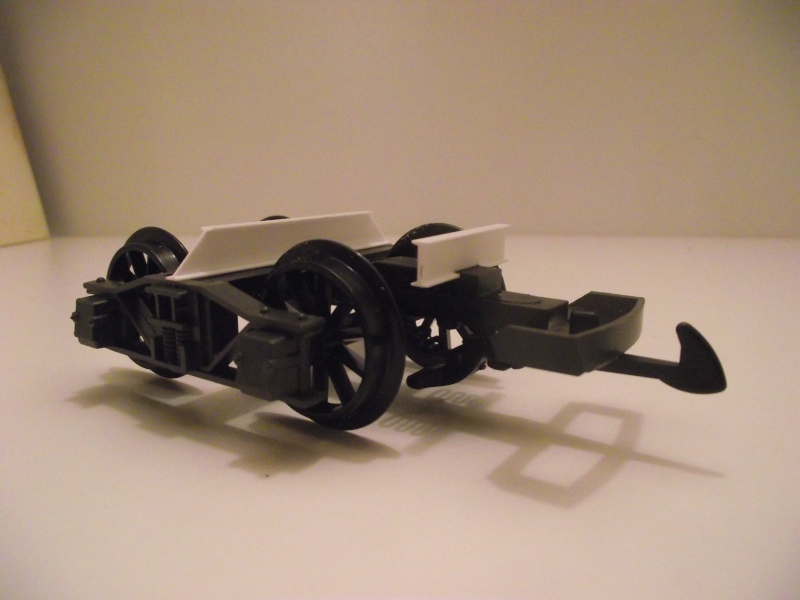
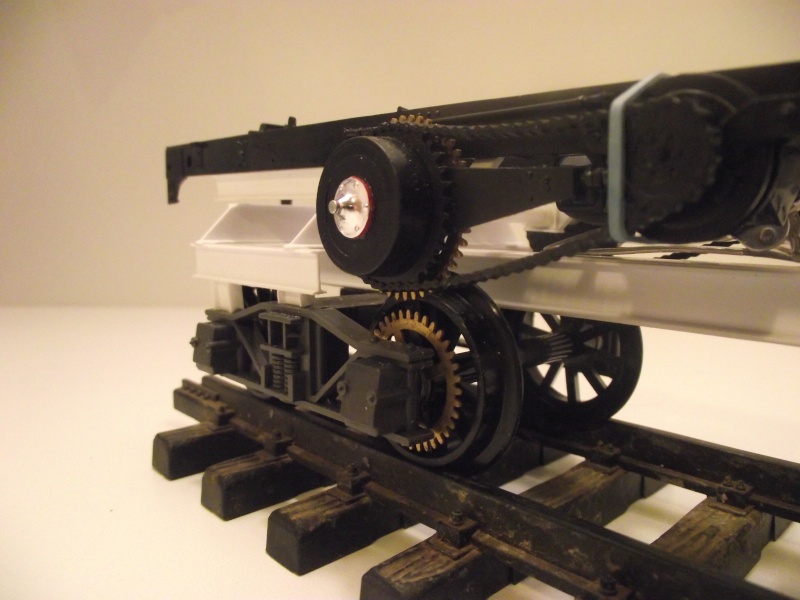
Ok, so what we have here is the front bogie over which the Mack cab and engine will sit.
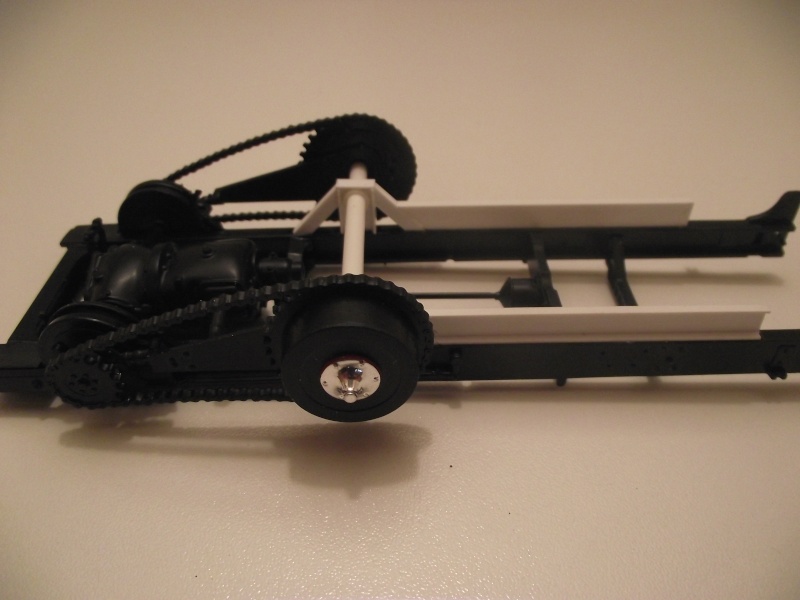
This photo shows the drive sprockets mounted forward and to an axle that will have another sprocket fitted to it to drive the trailing axle of the front bogie. The larger diameter tube in the axle mount is to represent the bearing assembly. Even managed to find some early Mack hubcaps to use as axle covers.

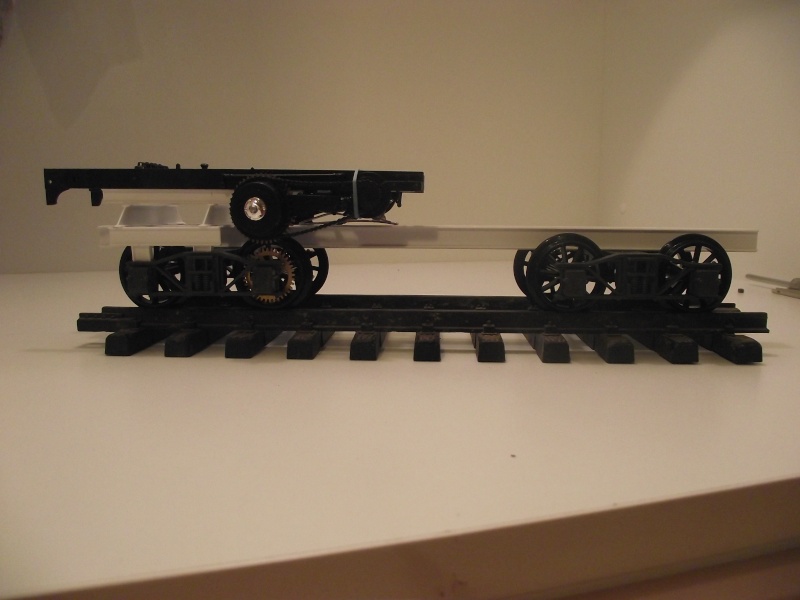
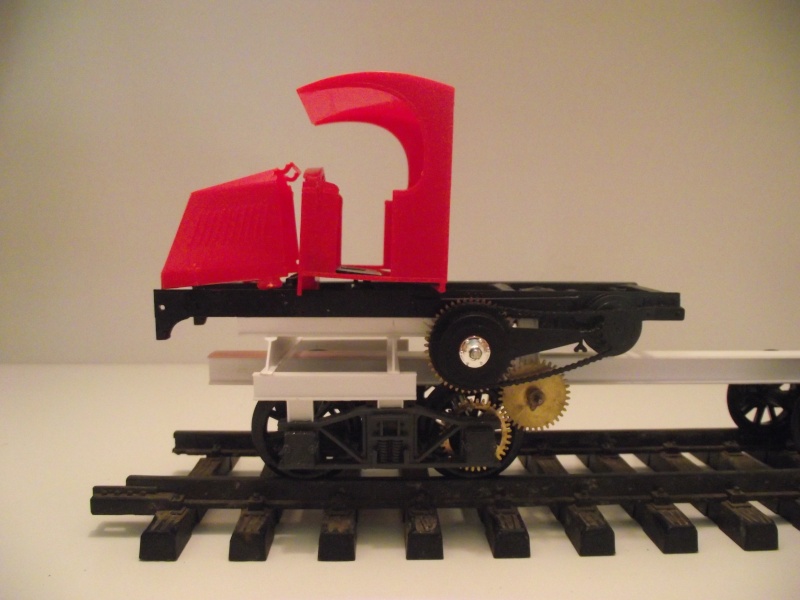
This is roughly how it will go together. The truck engine sits to the RHS with the drive sprockets mounted directly above each other. The truck chassis will sit higher above the bogie but I still have to sort out the main chassis that connects the front end to the back end yet. I'll also have to change the garden railway coupler for a knuckle coupler of some sort.
Deaf as- Legend Poster
- Number of posts : 1353
Age : 55
Location : Clergate
Registration date : 2013-11-20
Re: Recycled AC Mack
![]() by Jerry Ol'55 Sun 09 Nov 2014, 9:57 pm
by Jerry Ol'55 Sun 09 Nov 2014, 9:57 pm
guys get this kinda stuff to build ya models?... An' don't tell me
it's bits of sh*t laying around!...
No fibs now to ol' Jerry!...

Jerry Ol'55- I Love this place

- Number of posts : 639
Age : 68
Location : Gosnells W.A.
Registration date : 2014-06-03
Re: Recycled AC Mack
![]() by dv8v8 Sun 09 Nov 2014, 10:14 pm
by dv8v8 Sun 09 Nov 2014, 10:14 pm

dv8v8- AMCC ADDICT
- Number of posts : 5648
Location : Rockhampton QLD
Registration date : 2008-04-26
Re: Recycled AC Mack
![]() by Deaf as Mon 10 Nov 2014, 4:59 pm
by Deaf as Mon 10 Nov 2014, 4:59 pm
Deaf as- Legend Poster
- Number of posts : 1353
Age : 55
Location : Clergate
Registration date : 2013-11-20
Re: Recycled AC Mack
![]() by Deaf as Fri 02 Jan 2015, 9:42 pm
by Deaf as Fri 02 Jan 2015, 9:42 pm
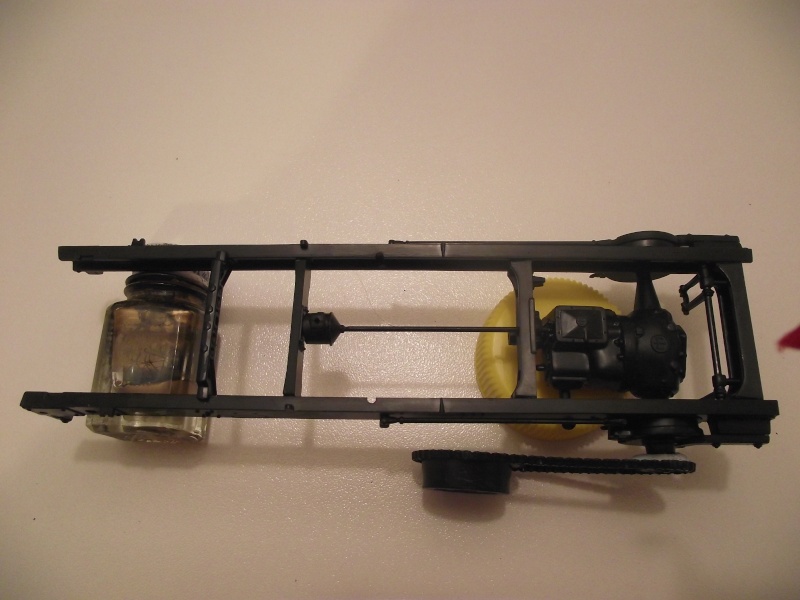
I couldn't find another suitable sprocket and chain to use as the drive mechanism from the truck axle to the rail bogie so I decided on a gear drive. I'm not sure that it would of worked in real life but it should look ok on the model.
I still have to mount the middle gear from the centre chassis so that it meshes with the other two.
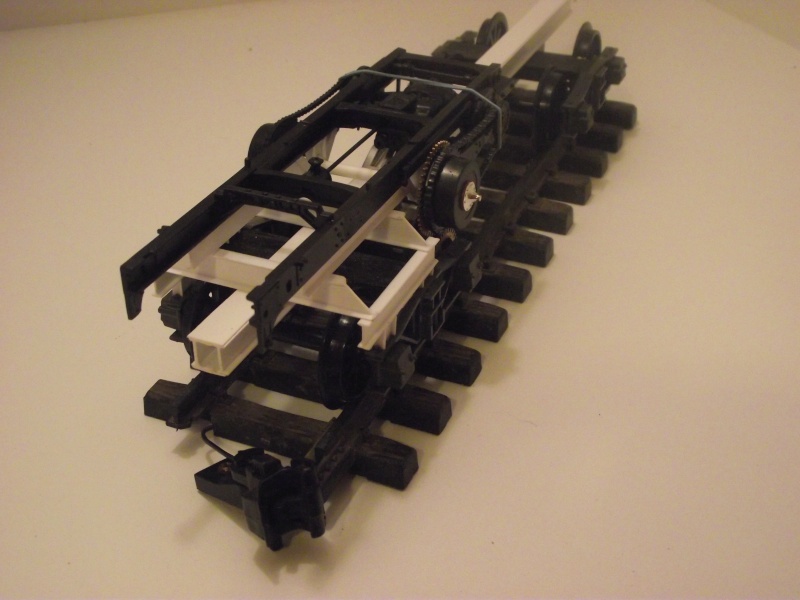
The rail chassis joining the bogies together is made up from 3 pieces of evergreen I beam joined side to side with the vertical section of the centre beam cut out to create a housing for the coupler. These are topped with strips of plastic to represent strengthening plates. I cut off the hook shaped ones in the earlier photos in favour of the knuckle type shown in this photo. The short sections of I beam shown mounted off the bogie under the truck chassis are to keep the front end rigid. I still have to plate over the spring box to suggest that they have been removed so that there is no movement in the front end which would change the geometry of the gear drive. The 'gears' are pieces from either old clockwork trains or clocks that my old man has stashed away. He did have some old bevelled gears from an old hand drill but I couldn't work out how to get it to work on the model. The worm from a shifting spanner would also have made for an interesting drive system.
Deaf as- Legend Poster
- Number of posts : 1353
Age : 55
Location : Clergate
Registration date : 2013-11-20
Re: Recycled AC Mack
![]() by Deaf as Wed 07 Jan 2015, 5:58 pm
by Deaf as Wed 07 Jan 2015, 5:58 pm
Still have to work on the engine, once it's mostly done I'll be able to set it in place , position the cab accordingly and then start on the hopper and conveyer etc. After seeing Santa's sled on the home page, my old man thinks this build would lend itself to something similar-what do you think?
Deaf as- Legend Poster
- Number of posts : 1353
Age : 55
Location : Clergate
Registration date : 2013-11-20

allan- AMCC ADDICT
- Number of posts : 10385
Age : 66
Location : East Maitland
Registration date : 2008-03-31
Re: Recycled AC Mack
![]() by Deaf as Sun 11 Jan 2015, 6:18 pm
by Deaf as Sun 11 Jan 2015, 6:18 pm
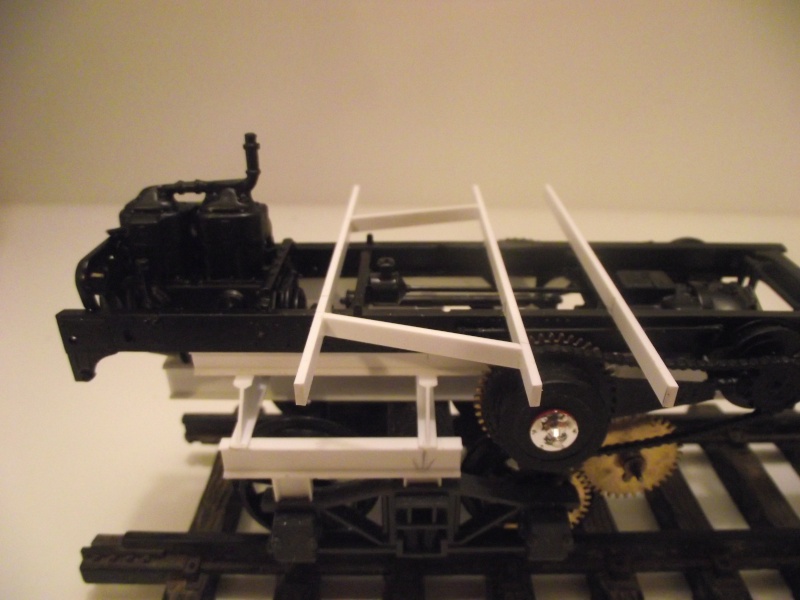
Got the engine together and sat in place. The plastic strip will act as the supports for the timber walkway around the cab.
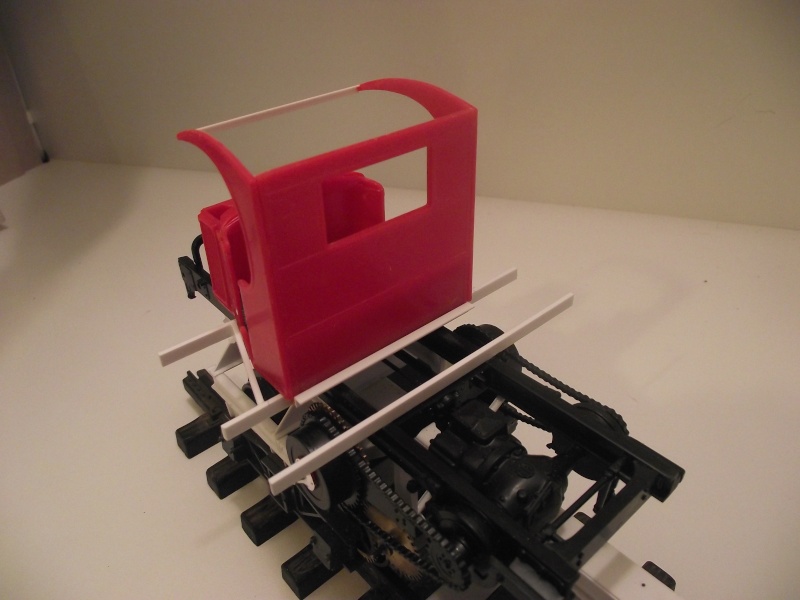
Used a piece of angle for the timber support behind the cab. I cut the roof back out of the cab, I'm thinking of doing it either in timber or 'corrugated iron'. I thought these would give a bit more scope for weathering/detailing. Going to try and replicate canvas sheets that can be pulled across the door opening in bad weather and tied back when it's warm.
Deaf as- Legend Poster
- Number of posts : 1353
Age : 55
Location : Clergate
Registration date : 2013-11-20
Re: Recycled AC Mack
![]() by dv8v8 Sun 11 Jan 2015, 7:38 pm
by dv8v8 Sun 11 Jan 2015, 7:38 pm
dv8v8- AMCC ADDICT
- Number of posts : 5648
Location : Rockhampton QLD
Registration date : 2008-04-26
Re: Recycled AC Mack
![]() by Deaf as Tue 13 Jan 2015, 11:07 am
by Deaf as Tue 13 Jan 2015, 11:07 am
Deaf as- Legend Poster
- Number of posts : 1353
Age : 55
Location : Clergate
Registration date : 2013-11-20
Re: Recycled AC Mack
![]() by dv8v8 Tue 13 Jan 2015, 5:31 pm
by dv8v8 Tue 13 Jan 2015, 5:31 pm
dv8v8- AMCC ADDICT
- Number of posts : 5648
Location : Rockhampton QLD
Registration date : 2008-04-26
Deaf as- Legend Poster
- Number of posts : 1353
Age : 55
Location : Clergate
Registration date : 2013-11-20
Re: Recycled AC Mack
![]() by aussie muscle Sat 17 Jan 2015, 3:16 pm
by aussie muscle Sat 17 Jan 2015, 3:16 pm

aussie muscle- I Love this place
- Number of posts : 963
Age : 52
Location : Bombala NSW
Registration date : 2011-06-06 -
Re: Recycled AC Mack
![]() by Deaf as Sun 18 Jan 2015, 7:48 am
by Deaf as Sun 18 Jan 2015, 7:48 am
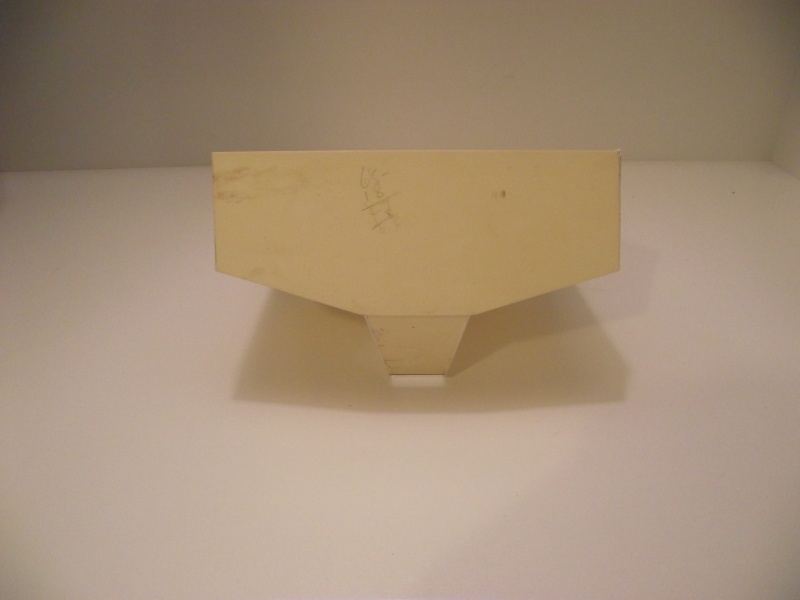
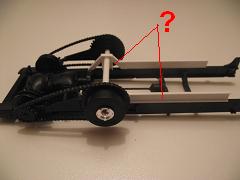
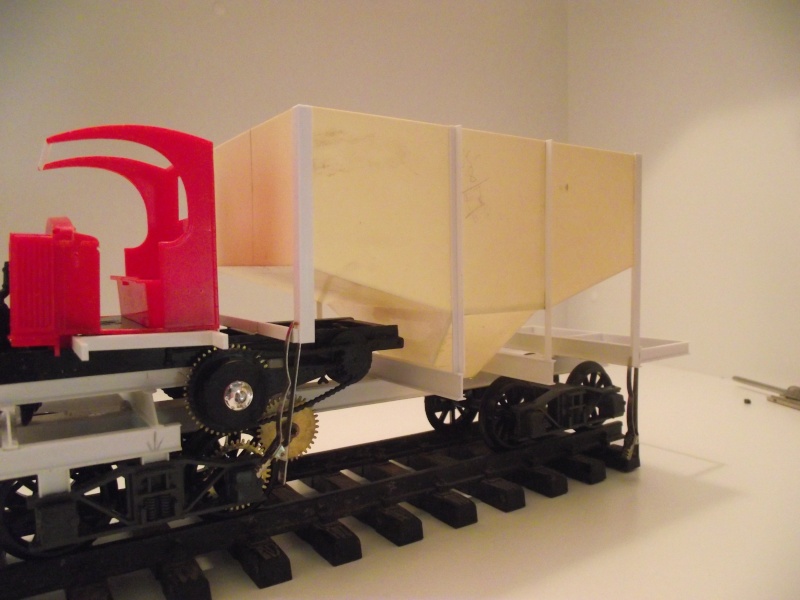
This is the side view.
 [l]
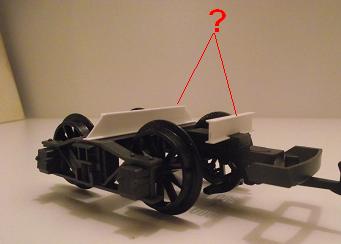
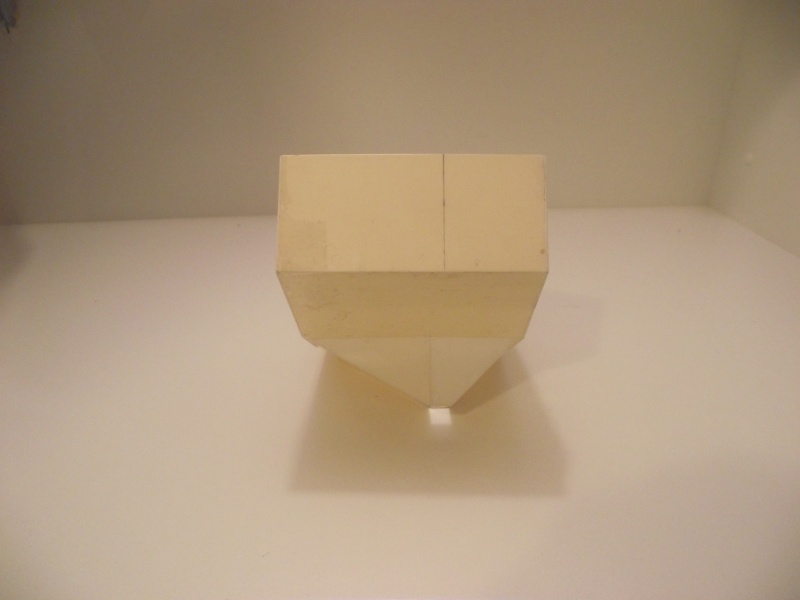
[l]This is the end on view from the front.

Tacked on with blue tac. There will be a small deck made for the back end with a few tools and odds and ends on it, braking wheel etc.
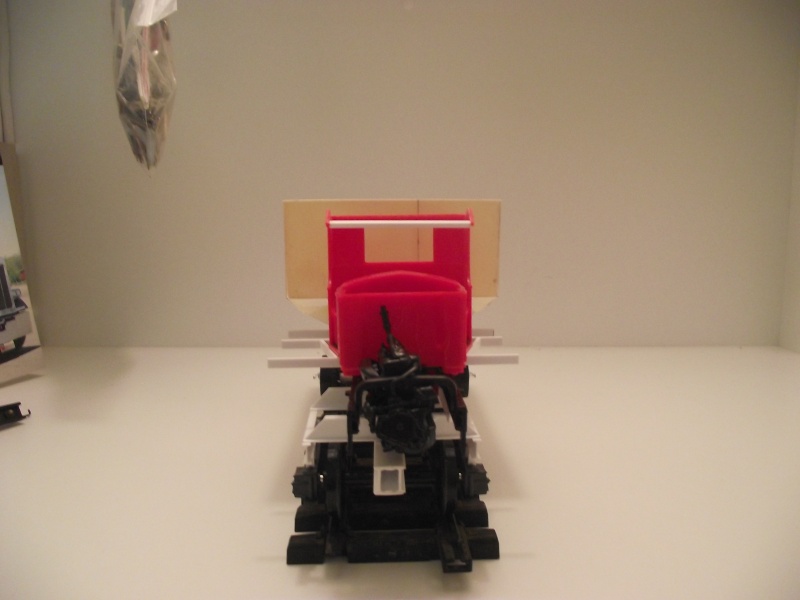
The head on profile really shows how nothing much seems to sit along the centre line. I'm not sure about the prototype but with mine , the offset allows for clearance around the bell house, diff etc. while keeping the whole thing low on the rail chassis. I tried to counter this slightly by offsetting the hopper as the conveyor gear will also be on the cab side . If nothing else, it adds to the 'home' built feel.
Deaf as- Legend Poster
- Number of posts : 1353
Age : 55
Location : Clergate
Registration date : 2013-11-20
Re: Recycled AC Mack
![]() by Deaf as Mon 19 Jan 2015, 5:30 pm
by Deaf as Mon 19 Jan 2015, 5:30 pm
Have started to get the bracing and frame work on .

The rear deck will have a timber top on it. I'll put an extension on the top but might use a different material to make it look like a later add on. The conveyor still needs to be sorted but now the location is sorted. I'm going to have a go at something a bit different with the sides. I'll try to clad the plastic to give the sides a 'on it's last legs' look. Will put pics up if it works.
Deaf as- Legend Poster
- Number of posts : 1353
Age : 55
Location : Clergate
Registration date : 2013-11-20
Re: Recycled AC Mack
![]() by RetrospectKustoms Tue 20 Jan 2015, 12:01 pm
by RetrospectKustoms Tue 20 Jan 2015, 12:01 pm

RetrospectKustoms- AMCC ADDICT
- Number of posts : 2475
Age : 43
Location : Barossa Valley, So Aus
Registration date : 2011-12-14
Re: Recycled AC Mack
![]() by allan Wed 21 Jan 2015, 8:05 am
by allan Wed 21 Jan 2015, 8:05 am
RetrospectKustoms wrote:Wow. Looks spot on so far, nice work.

allan- AMCC ADDICT
- Number of posts : 10385
Age : 66
Location : East Maitland
Registration date : 2008-03-31
Re: Recycled AC Mack
![]() by Deaf as Mon 26 Jan 2015, 8:53 pm
by Deaf as Mon 26 Jan 2015, 8:53 pm
 .
. .
.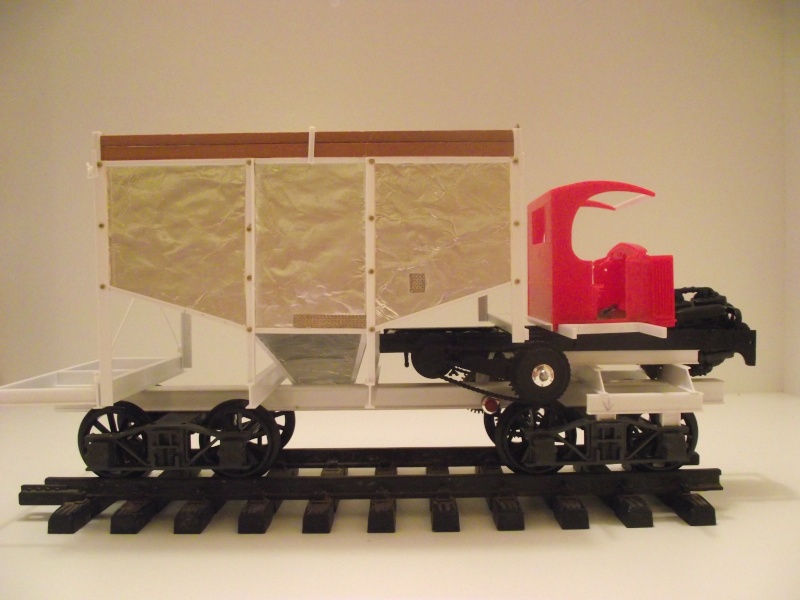 .
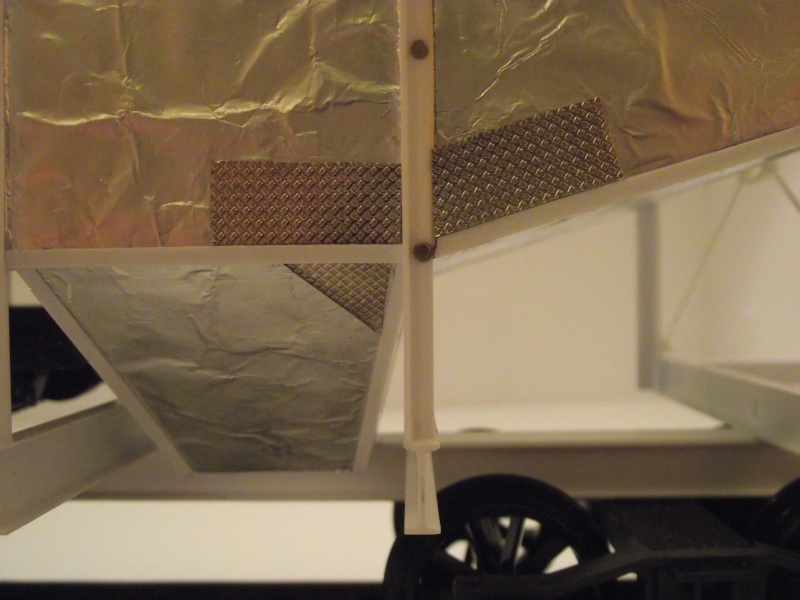
.I've put the cladding on the sides and added the hungry boards to the top and bracing to the rear. I think this allows the structure to be bought into square by adjusting the 'bolts' on the diagonals as required. The bolt head detail is done with KFS photo etch bolt heads. The hungry board frames are pieces of c channel with a few pieces angle and flat as extra bracing. I used photo etch chequer plate to represent patches on the hopper body. Small strips of chequer plate were also used for the hungry board bracing front and rear. I'm trying to give make it look like a project that started out with reasonable budget that has dwindled to nothing as time has passed. The patching etc has been done with whatever was at hand. I'll weather the timber to give it that silvery grey look.
 .
. .
.The cladding is a sheet of paper sandwiched between two pieces of al. foil then slightly rumpled. It's not quite as I'd hoped but I think it's better than smooth sides. I'm hoping it looks like worn metal, rippled and twisted with age. It's a technique described in Model Truck World magazine. Be interesting to see how it looks with paint on it. I'll do the back first so if I need to smooth it out a bit more it won't affect the paint. I'll over paint the patches with primer or that red rust preventing paint.
Deaf as- Legend Poster
- Number of posts : 1353
Age : 55
Location : Clergate
Registration date : 2013-11-20
Re: Recycled AC Mack
![]() by checkmate Tue 27 Jan 2015, 12:00 am
by checkmate Tue 27 Jan 2015, 12:00 am
_________________
checkmate- Moderator
- Number of posts : 2573
Age : 49
Location : Tumut NSW.
Registration date : 2008-04-16 -
Page 1 of 4 • 1, 2, 3, 4 ![]()
|
|
|