Beemax Starion Grp A
5 posters
Page 1 of 1
 Beemax Starion Grp A
Hi guys.
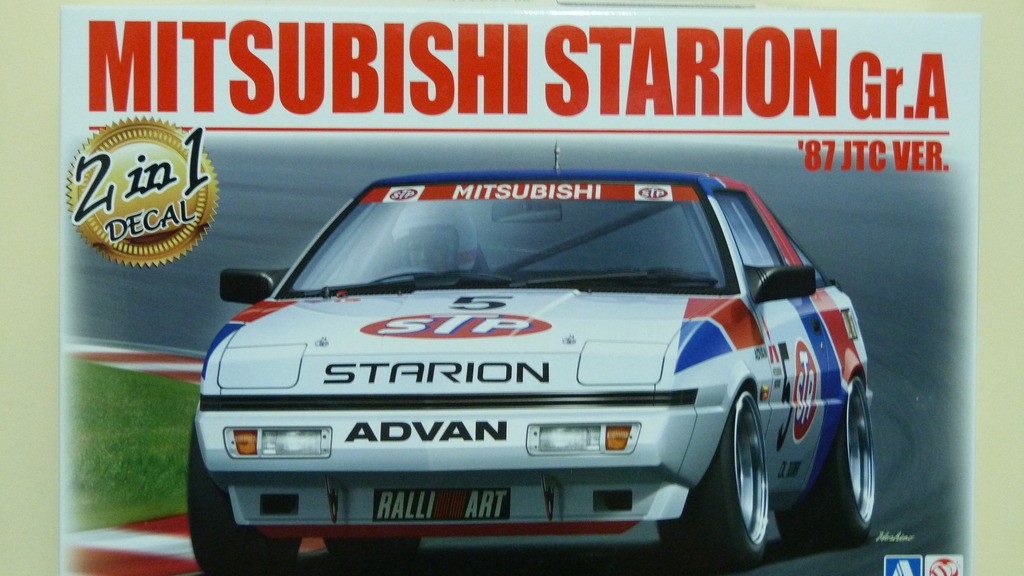
This will be the Starion that Brad Jones and Akihiro Nakaya drove to 7th in the 1987 Bathurst 1000. Starting with the recently released Beemax Starion with SK Decals and I'll change it to Australian spec with a modified interior and LHD conversion.
This should give you an indication of what I do to kits to turn them into Australian race cars.

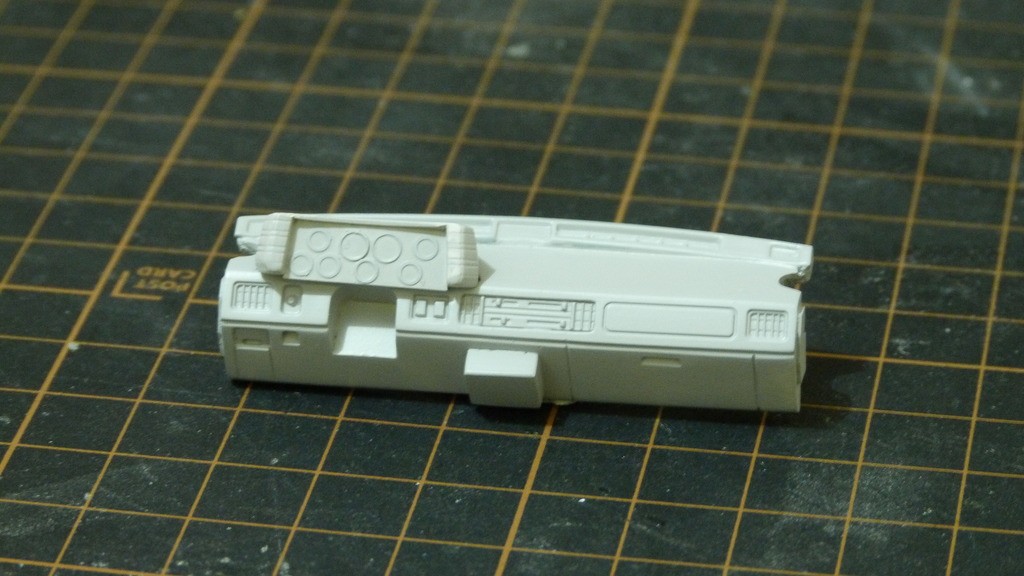
The kit is RHD but the Australian factory Starions were LHD . I took the LHD dash from Fujimi's ancient Starion kit and chopped 3mm out of the centre and tweaked it here and there to get it to fit the Beemax kit.
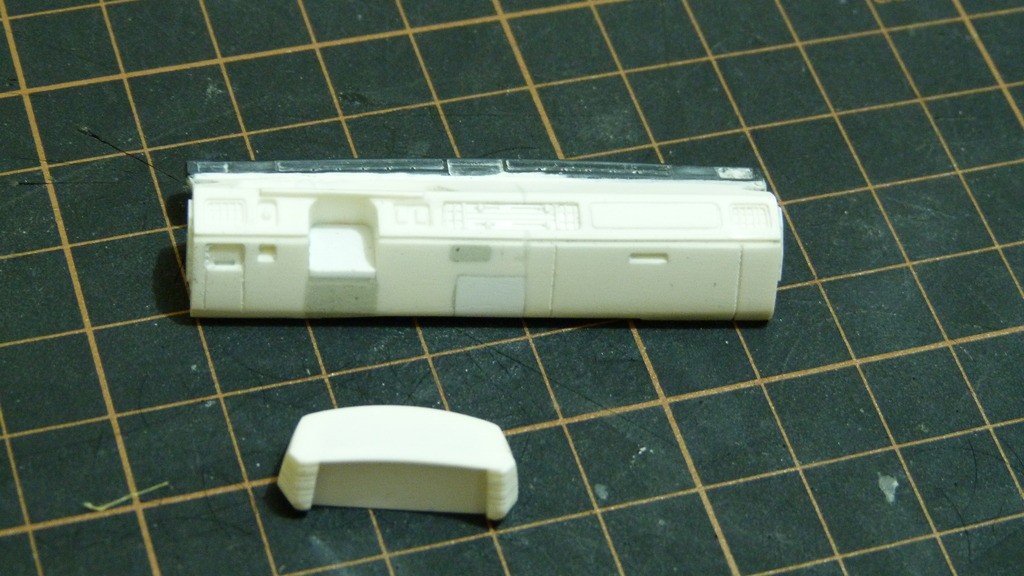
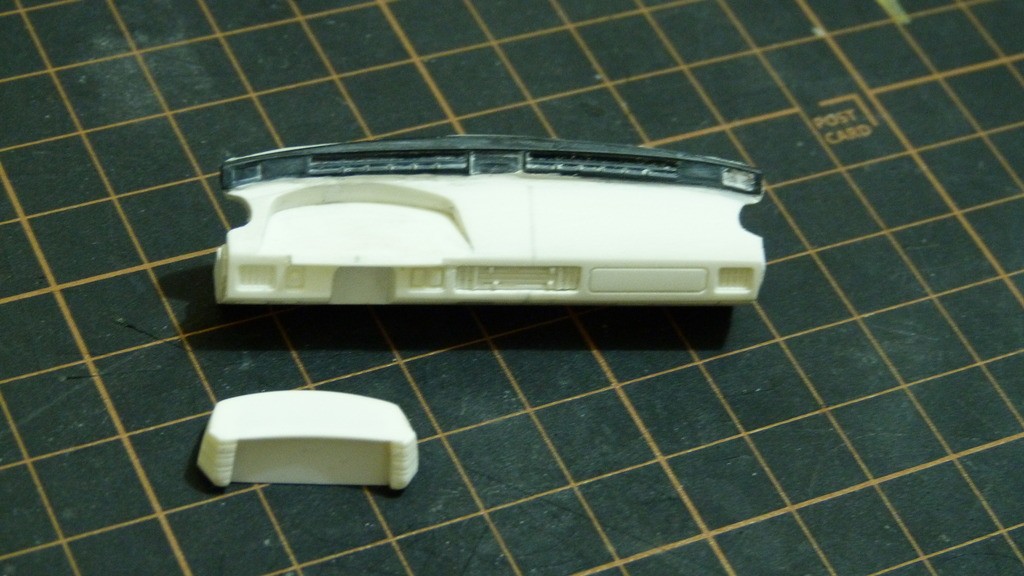
I added PE gauge rings and shot some primer to check for defects and it's ready for casting.
The kit has this large cover over the rear hatch area that covers the fuel cell. My pics show that the cover on the Aus version wasn't so big so I got cutting and modifying.

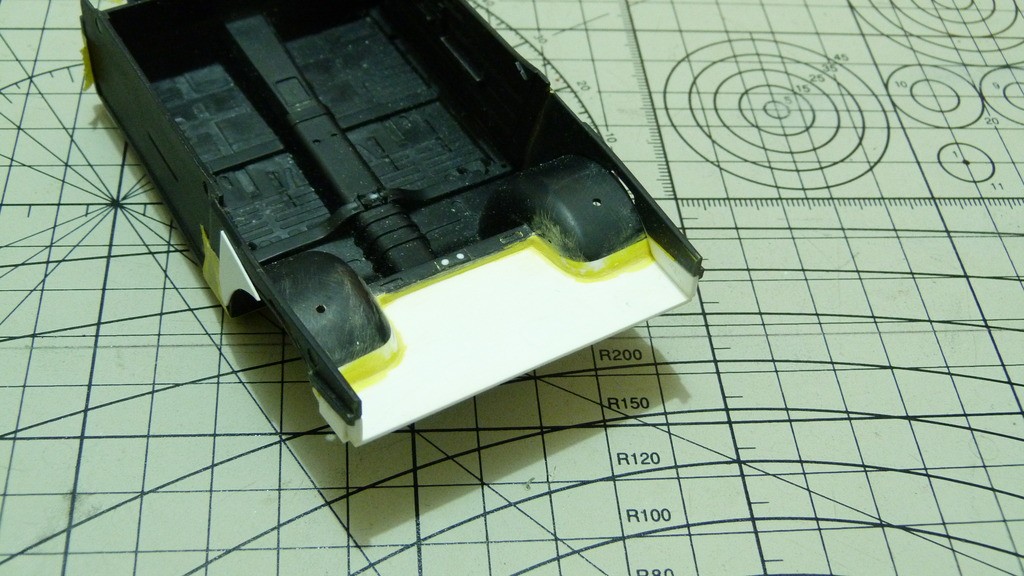
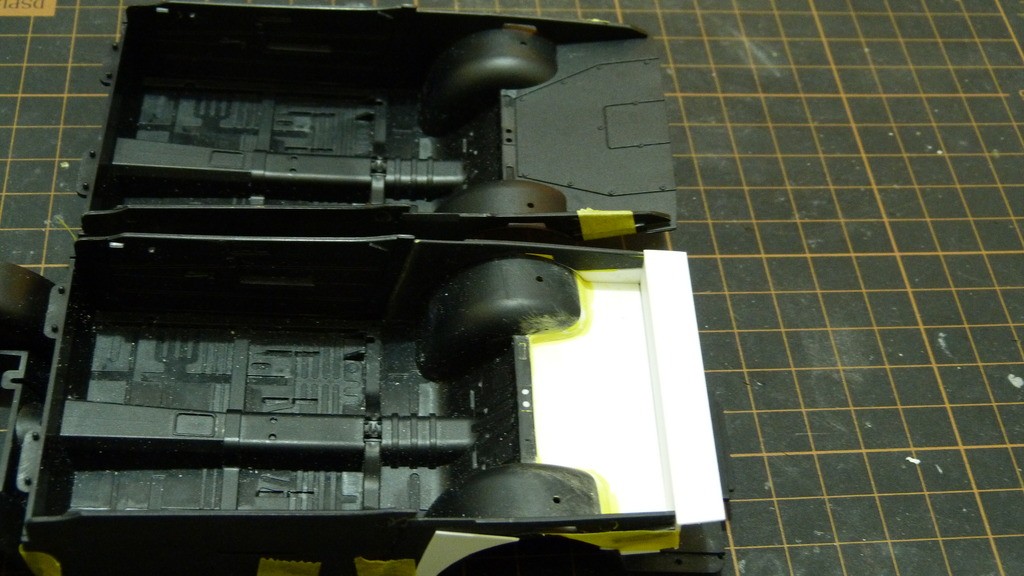

The rear rollcage cross bar was removed and the shock towers were sanded smooth and glued on to the wheel arches and blended in.
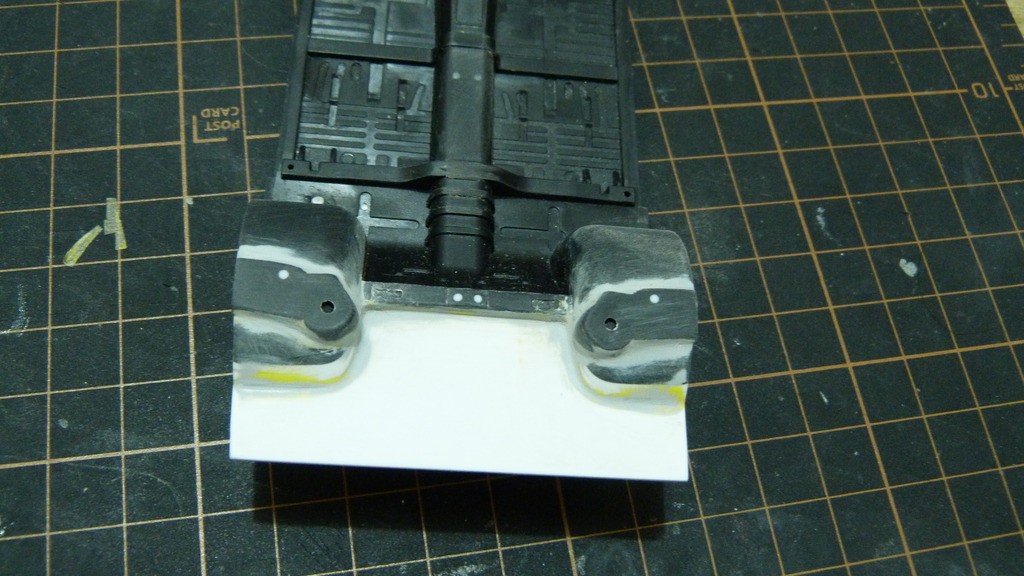
While the glue and putty were setting I turned my attention to the body. The front bumper has some big sink marks and a couple of big gaps that need to be filled.

fixed
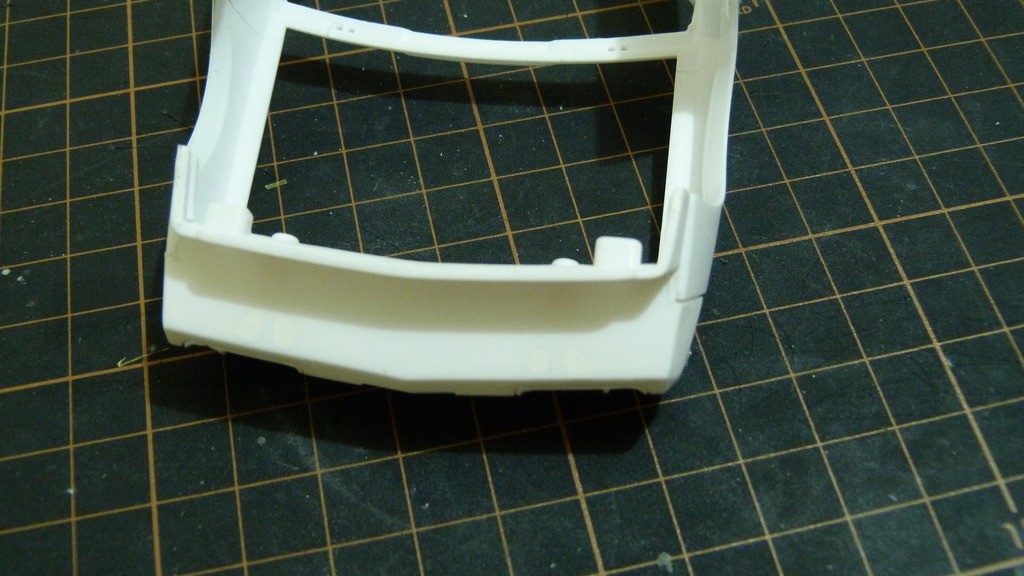
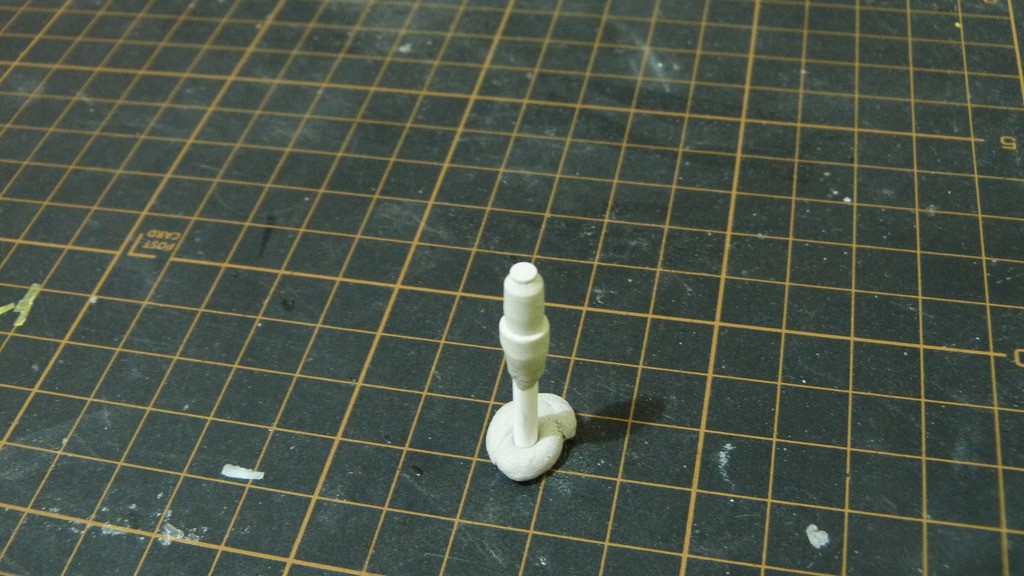
For the fuel fillers I needed to replace the awful clunky toy like kit parts but I didn't have any suitable replacements in my spares boxes so I came up with an idea. I put a wad of Apoxie Sculpt 2 part putty (similar to Miliput) on a piece of sprue and when it was set I turned it in my Dremel to make a shape that I could use as a stamp.
I cut the holes in the rear panels for the fuel fillers and pressed another wad of putty on the inside.
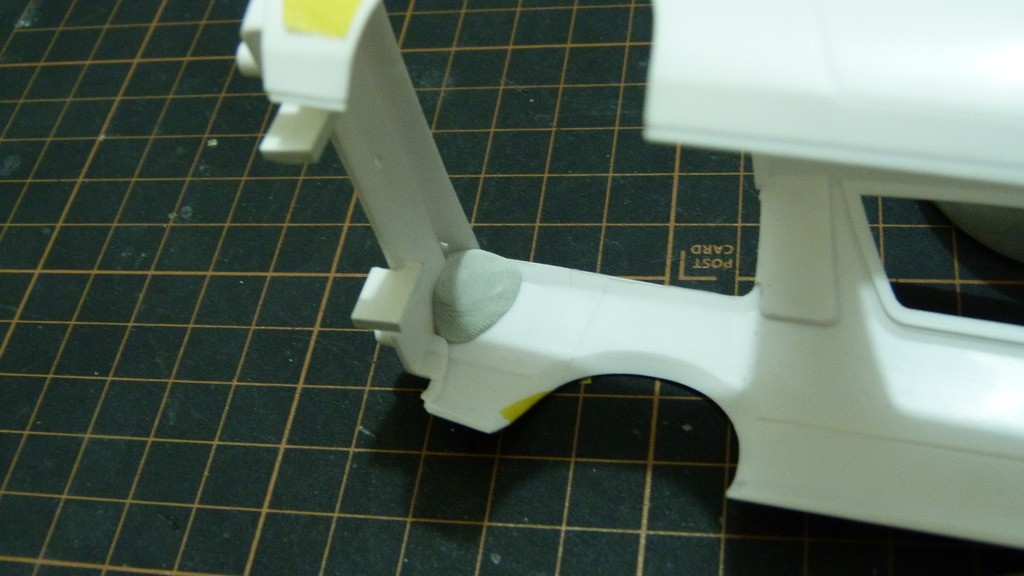
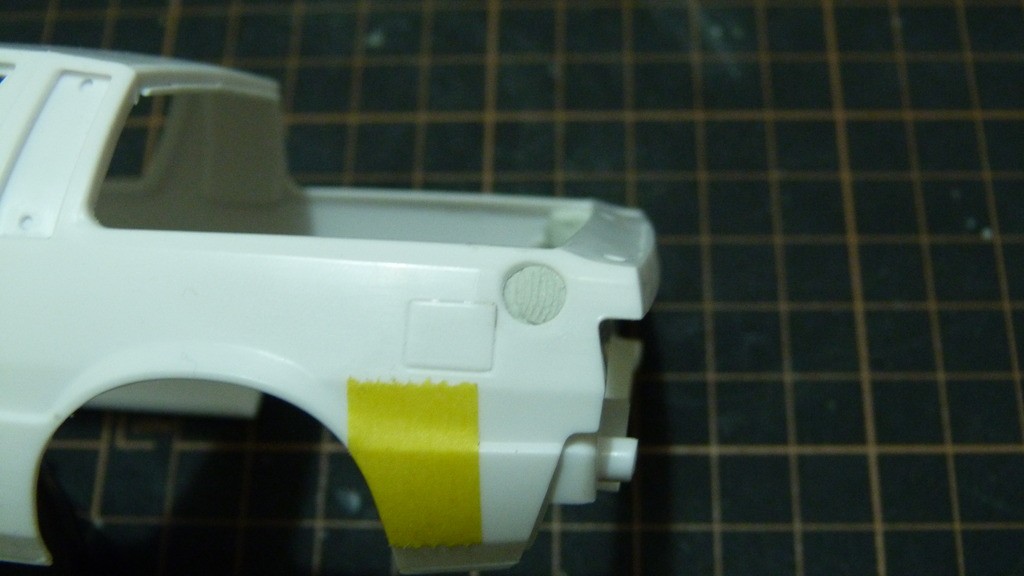
I then lubricated the stamp with cooking spray and pressed it into the still soft putty and boom I had some fuel fillers.


Back to the interior I modified the rollcage.
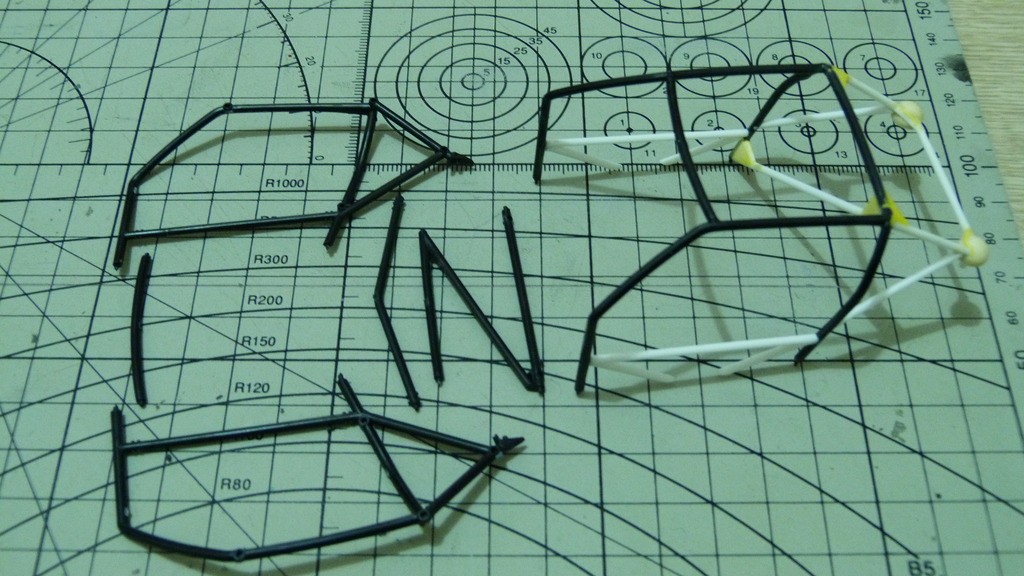
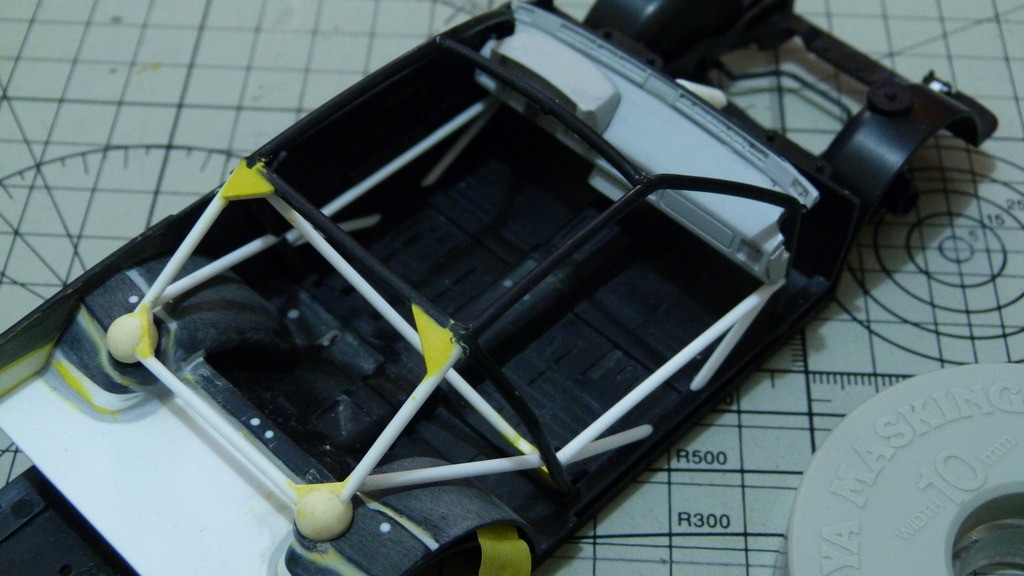
More updates soon
CheersSS
This will be the Starion that Brad Jones and Akihiro Nakaya drove to 7th in the 1987 Bathurst 1000. Starting with the recently released Beemax Starion with SK Decals and I'll change it to Australian spec with a modified interior and LHD conversion.
This should give you an indication of what I do to kits to turn them into Australian race cars.


The kit is RHD but the Australian factory Starions were LHD . I took the LHD dash from Fujimi's ancient Starion kit and chopped 3mm out of the centre and tweaked it here and there to get it to fit the Beemax kit.


I added PE gauge rings and shot some primer to check for defects and it's ready for casting.

The kit has this large cover over the rear hatch area that covers the fuel cell. My pics show that the cover on the Aus version wasn't so big so I got cutting and modifying.


The rear rollcage cross bar was removed and the shock towers were sanded smooth and glued on to the wheel arches and blended in.


While the glue and putty were setting I turned my attention to the body. The front bumper has some big sink marks and a couple of big gaps that need to be filled.

fixed

For the fuel fillers I needed to replace the awful clunky toy like kit parts but I didn't have any suitable replacements in my spares boxes so I came up with an idea. I put a wad of Apoxie Sculpt 2 part putty (similar to Miliput) on a piece of sprue and when it was set I turned it in my Dremel to make a shape that I could use as a stamp.

I cut the holes in the rear panels for the fuel fillers and pressed another wad of putty on the inside.


I then lubricated the stamp with cooking spray and pressed it into the still soft putty and boom I had some fuel fillers.


Back to the interior I modified the rollcage.


More updates soon
CheersSS

ShawnS- I Love this place

-
 Number of posts : 565
Age : 50
Location : South Australia
Registration date : 2009-12-22
 Re: Beemax Starion Grp A
Awesome work so far . Great attention to detail .
TubOLard- AMCC NEWBIE!

-
 Number of posts : 21
Age : 62
Location : Ulladulla
Registration date : 2020-10-26

Jezza- I should be working on Models

-
 Number of posts : 381
Age : 69
Location : Gosnells West. Aust.
Registration date : 2020-05-22
 Re: Beemax Starion Grp A
Looking good so far

allan- AMCC ADDICT

-
 Number of posts : 10406
Age : 67
Location : East Maitland
Registration date : 2008-03-31
 Re: Beemax Starion Grp A
The Yellow stuff? That's Tamiya Polyester putty.
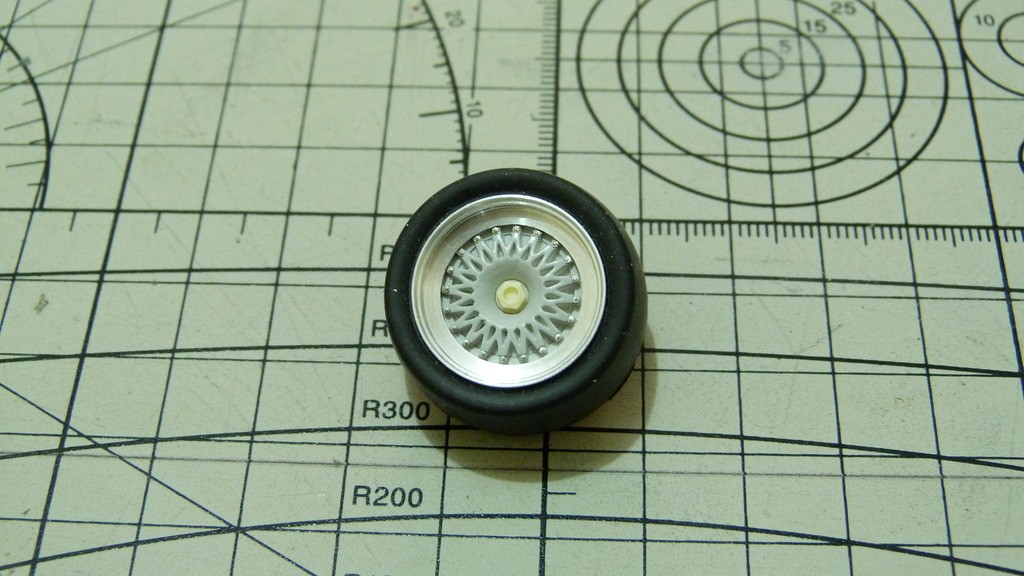
For today's update I'll show you the progress on the wheels.
In 1987 and 1988 the Aus factory Starions used these.
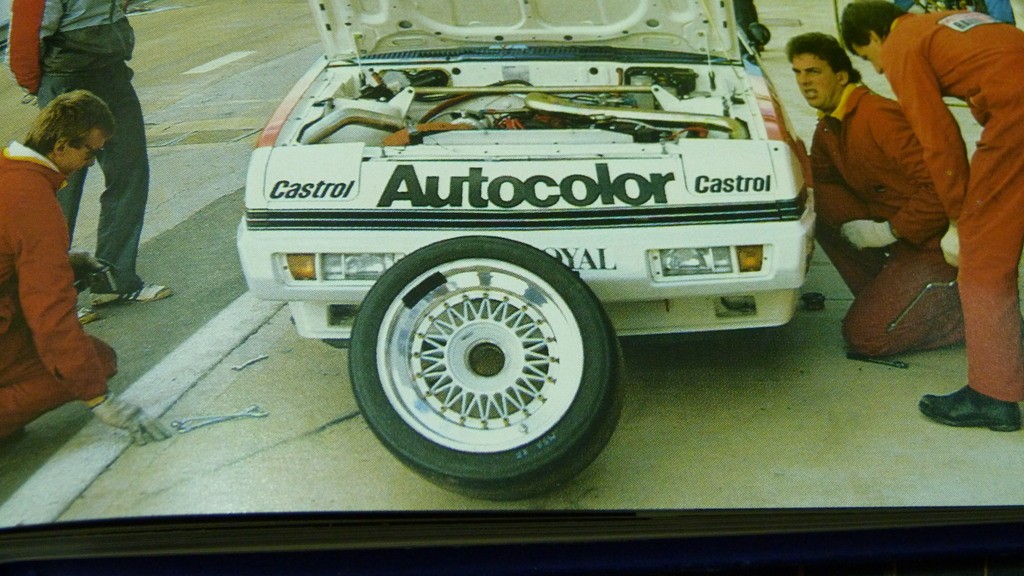
I assume that they are made by Simmons wheels as they have the same spoke style as other Simmons types. The kit has BBS wheels so a change was needed. I have been looking around for years for Simmons style wheels where the spokes don't cross over each other like BBS wheels do and one day early last year I was looking at pics of Belkits Opel Ascona rally car kit and I discovered that kit had the wheels that I was looking for. I was lucky enough to find the wheel sprue on Spot Models spare parts page so I snapped it up on the spot and when it arrived I got to work.
Knowing that I was going to have to cut and reshape the wheels I decided to resin cast a handful so I didn't have to sacrifice the original.

Knowing that all sorts of cars had Simmons wheels in different sizes and configurations I spent a bit of time last year making different types for future projects.

I also made some for a yet to be completed Mobil BMW.
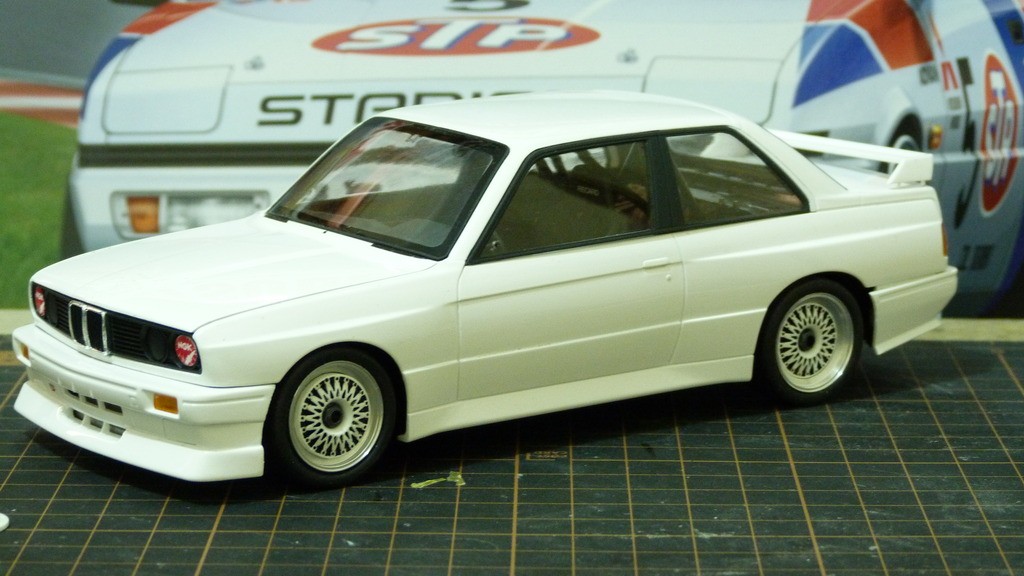
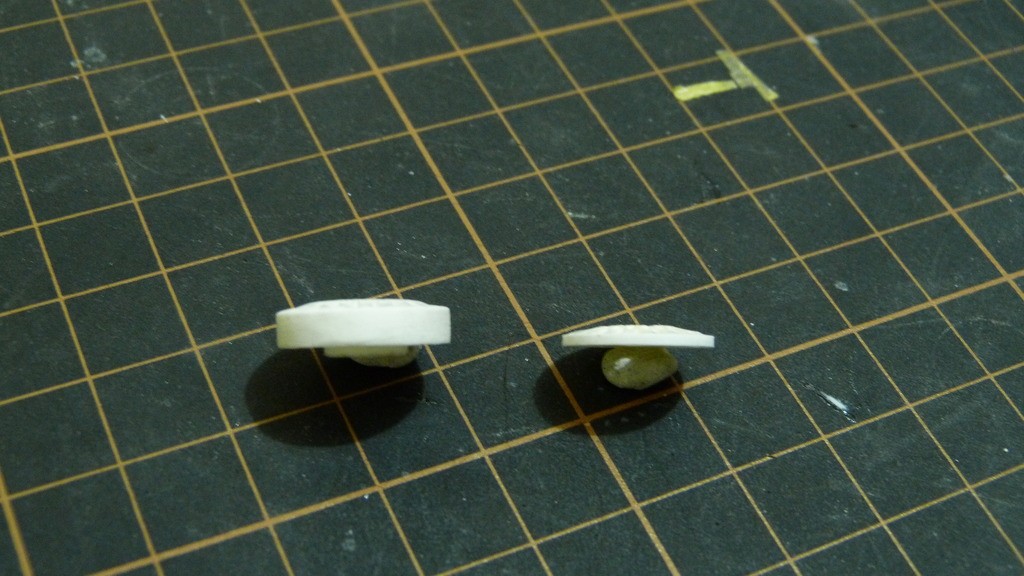
As helpful as the original wheel was, the face of the Belkits wheel was dead flat but the Simmons wheels curved inwards as it got to the rim so I also had to try and replicate that too.
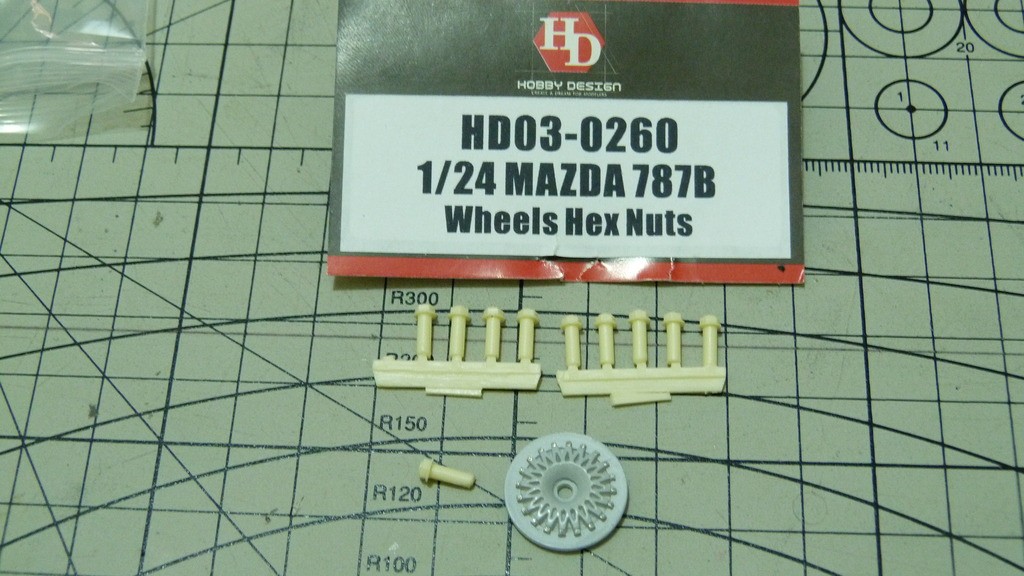
This is the finished item ready for casting. I added Protech nuts at the end of each spoke.

I also added a centre nut from Hobby Design and will be using aluminium rims from SK Decals.
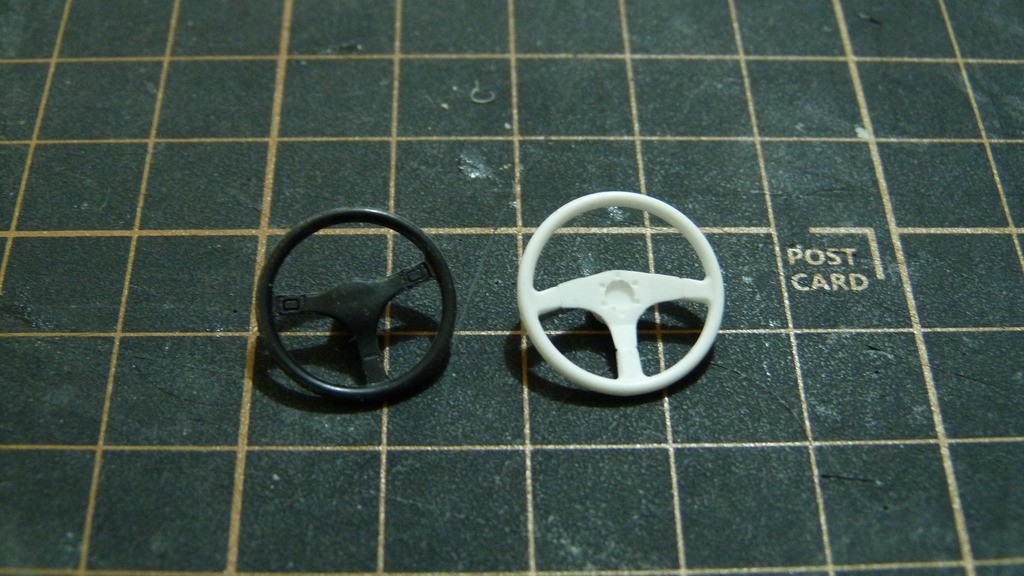
I needed to change the steering wheel to a more racing type than the kits almost stock style.
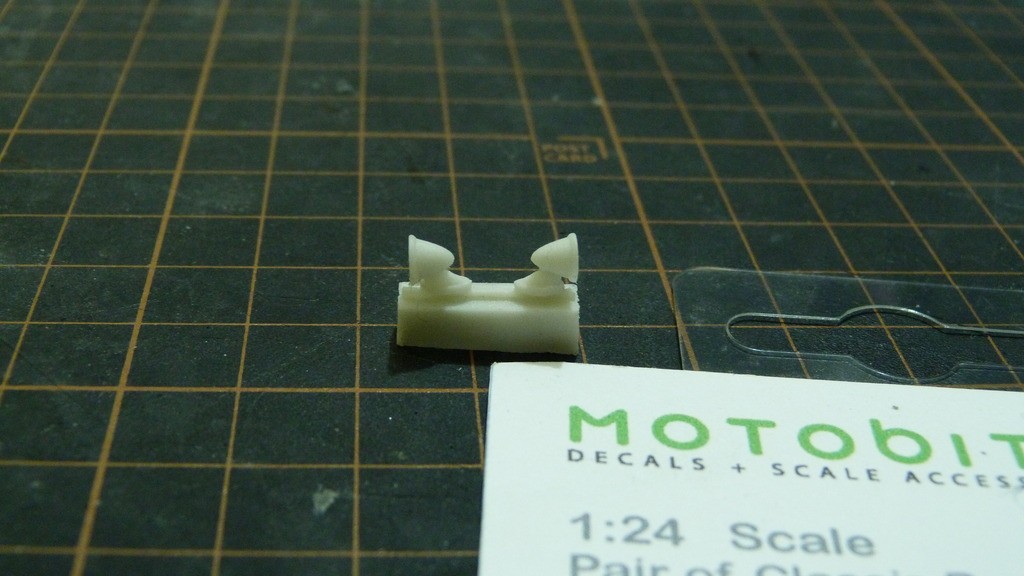
The Australian Starions had bullet mirrors so I sourced some from Motobitz in the UK.
another update soon
CheersSS

ShawnS- I Love this place

-
 Number of posts : 565
Age : 50
Location : South Australia
Registration date : 2009-12-22
 Re: Beemax Starion Grp A
Hi Shawn. That's some nice work. Looking forward to more. Seeing all the different techniques is really inspiring.
Stuart Wallace- I should be working on Models

-
 Number of posts : 146
Age : 44
Location : Hamilton Victoria
Registration date : 2020-06-12
 Re: Beemax Starion Grp A
Hey all, just realised I hadn't updated this thread in a while so here goes.
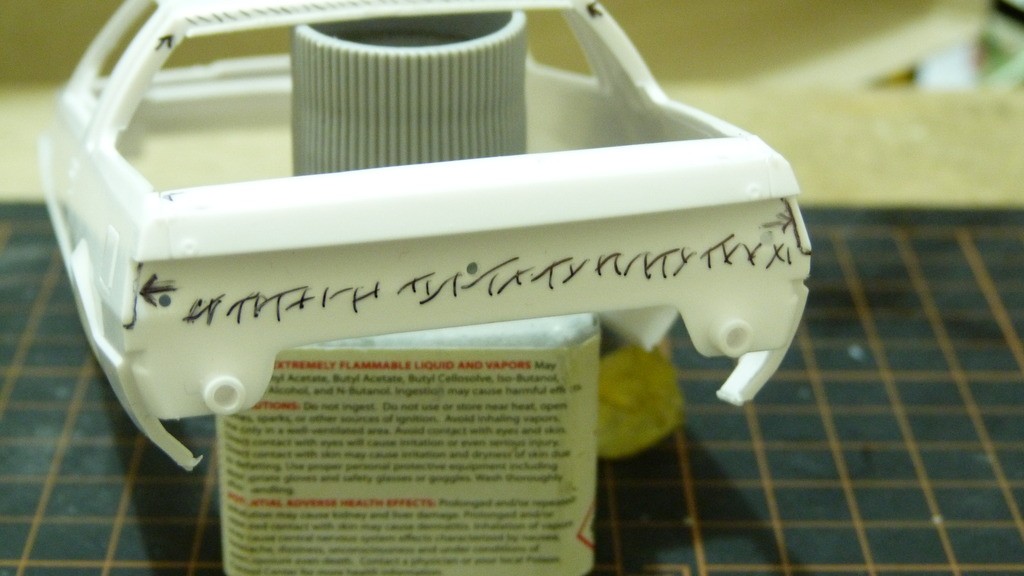
Prior to painting the body I was test fitting the windows and I found that the rear hatch didn't fit properly.
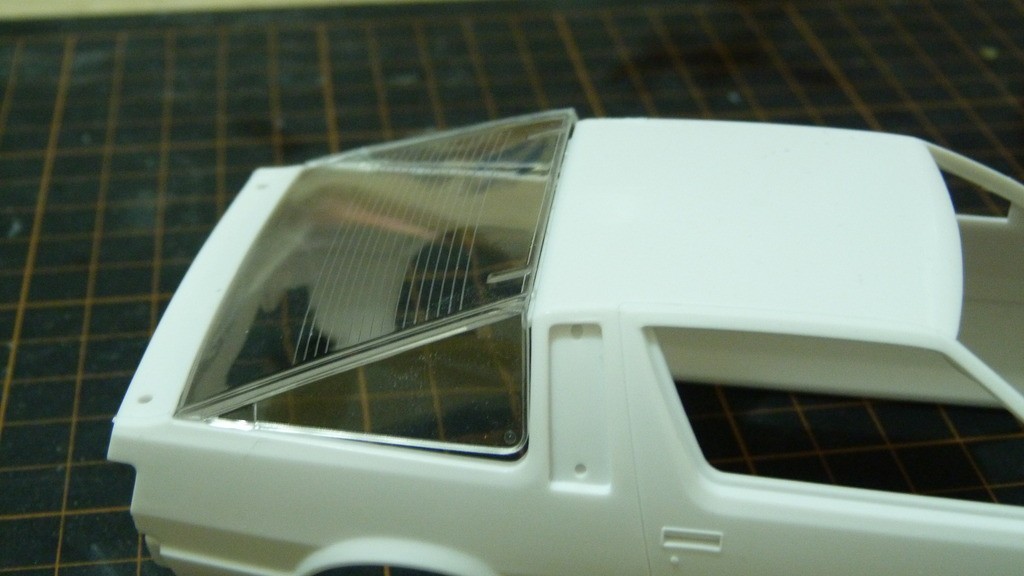
Most of the problem was this step at the rear of the roof.
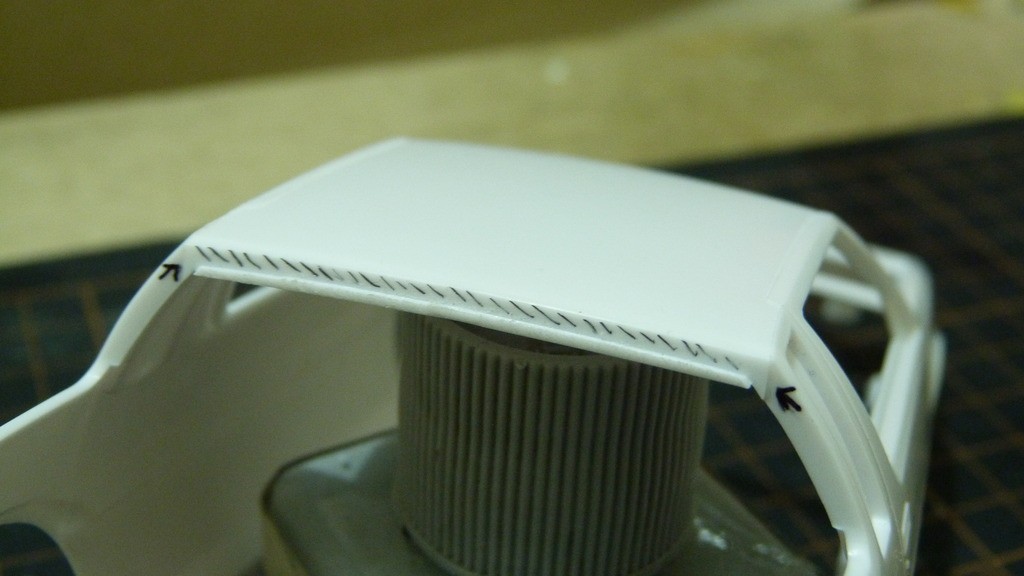
and some flash around the rear corners as well as around the clear hatch part.
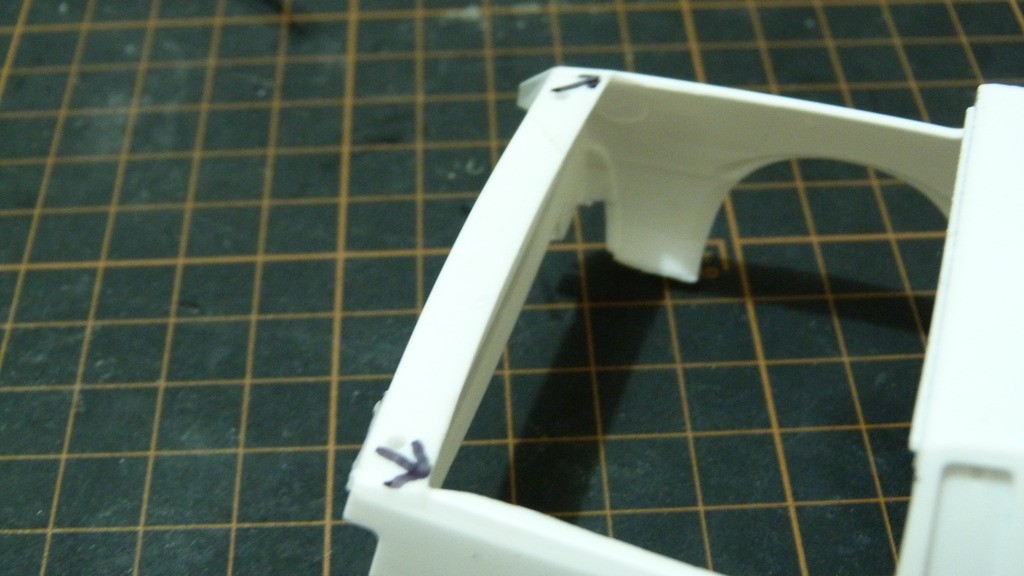
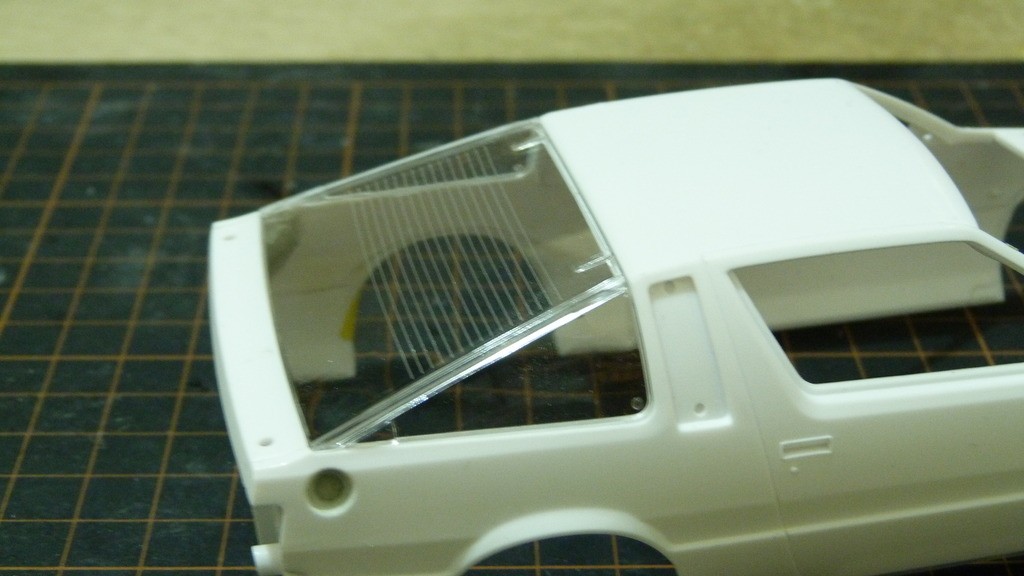
After sanding off the step and the flash she fit like a charm.
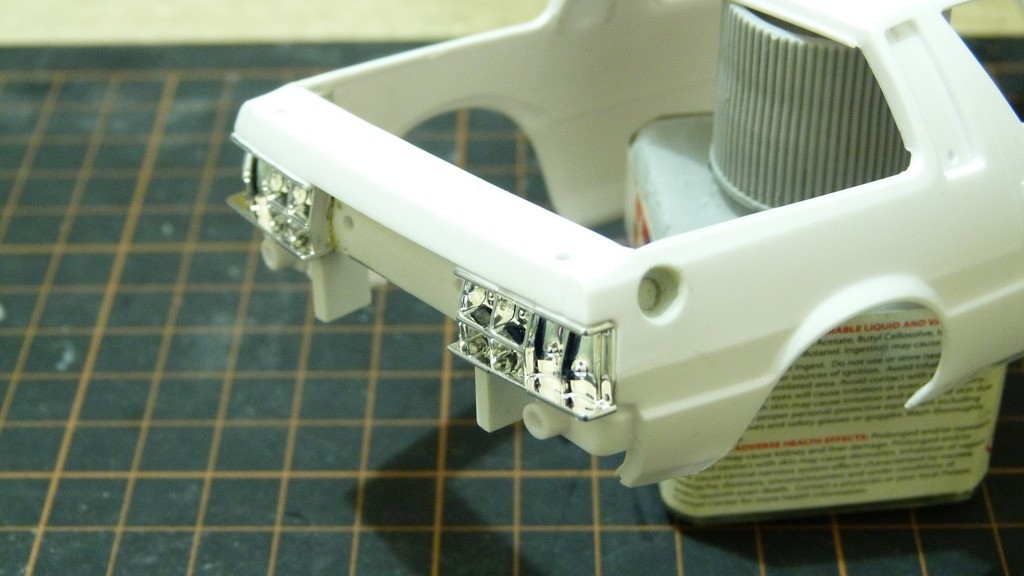
Another fitment issue was with the tail light reflectors. Way too much thick chrome was one problem,
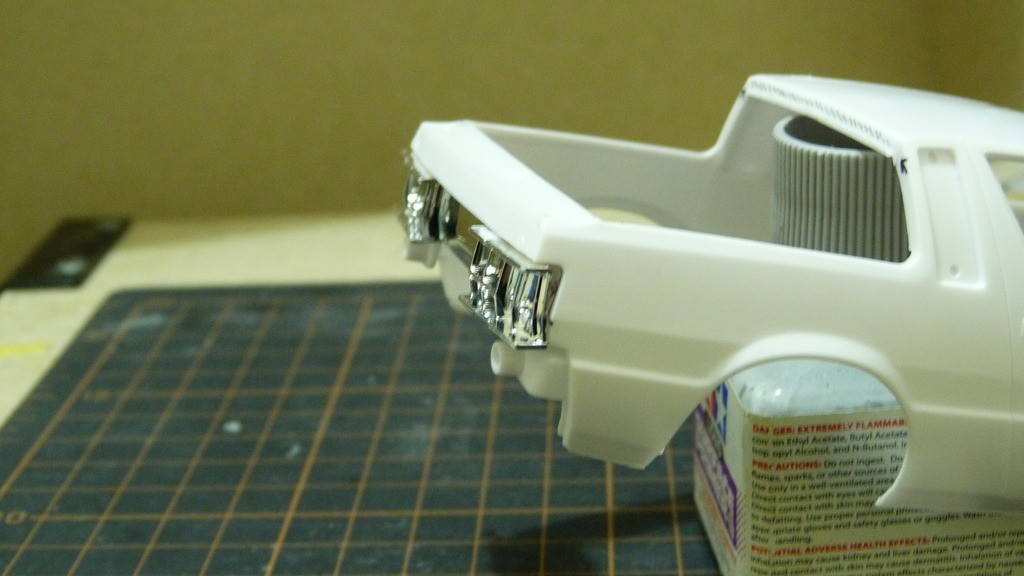
and the other problem was the seams in the area the reflector sits.
Removed the chrome and sanded off the seams and that part fitted just right.
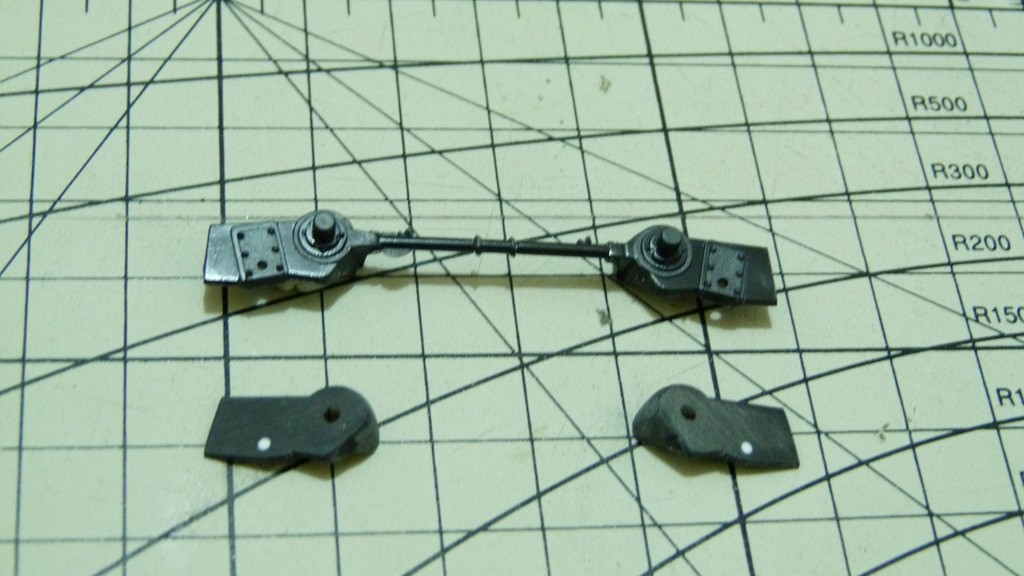
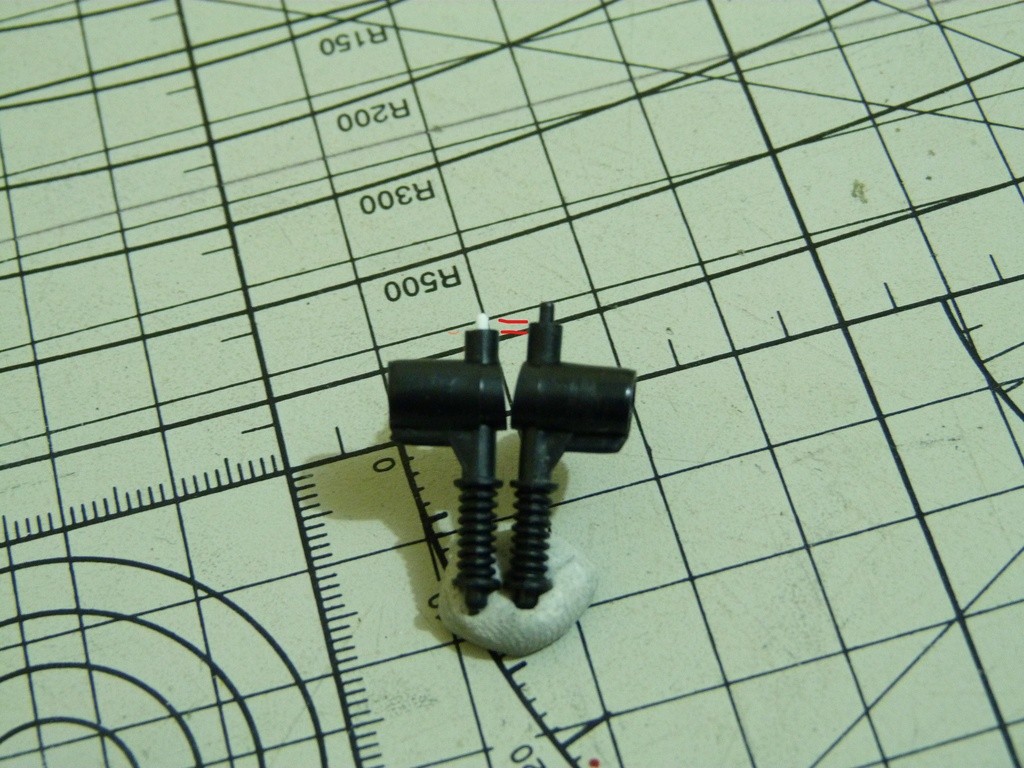
The suspension wasn't immune from fitment issues either. both the front and rear suspension uprights are too tall and need to be shortened or the cross members won't mate properly to the chassis. The front was just a matter of trimming the top and putting in a bit or rod for the pin.
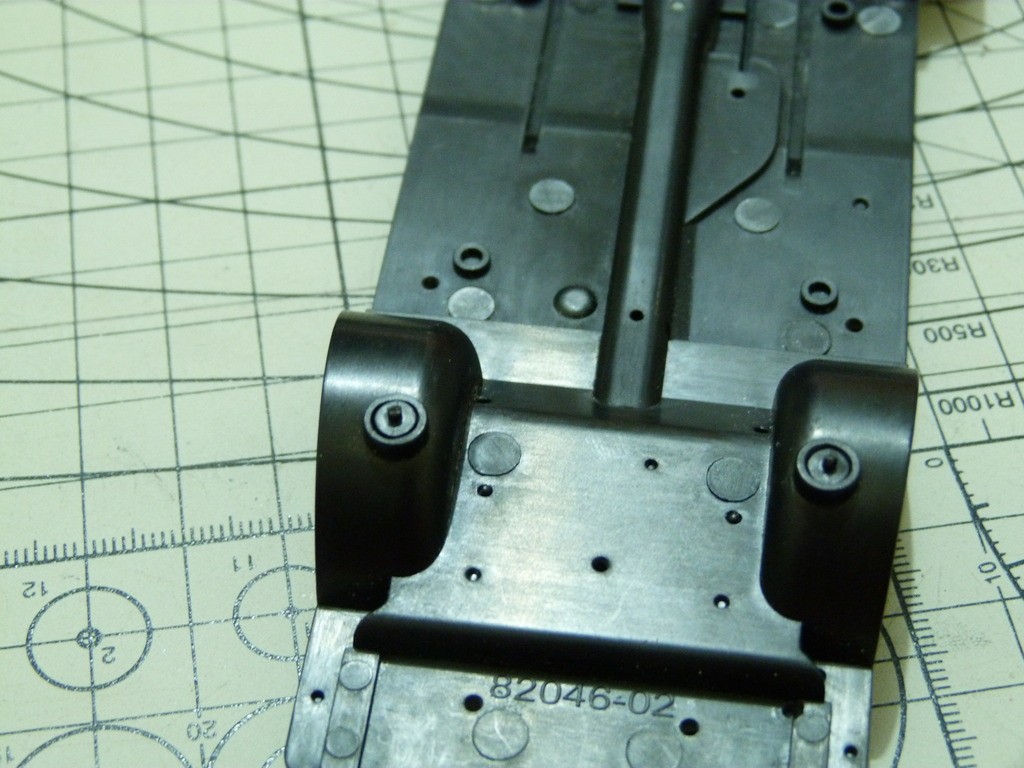
The rear suspension needed a different approach so I drilled out the mounting point on the chassis and re-capped it which gave me the extra 1mm or so that was required.

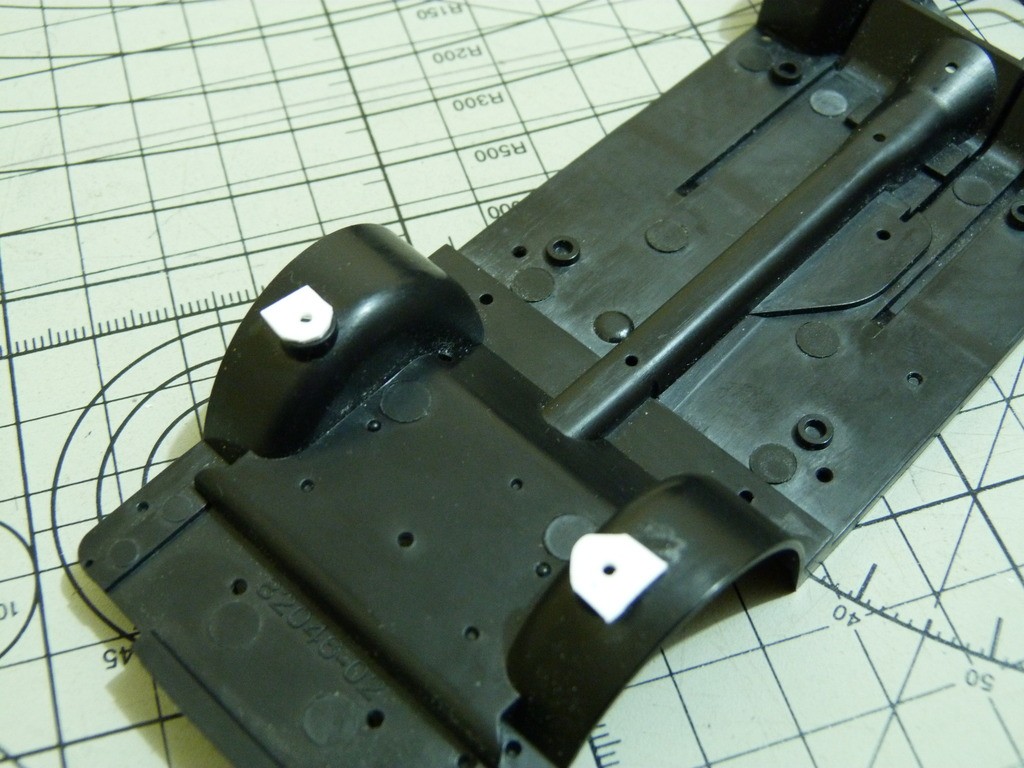
Another thing that bugged me was the massive toe-in on the front end.
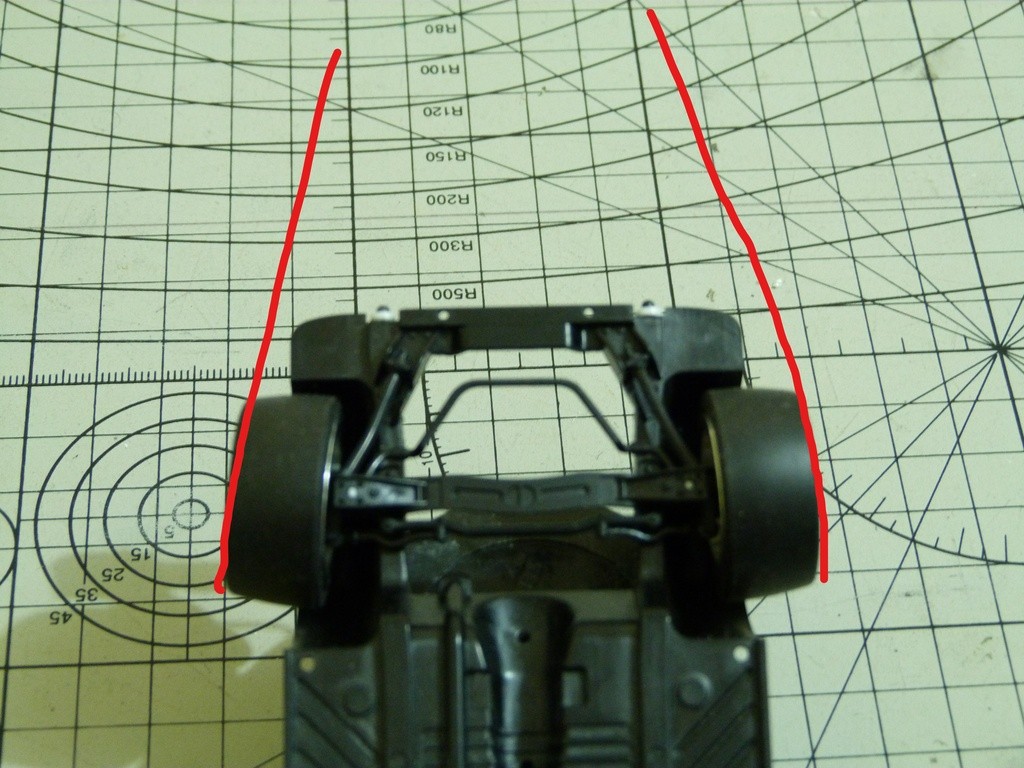
So I just trimmed a little bit from the rearward side of the hubs on the uprights.

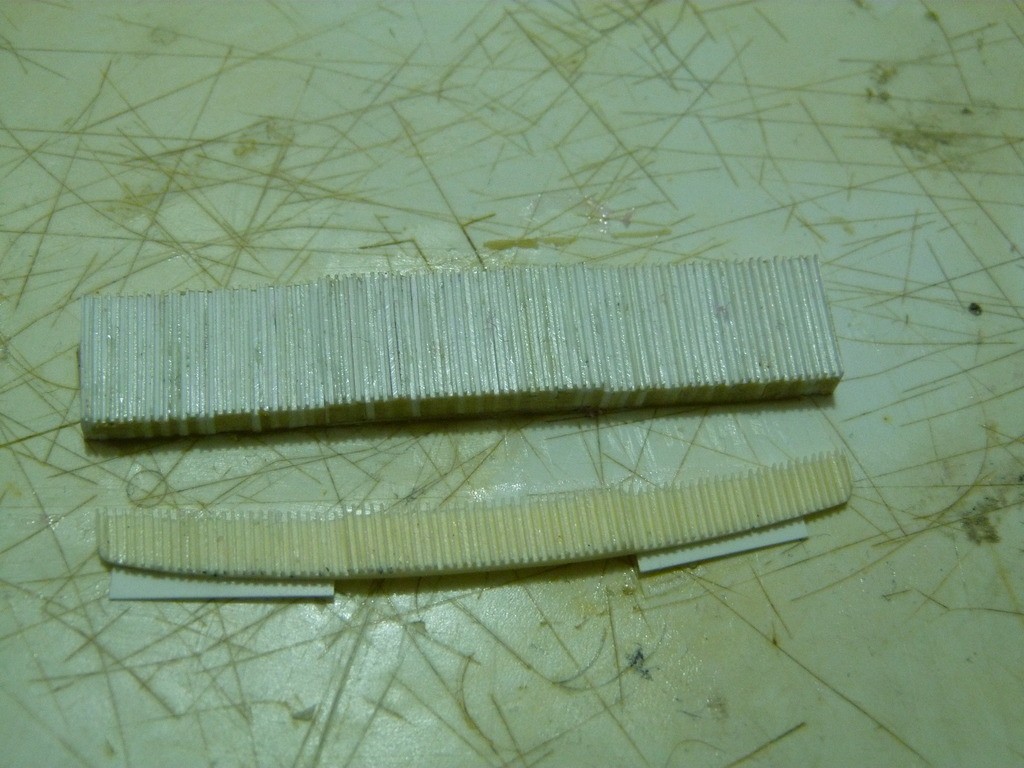
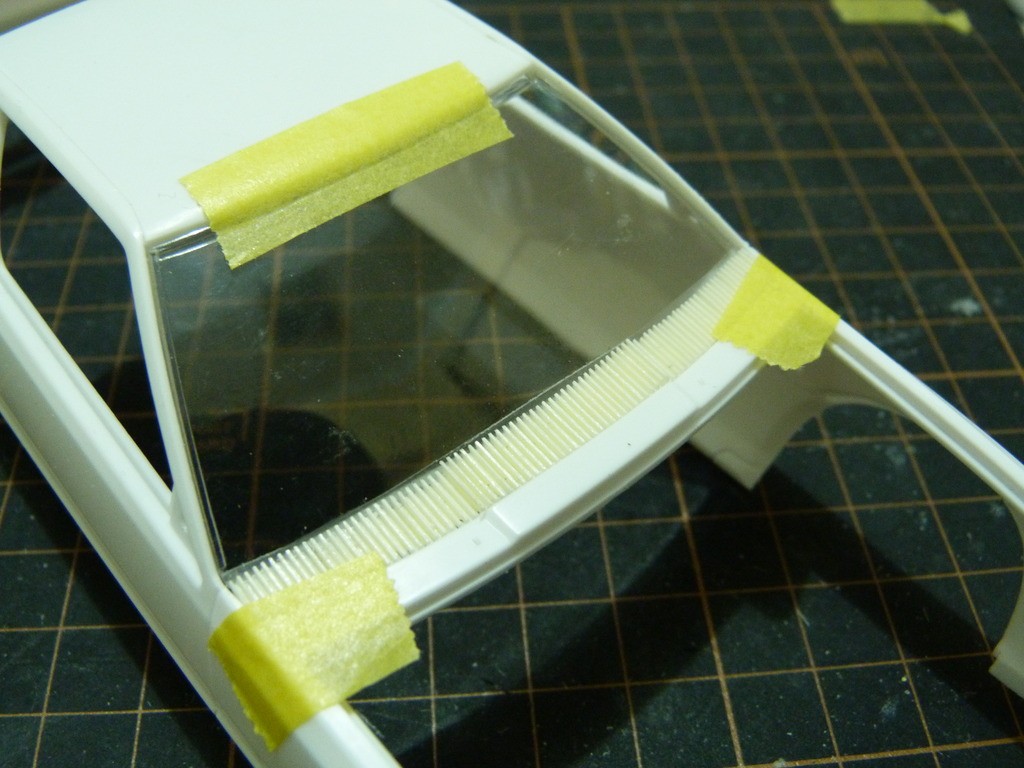
Because I've converted it to left hand drive I needed to deal with the issue of the RHD windscreen wiper recesses in the scuttle vent grill.
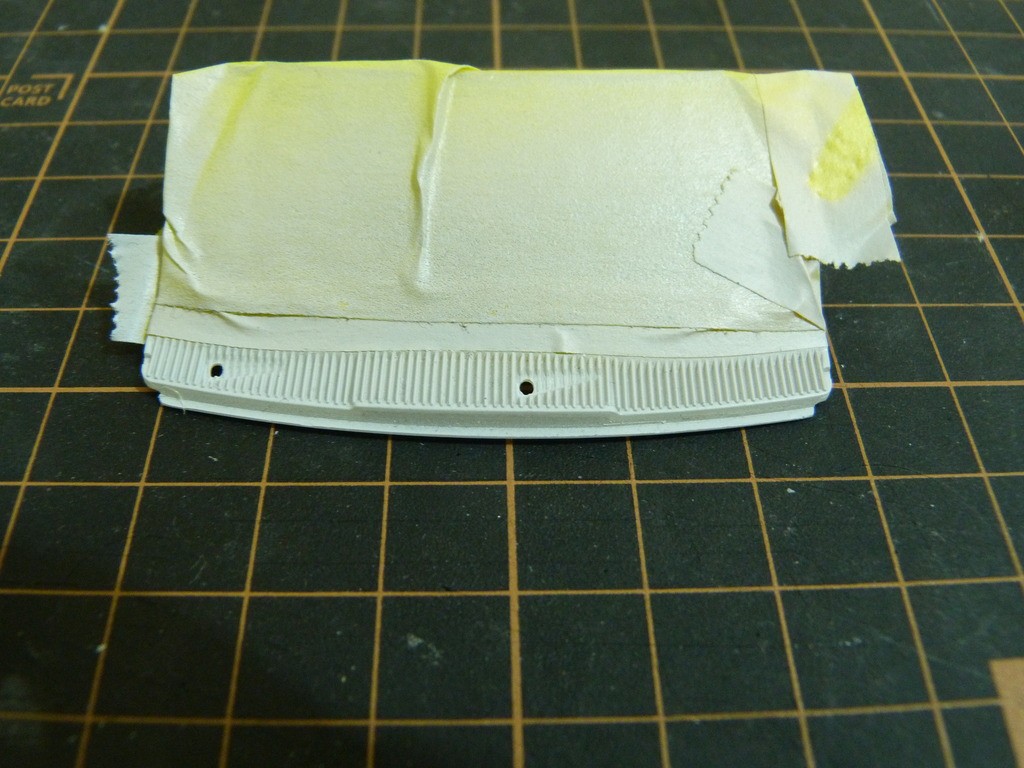
I thought about how to deal with this for quite a while and ended up just making my own. Evergreen strip #114 (0.4mm x 3.2mm) and 3107 (.25mm x 4mm) glued together chopped to size assembled and cast in resin.


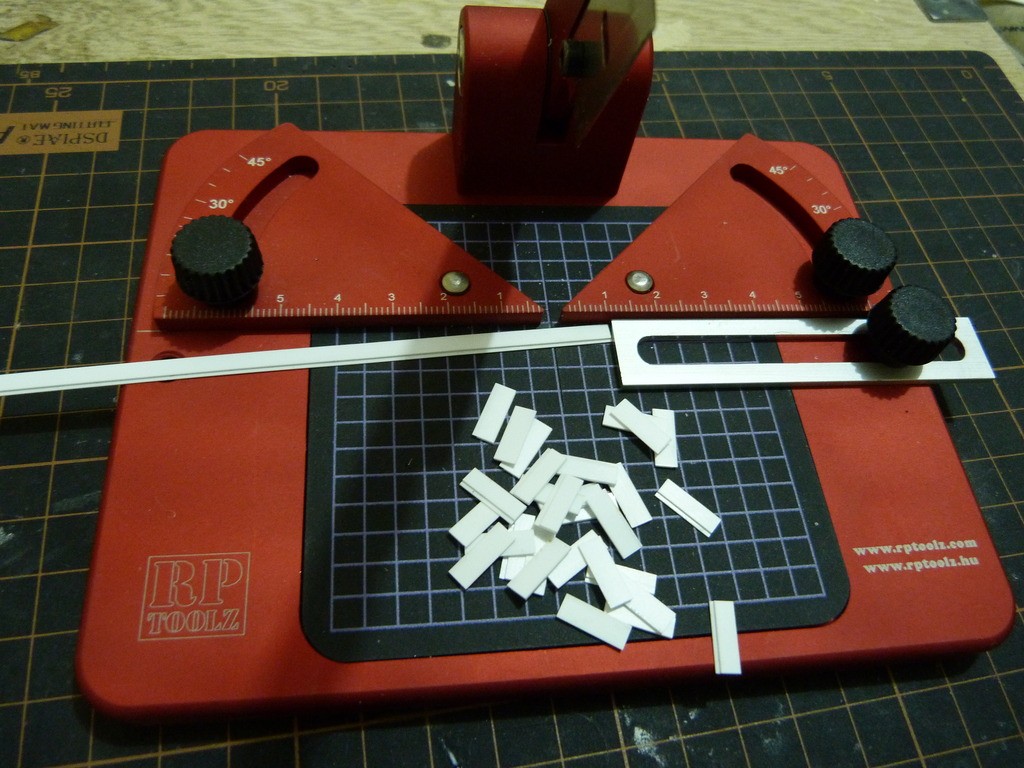

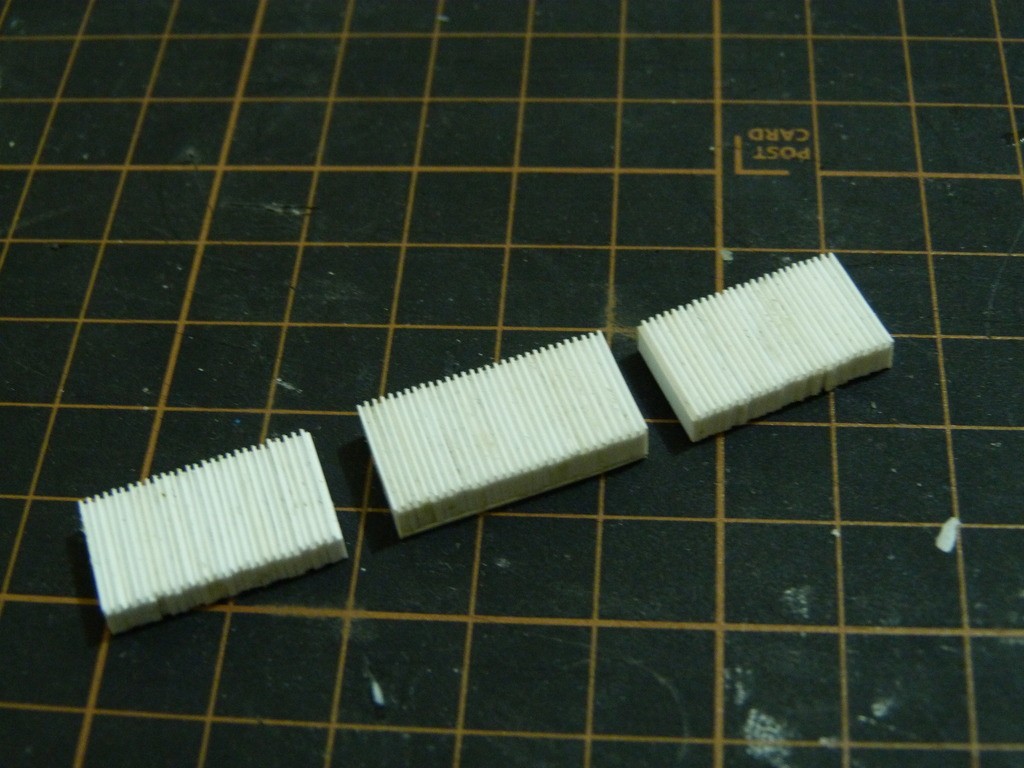
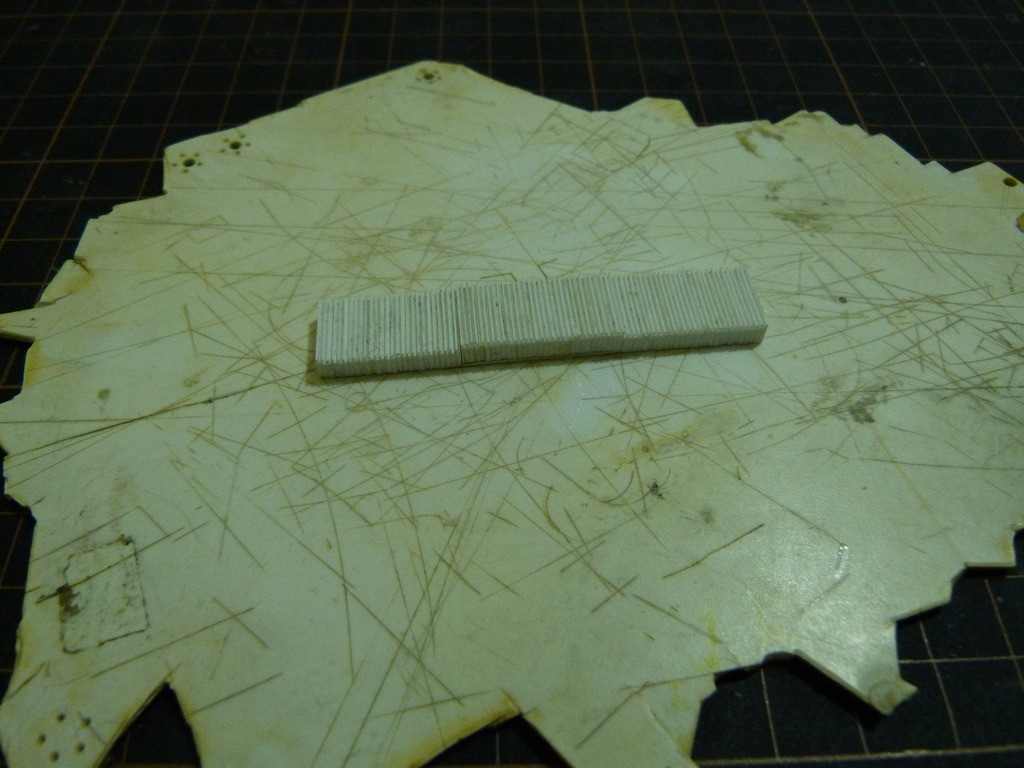
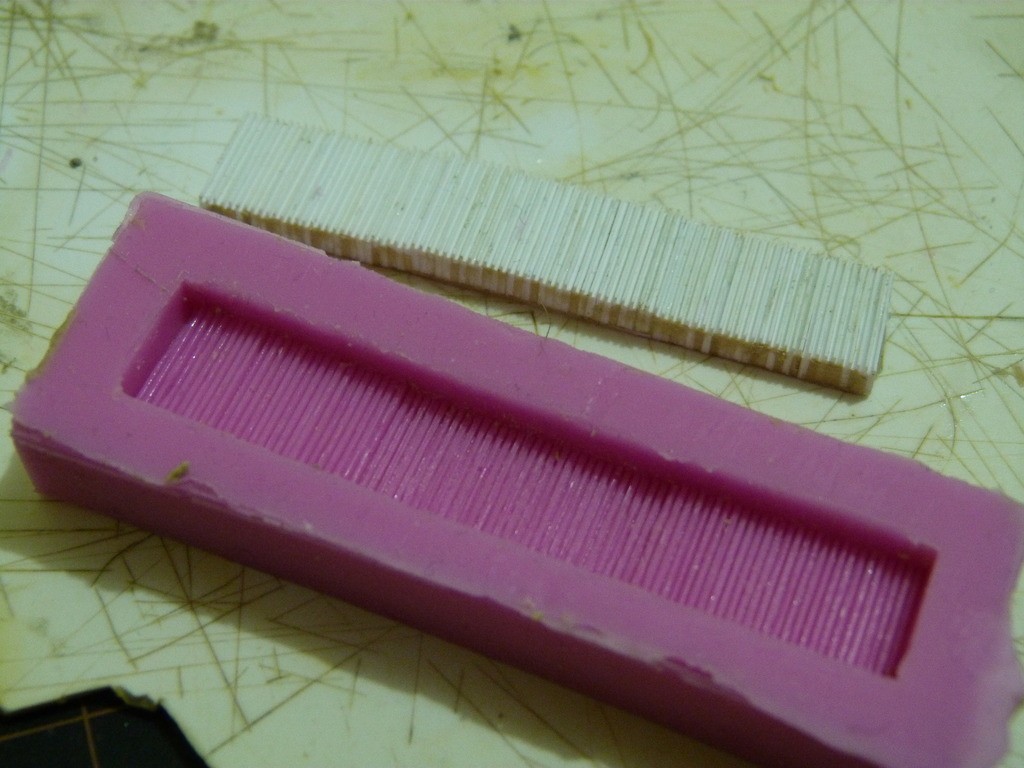
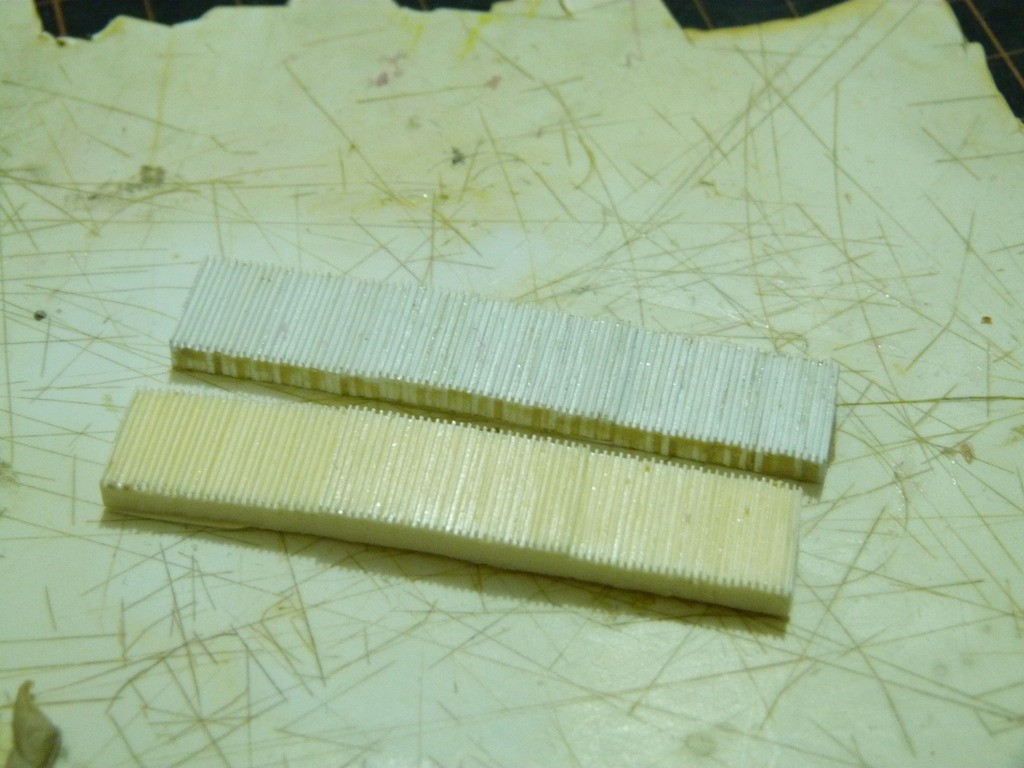
Lots of cutting, grinding and test fitting later.
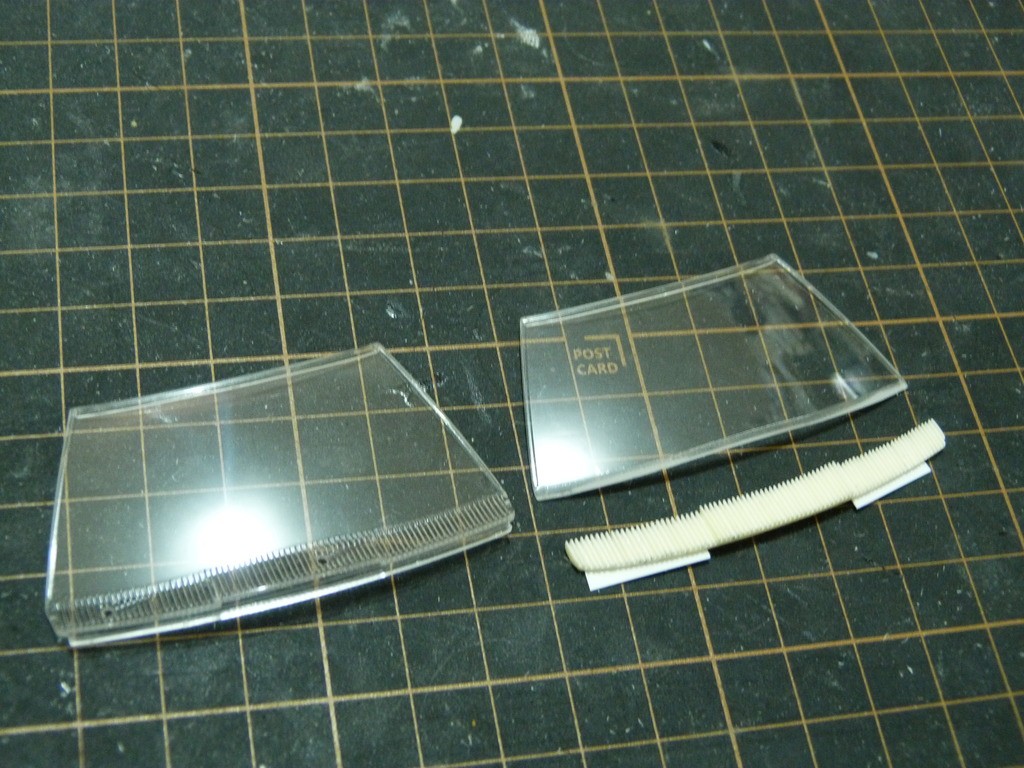
Just need to cut out a new mounting area for the wiper and it'll be done.
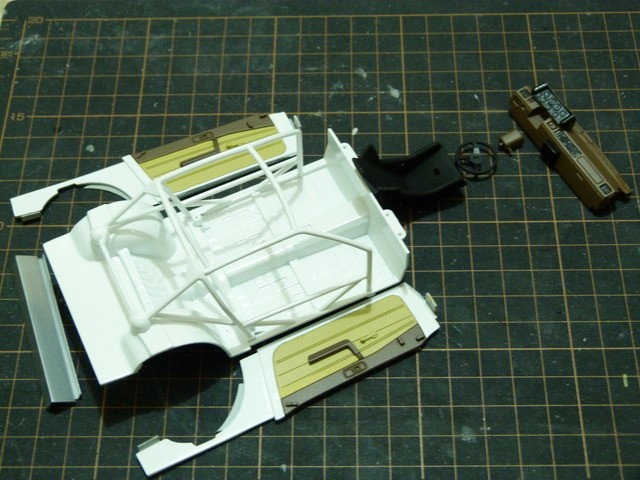
All parts have been painted their base colours and just need detail painting and assembly.


And the body is painted and polished and it's ready to go now too.
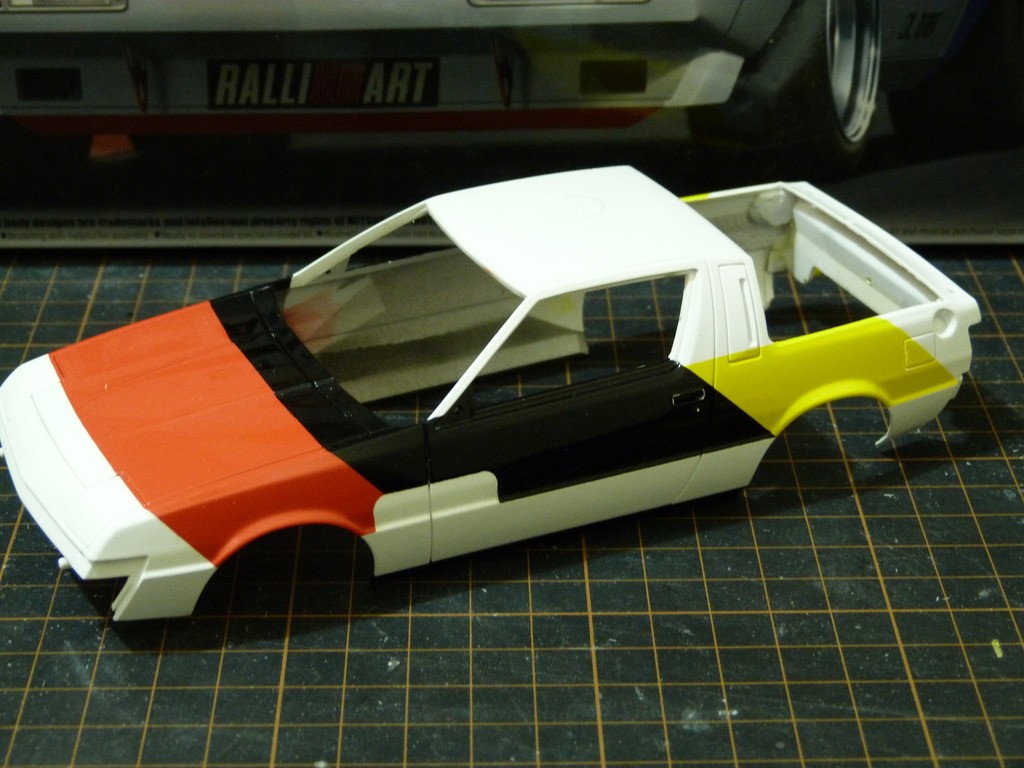
Now you're up to date.
Thanks, cheers and Happy New Year.
ShawnS
Prior to painting the body I was test fitting the windows and I found that the rear hatch didn't fit properly.

Most of the problem was this step at the rear of the roof.

and some flash around the rear corners as well as around the clear hatch part.

After sanding off the step and the flash she fit like a charm.

Another fitment issue was with the tail light reflectors. Way too much thick chrome was one problem,

and the other problem was the seams in the area the reflector sits.

Removed the chrome and sanded off the seams and that part fitted just right.

The suspension wasn't immune from fitment issues either. both the front and rear suspension uprights are too tall and need to be shortened or the cross members won't mate properly to the chassis. The front was just a matter of trimming the top and putting in a bit or rod for the pin.

The rear suspension needed a different approach so I drilled out the mounting point on the chassis and re-capped it which gave me the extra 1mm or so that was required.


Another thing that bugged me was the massive toe-in on the front end.

So I just trimmed a little bit from the rearward side of the hubs on the uprights.

Because I've converted it to left hand drive I needed to deal with the issue of the RHD windscreen wiper recesses in the scuttle vent grill.

I thought about how to deal with this for quite a while and ended up just making my own. Evergreen strip #114 (0.4mm x 3.2mm) and 3107 (.25mm x 4mm) glued together chopped to size assembled and cast in resin.


Lots of cutting, grinding and test fitting later.


Just need to cut out a new mounting area for the wiper and it'll be done.

All parts have been painted their base colours and just need detail painting and assembly.


And the body is painted and polished and it's ready to go now too.

Now you're up to date.
Thanks, cheers and Happy New Year.
ShawnS

ShawnS- I Love this place

-
 Number of posts : 565
Age : 50
Location : South Australia
Registration date : 2009-12-22
 Re: Beemax Starion Grp A
Have to say that is some nice detailed work your doing there. May I ask what you use for your moulds, and which resin you use. Very impressed.
Stuart Wallace- I should be working on Models

-
 Number of posts : 146
Age : 44
Location : Hamilton Victoria
Registration date : 2020-06-12
 Re: Beemax Starion Grp A
Thanks Stuart. I use Pinkysil for my moulds and either Easycast or Supercast resin both from www.amcsupplies.com.au

ShawnS- I Love this place

-
 Number of posts : 565
Age : 50
Location : South Australia
Registration date : 2009-12-22

Jezza- I should be working on Models

-
 Number of posts : 381
Age : 69
Location : Gosnells West. Aust.
Registration date : 2020-05-22
Page 1 of 1
Permissions in this forum:
You cannot reply to topics in this forum