
How-to scratchbuild an eggcrate grille.
+3
blatdriver
DeeCee
ShawnS
7 posters
Page 1 of 1

How-to scratchbuild an eggcrate grille.
![]() by ShawnS Sat 08 Jun 2013, 7:14 pm
by ShawnS Sat 08 Jun 2013, 7:14 pm
Hey guys here is something I've been working on. Egg crate grilles have been seen on many vehicles through out the ages so if you need to make one here is how to do it. The shape and size is up to you.
Whatchoo need.
Pencil, paper, ruler, marker pen (texta)
Super (CA) glue and thin liquid cement.
Saw and mitre box with grooves in the inside.

You'll also need evergreen 8106 for the grille slats and 157 for the spacer jig. I used 8106 strip because it's the same width as the saw.

The first thing you need to do is figure out the outside dimensions of the grille you want to make as well as how many slats it needs and then draw it on paper. This one has vertical slats 3mm apart and the horizontal slats are 1.5mm apart.

Then cut the strips with about 2cm extra length than the final result requires.

Bundle the strips of the same length together and superglue the ends. Make sure that you glue THE ENDS ONLY.

You should end up with two neat bundles.

Put those aside and start work on the spacer jig. The spacer jig will allow you to cut grooves at an even and consistant spacing.
Cut about 1 inch of the evergreen 157 strip and mark the width of the slat onto it.
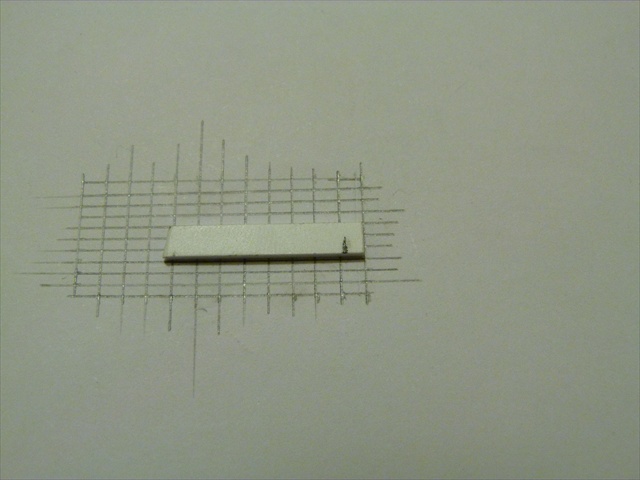
Put it in the mitre box and cut it to half way deep.


Lightly glue a piece of the 8106 strip into the slot and turn it over to add another chunk of 157 to the back to be a handle.


Put the first bundle of strips in the mitre box and saw a groove in the middle. GENTLY saw it to a little over half depth. CHECK YOUR WORK CONSTANTLY if you over cut it you will have to start all over again.


This is where the spacer jig comes in. Put the spacer jig in the first cut and return the part to the mitre box.


Gently push the spacer jig against the saw blade and start sawing again. Once again- check your work as you go.


You should have the idea by now so continue cutting either side of the original middle cut untill you have the amount of the grooves you need.

Make the spacer jig for the other slats as before and repeat the cutting steps.

Put the spacer jig in one of the outside slots and cut all the way through. Clean up the end with a sharp new blade and mark the end with a marker pen. You only need to mark ONE END of the slats. Now cut the other end off and clean it up too.

With the ends removed and cleaned up you can separate the slats.

Join one each of the vertical and horizontal slats at the marked end and one each at the unmarked end and tape them to a square edge of a metal surface. I am using an old carpenters square. Apply some liquid cement to the join.

When the glue sets, remove them and join them together with more cement to make the outer slats a frame to help the other slats .

Continue by adding the centre slats first and gluing as you go.


You should end up with this.

At this stage the liquid cement will have softened the whole lot up and it will begin to bow outward. To counter this I put the grille between the ruler and the saw blade and weighted it down with the glue bottle overnight for the plastic to re-harden.


Badabing she's done.


I developed this technique to make a grille for a Morris 850 a couple of years ago.

One word of warning though be careful with how wide you make the slots between the slats as the thin styrene can't handle the liquid solvent cement too well and you end up with something that's not too straight.

Well there you go. Happy scratchbuilding.
CheersSS
Whatchoo need.
Pencil, paper, ruler, marker pen (texta)
Super (CA) glue and thin liquid cement.
Saw and mitre box with grooves in the inside.
You'll also need evergreen 8106 for the grille slats and 157 for the spacer jig. I used 8106 strip because it's the same width as the saw.
The first thing you need to do is figure out the outside dimensions of the grille you want to make as well as how many slats it needs and then draw it on paper. This one has vertical slats 3mm apart and the horizontal slats are 1.5mm apart.
Then cut the strips with about 2cm extra length than the final result requires.
Bundle the strips of the same length together and superglue the ends. Make sure that you glue THE ENDS ONLY.
You should end up with two neat bundles.
Put those aside and start work on the spacer jig. The spacer jig will allow you to cut grooves at an even and consistant spacing.
Cut about 1 inch of the evergreen 157 strip and mark the width of the slat onto it.
Put it in the mitre box and cut it to half way deep.
Lightly glue a piece of the 8106 strip into the slot and turn it over to add another chunk of 157 to the back to be a handle.
Put the first bundle of strips in the mitre box and saw a groove in the middle. GENTLY saw it to a little over half depth. CHECK YOUR WORK CONSTANTLY if you over cut it you will have to start all over again.
This is where the spacer jig comes in. Put the spacer jig in the first cut and return the part to the mitre box.
Gently push the spacer jig against the saw blade and start sawing again. Once again- check your work as you go.
You should have the idea by now so continue cutting either side of the original middle cut untill you have the amount of the grooves you need.
Make the spacer jig for the other slats as before and repeat the cutting steps.
Put the spacer jig in one of the outside slots and cut all the way through. Clean up the end with a sharp new blade and mark the end with a marker pen. You only need to mark ONE END of the slats. Now cut the other end off and clean it up too.
With the ends removed and cleaned up you can separate the slats.
Join one each of the vertical and horizontal slats at the marked end and one each at the unmarked end and tape them to a square edge of a metal surface. I am using an old carpenters square. Apply some liquid cement to the join.
When the glue sets, remove them and join them together with more cement to make the outer slats a frame to help the other slats .
Continue by adding the centre slats first and gluing as you go.
You should end up with this.
At this stage the liquid cement will have softened the whole lot up and it will begin to bow outward. To counter this I put the grille between the ruler and the saw blade and weighted it down with the glue bottle overnight for the plastic to re-harden.
Badabing she's done.
I developed this technique to make a grille for a Morris 850 a couple of years ago.
One word of warning though be careful with how wide you make the slots between the slats as the thin styrene can't handle the liquid solvent cement too well and you end up with something that's not too straight.
Well there you go. Happy scratchbuilding.
CheersSS

ShawnS- I Love this place

-
 Number of posts : 565
Age : 49
Location : South Australia
Registration date : 2009-12-22
Re: How-to scratchbuild an eggcrate grille.
![]() by DeeCee Sat 08 Jun 2013, 9:01 pm
by DeeCee Sat 08 Jun 2013, 9:01 pm


DeeCee- AMCC ADDICT

- Number of posts : 3772
Age : 57
Location : Launceston Tas
Registration date : 2011-08-07
Re: How-to scratchbuild an eggcrate grille.
![]() by blatdriver Sat 08 Jun 2013, 10:10 pm
by blatdriver Sat 08 Jun 2013, 10:10 pm
Thanks, good work 

blatdriver- AMCC ADDICT
- Number of posts : 1550
Age : 47
Location : Wagga
Registration date : 2011-04-22
Re: How-to scratchbuild an eggcrate grille.
![]() by zenrat Sun 09 Jun 2013, 11:37 am
by zenrat Sun 09 Jun 2013, 11:37 am
Jigs!
I would never have thought of using jigs!
I would have marked the lines with a pen and then cut them wonky or been off by the thickness of the pen.
Awesome.
I'm off to make egg crate grilles for everything now...
I would never have thought of using jigs!
I would have marked the lines with a pen and then cut them wonky or been off by the thickness of the pen.
Awesome.
I'm off to make egg crate grilles for everything now...
_________________
Fred
Badda Bing Badda Bang

zenrat- Moderator
- Number of posts : 6842
Age : 56
Location : Dank Northern slopes of Mount Martha, Vic
Registration date : 2008-07-17
Re: How-to scratchbuild an eggcrate grille.
![]() by ShawnS Sun 09 Jun 2013, 3:40 pm
by ShawnS Sun 09 Jun 2013, 3:40 pm
zenrat wrote:Jigs!
I would never have thought of using jigs!
I would have marked the lines with a pen and then cut them wonky or been off by the thickness of the pen.
Awesome.
I'm off to make egg crate grilles for everything now...
Ha. Been there done that too.
Egg crates for everything? A few less vertical slats and you can make venetian blinds for everything too.
ShawnS- I Love this place
- Number of posts : 565
Age : 49
Location : South Australia
Registration date : 2009-12-22
Re: How-to scratchbuild an eggcrate grille.
![]() by mgy125 Mon 10 Jun 2013, 9:28 am
by mgy125 Mon 10 Jun 2013, 9:28 am
ShawnS wrote:
Egg crates for everything? A few less vertical slats and you can make venetian blinds for everything too.

That would be perfect the back windows of a Holden Wagon.

mgy125- AMCC ADDICT
- Number of posts : 1679
Age : 88
Location : Moldovia
Registration date : 2010-06-24
Re: How-to scratchbuild an eggcrate grille.
![]() by IronMunkie Sat 07 Jun 2014, 7:04 pm
by IronMunkie Sat 07 Jun 2014, 7:04 pm
Cut it using the angle of the Mitre box, and you can get a 45 degree slant to the blades, and make better venetians. 

IronMunkie- I should be working on Models

- Number of posts : 148
Age : 29
Location : Sydney
Registration date : 2012-07-21


ratsmann- I should be working on Models
- Number of posts : 110
Age : 51
Location : Benalla Vic
Registration date : 2010-12-21 -

» Scratchbuild - Trailer 1/24
» Late model scratchbuild
» 37 Ford Pickup with Hudson Terraplane Grille
» Late model scratchbuild
» 37 Ford Pickup with Hudson Terraplane Grille
Page 1 of 1
Permissions in this forum:
You cannot reply to topics in this forum|
|
|