Scratch building classic GTR UX1 Torana.
+4
LordZycon
allan
Deadly
fractalign
8 posters
Page 1 of 1

Scratch building classic GTR UX1 Torana.
![]() by fractalign Sat 20 Sep 2014, 5:31 pm
by fractalign Sat 20 Sep 2014, 5:31 pm
Hey Guys.
This is a build I have had underway since July on the US Forum, so its hardly new, but at the same time I know there are lots of guys on the Aussie Forum who may not check out the US forum, so I thought I would put the build up here. I have not posted any thing on the Aussie forum before, I had a special project in mind but that is on there back burner because this one is taking so long. Anyway I won't be able to post up all the photo's from the beginning because there are too many. But a quick rundown. Most of the model is being constructed from 2mm thick sheet styrene and so far I have completed the bonnet, boot and body sides. At them moment I am working on the roof and it will be from this stage that I will be uploading photos. All measurement are being taken from a 1:1 stock standard LJ that I own.
All comments and feedback welcome.
Last edited by fractalign on Sat 20 Sep 2014, 8:57 pm; edited 4 times in total

fractalign- AMCC NEWBIE!

-
 Number of posts : 38
Age : 52
Location : Australia
Registration date : 2013-02-16
Re: Scratch building classic GTR UX1 Torana.
![]() by fractalign Sat 20 Sep 2014, 8:42 pm
by fractalign Sat 20 Sep 2014, 8:42 pm
Hey Guys.
Here are some shots of the roof. The roof was made from the bases of a couple of old ice cream containers. I used two pieces stuck together to create a ply.
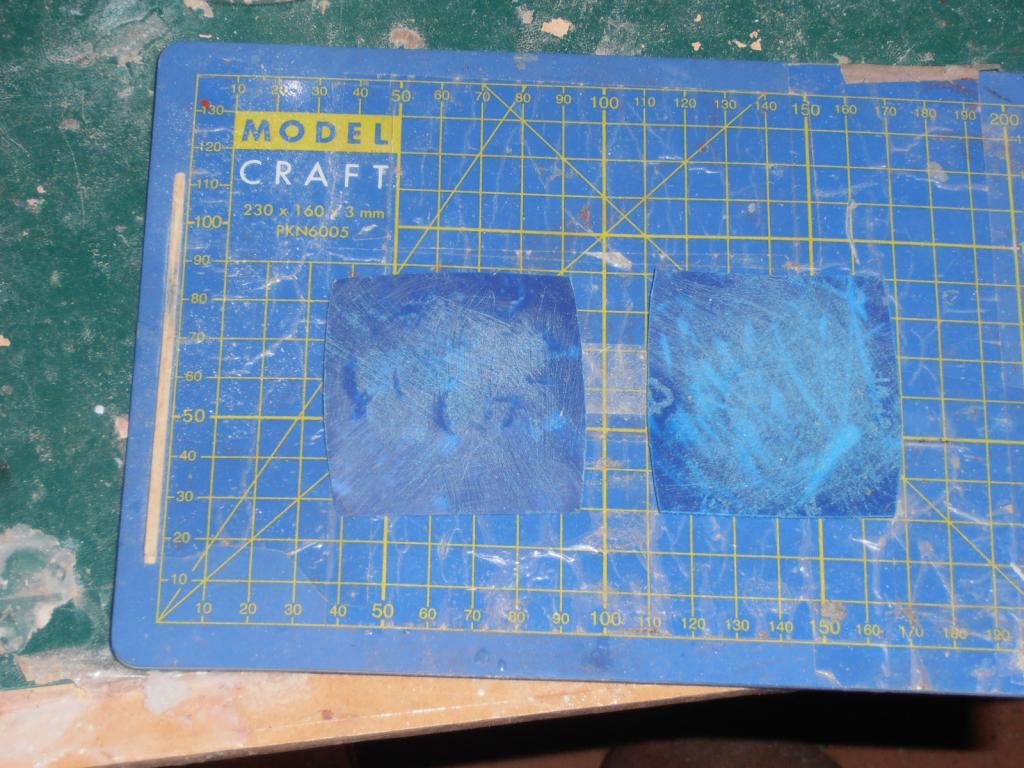
Here are some shots of the roof. The roof was made from the bases of a couple of old ice cream containers. I used two pieces stuck together to create a ply.

Last edited by fractalign on Sat 20 Sep 2014, 8:51 pm; edited 1 time in total
fractalign- AMCC NEWBIE!
- Number of posts : 38
Age : 52
Location : Australia
Registration date : 2013-02-16
Re: Scratch building classic GTR UX1 Torana.
![]() by fractalign Sat 20 Sep 2014, 8:47 pm
by fractalign Sat 20 Sep 2014, 8:47 pm
Test fitting the unit.


fractalign- AMCC NEWBIE!
- Number of posts : 38
Age : 52
Location : Australia
Registration date : 2013-02-16
Re: Scratch building classic GTR UX1 Torana.
![]() by fractalign Sat 20 Sep 2014, 8:50 pm
by fractalign Sat 20 Sep 2014, 8:50 pm
After trimming this is how it looks. Next task will be to begin the fitting process.


fractalign- AMCC NEWBIE!
- Number of posts : 38
Age : 52
Location : Australia
Registration date : 2013-02-16
Re: Scratch building classic GTR UX1 Torana.
![]() by Deadly Sun 21 Sep 2014, 7:37 am
by Deadly Sun 21 Sep 2014, 7:37 am
Have been following this build on the US forum....................... AWSOME stuff mate 

Deadly- I Love this place

- Number of posts : 543
Age : 53
Location : Calliope Qld
Registration date : 2010-01-19


allan- AMCC ADDICT

- Number of posts : 10385
Age : 66
Location : East Maitland
Registration date : 2008-03-31
Re: Scratch building classic GTR UX1 Torana.
![]() by LordZycon Sun 21 Sep 2014, 6:26 pm
by LordZycon Sun 21 Sep 2014, 6:26 pm
Caught this on the US forum as well. Truly amazing work. 
Can't wait to see more.
Can't wait to see more.
LordZycon- I should be working on Models

- Number of posts : 176
Age : 42
Location : Sydney
Registration date : 2012-05-20
Re: Scratch building classic GTR UX1 Torana.
![]() by scummy Sun 21 Sep 2014, 9:06 pm
by scummy Sun 21 Sep 2014, 9:06 pm
As an owner of an xu1 this is looking very good .

scummy- AMCC ADDICT
- Number of posts : 1552
Age : 64
Location : Campbelltown
Registration date : 2010-01-15 -

Re: Scratch building classic GTR UX1 Torana.
![]() by fractalign Mon 22 Sep 2014, 8:40 pm
by fractalign Mon 22 Sep 2014, 8:40 pm
Thank for the positive feedback guys ! I will get some more photos up in the next couple of days.
Cheers.
Cheers.
fractalign- AMCC NEWBIE!
- Number of posts : 38
Age : 52
Location : Australia
Registration date : 2013-02-16
Re: Scratch building classic GTR UX1 Torana.
![]() by fractalign Wed 24 Sep 2014, 10:08 pm
by fractalign Wed 24 Sep 2014, 10:08 pm
Hey Guys.
Here are some images of the roof, I have been adding detail to the underside. The sand paper is supposed to simulate the spray on body deadener.
The mirror mount is nearly done.

Photo bucket is being very stubborn at the moment with uploads so I will send some more images through tomorrow.
Here are some images of the roof, I have been adding detail to the underside. The sand paper is supposed to simulate the spray on body deadener.

The mirror mount is nearly done.

Photo bucket is being very stubborn at the moment with uploads so I will send some more images through tomorrow.
fractalign- AMCC NEWBIE!
- Number of posts : 38
Age : 52
Location : Australia
Registration date : 2013-02-16

allan- AMCC ADDICT
- Number of posts : 10385
Age : 66
Location : East Maitland
Registration date : 2008-03-31
Re: Scratch building classic GTR UX1 Torana.
![]() by ozmodeler Fri 26 Sep 2014, 8:20 pm
by ozmodeler Fri 26 Sep 2014, 8:20 pm
What a great job you've done so far. Looking forward to seeing more. Which U.S. forum have you posted this on ?

ozmodeler- I should be working on Models
- Number of posts : 434
Age : 65
Location : Nowra
Registration date : 2012-04-16
Re: Scratch building classic GTR UX1 Torana.
![]() by fractalign Sat 27 Sep 2014, 7:08 am
by fractalign Sat 27 Sep 2014, 7:08 am
Hey Guys. Its up on the Model Cars Forum. Sorry for not getting up to speed with progress shots but here they are.
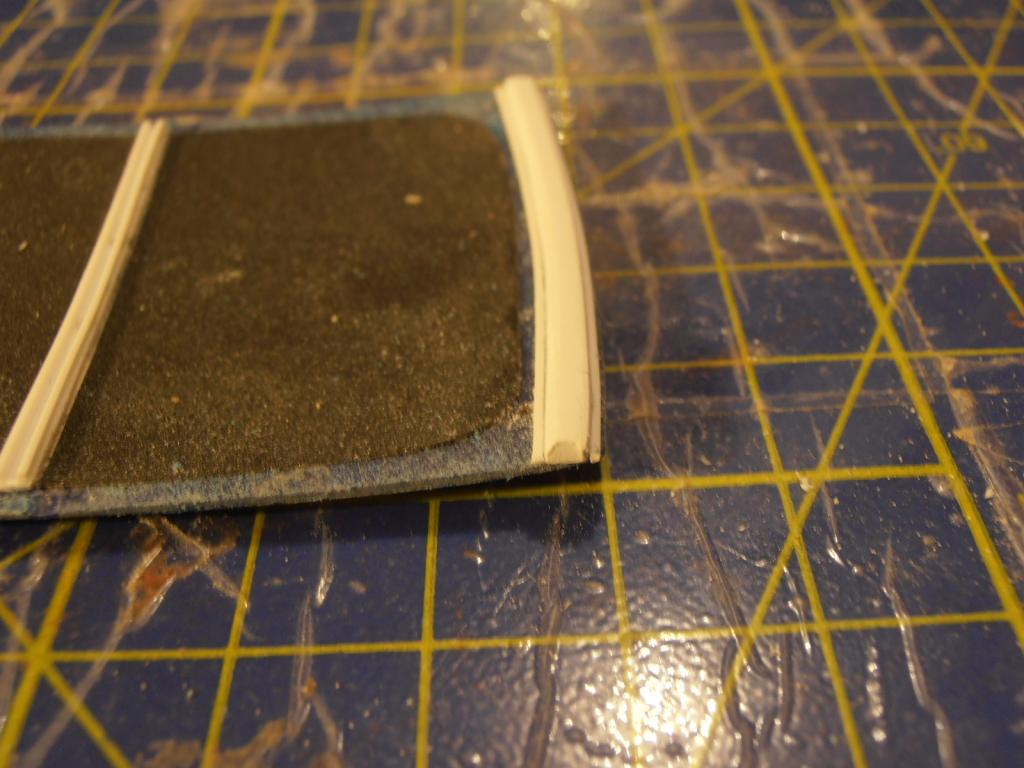
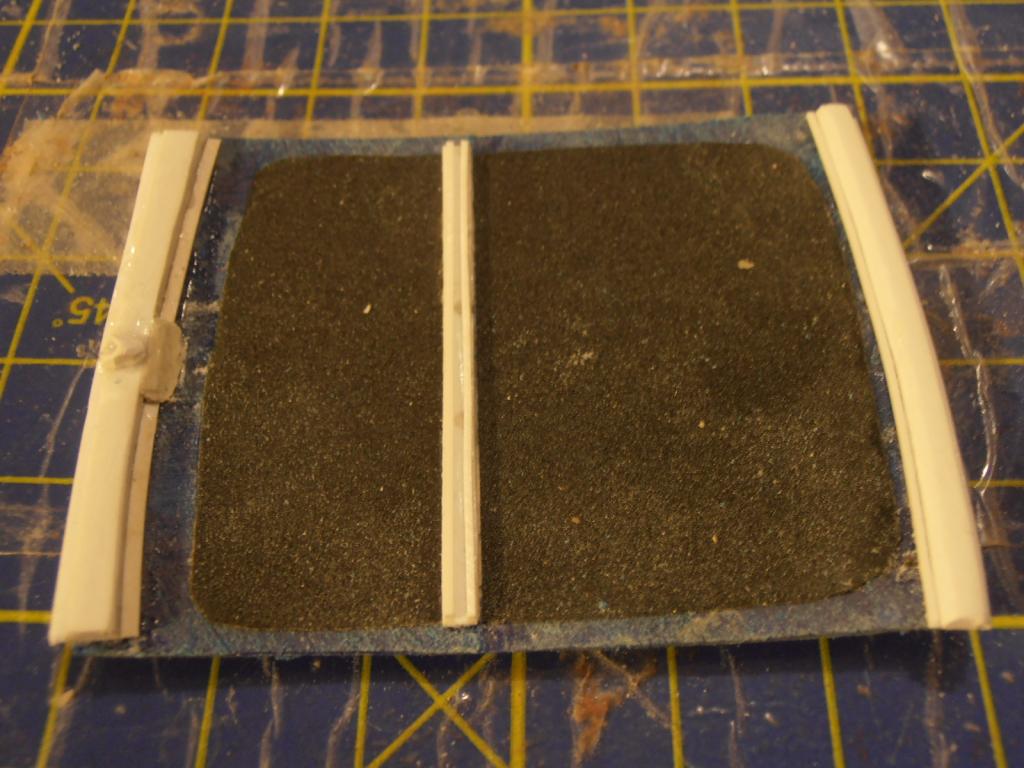
I finished of the rear cross beam. This one is what the rear window sit in. In case I did mention before the glass for this one will attach from the outside just like a real !:!. Here are the bits that made up the cross beam.

The finished unit.
At the moment I am working on making up templates for the inside of the C pillars, I will be using the cardboard from an inverted cereal box for this job, so hopefully tonight I will have some more shots to put up.
I finished of the rear cross beam. This one is what the rear window sit in. In case I did mention before the glass for this one will attach from the outside just like a real !:!. Here are the bits that made up the cross beam.

The finished unit.


At the moment I am working on making up templates for the inside of the C pillars, I will be using the cardboard from an inverted cereal box for this job, so hopefully tonight I will have some more shots to put up.
fractalign- AMCC NEWBIE!
- Number of posts : 38
Age : 52
Location : Australia
Registration date : 2013-02-16
Re: Scratch building classic GTR UX1 Torana.
![]() by fractalign Tue 30 Sep 2014, 6:55 am
by fractalign Tue 30 Sep 2014, 6:55 am
Hey Guys.
After making up the cardboard template, I went to work constructing a press.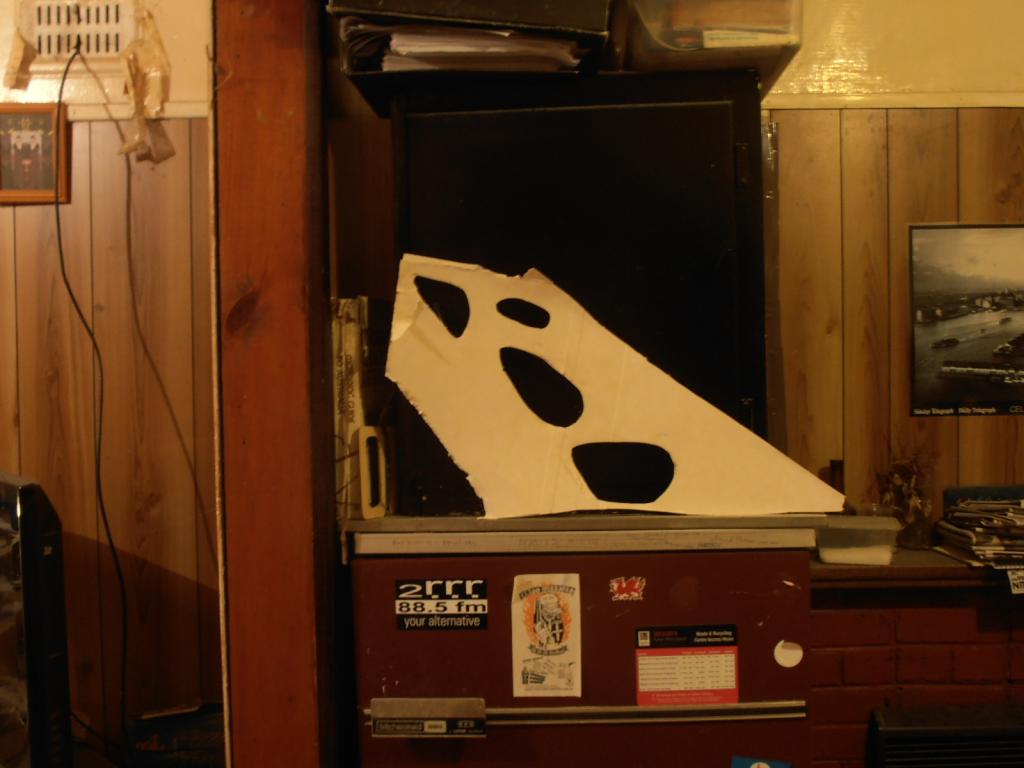
In took a photo of the template first and i sure the image in the viewfinder was 1:25 scale. I then took some Fimo which is a synthetic baking clay and shaped the shafts the same size as the holes in the image.
After doing that i got some clear plastic from a cd cover, stuck that over the image in the view finder and began sticking the shaft to it. Once this side was done I turned it over and repeated the process.

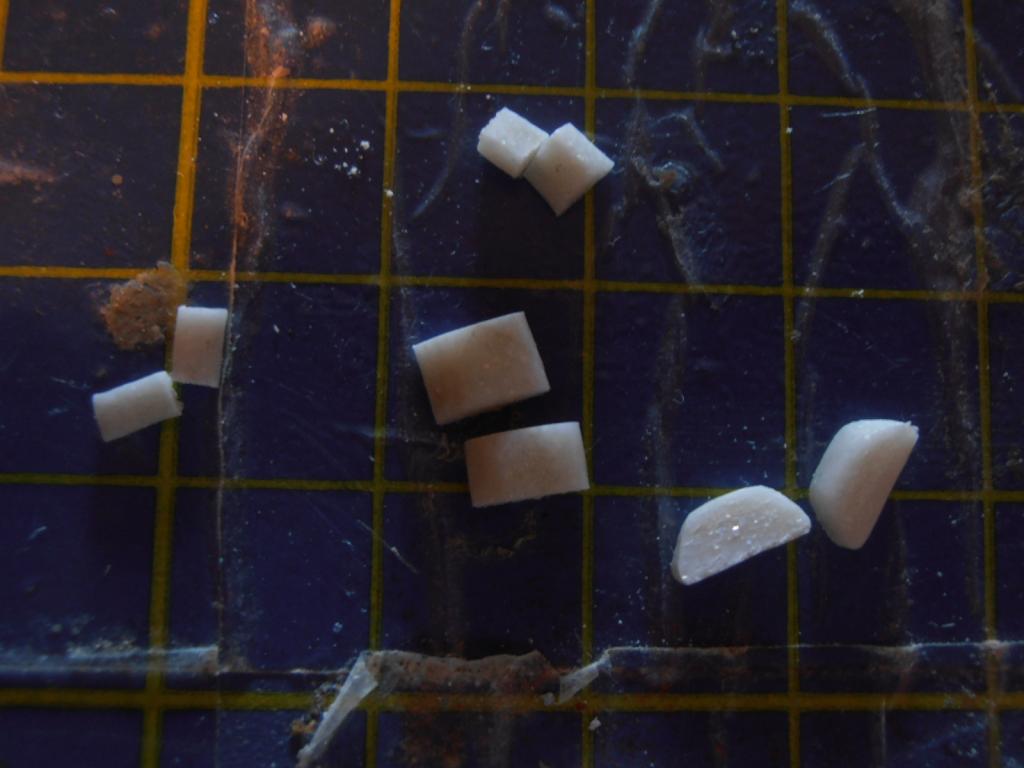
I then got some more Fimo and pushed it into the press to get a perfect imprint. Here are the pieces before going into the oven.

After baking, the one on the right is ready to try out in the pillar.

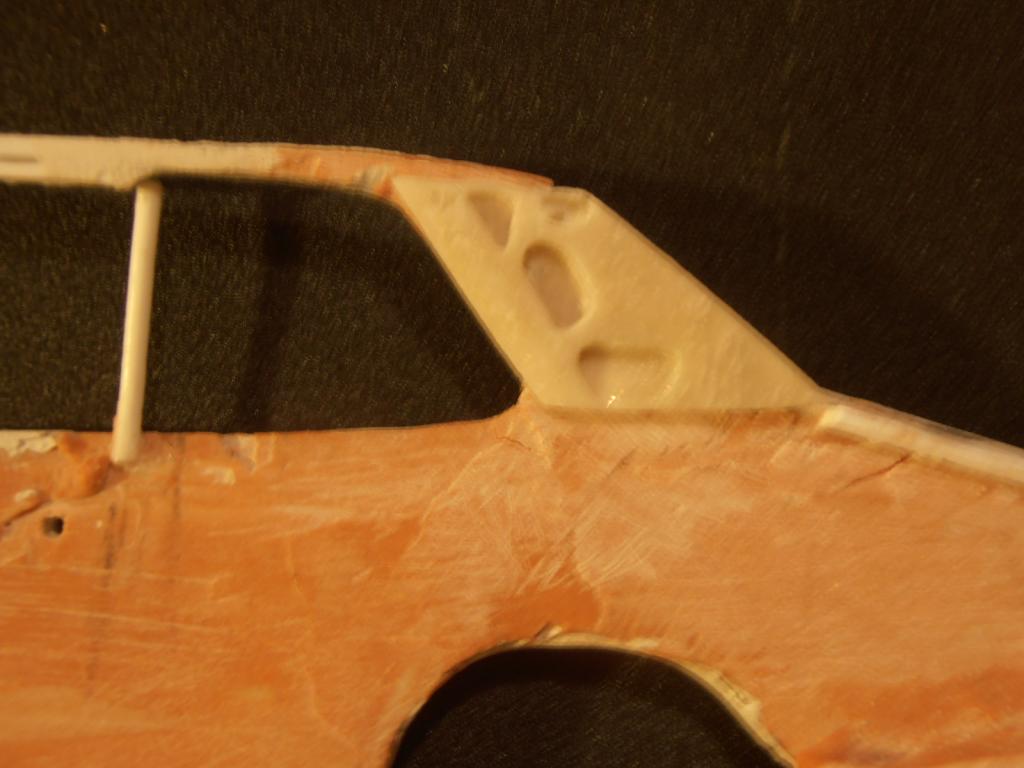
Here is how it looks after some more trimming.
After making up the cardboard template, I went to work constructing a press.

In took a photo of the template first and i sure the image in the viewfinder was 1:25 scale. I then took some Fimo which is a synthetic baking clay and shaped the shafts the same size as the holes in the image.

After doing that i got some clear plastic from a cd cover, stuck that over the image in the view finder and began sticking the shaft to it. Once this side was done I turned it over and repeated the process.

I then got some more Fimo and pushed it into the press to get a perfect imprint. Here are the pieces before going into the oven.

After baking, the one on the right is ready to try out in the pillar.

Here is how it looks after some more trimming.

fractalign- AMCC NEWBIE!
- Number of posts : 38
Age : 52
Location : Australia
Registration date : 2013-02-16
allan- AMCC ADDICT
- Number of posts : 10385
Age : 66
Location : East Maitland
Registration date : 2008-03-31
Re: Scratch building classic GTR UX1 Torana.
![]() by silverfox Tue 30 Sep 2014, 10:37 am
by silverfox Tue 30 Sep 2014, 10:37 am
I have a resin ? xu1 body that Allan gave me some time back . It is pretty rough and appears to be 1/25 or 1/24 .

silverfox- Legend Poster
- Number of posts : 1181
Age : 72
Location : hunter valley
Registration date : 2012-02-23
Re: Scratch building classic GTR UX1 Torana.
![]() by mgy125 Tue 30 Sep 2014, 3:32 pm
by mgy125 Tue 30 Sep 2014, 3:32 pm
Worth watching. Some creative thinking here.

mgy125- AMCC ADDICT
- Number of posts : 1679
Age : 88
Location : Moldovia
Registration date : 2010-06-24
Re: Scratch building classic GTR UX1 Torana.
![]() by fractalign Tue 25 Nov 2014, 11:09 pm
by fractalign Tue 25 Nov 2014, 11:09 pm
Hey Guys.
I have been slow to put anything up over the last 5 weeks after I broke my wrist in a car accident and ended up with my arm in cast. Needless to say I have slowly been getting back into the build over the last week or so. At them moment I have shitted my focus strictly back to the body namely the rear of the body. I won't be doing an more work on the floor pan or chassis until the body is completely finished. One of the first things I did was make up a contour gauge that surrounded the entire body so that i could get the left side looking exact the same as the right side. I added stub axles for the wheel base the wheel slide on and off when ever i need to them to. The stub axle goes through to the other side so that the other body half can be cheated as well. With both body halves looking more or less the same I moved onto the tail light and bumper area. I used a pace of A4 copy paper to trace a basic template around the 1:1 and i then turned that into a diagram. i with the measurement recorded I cut out the tail light housing and bumper recesses on the first body half. i then put hat body half back to back with eh other half and repeated the process.
The photos have been taking a long-time to load so i will try and resend them tomorrow night.
fractalign- AMCC NEWBIE!
- Number of posts : 38
Age : 52
Location : Australia
Registration date : 2013-02-16
» scratch building engine bay?
» Scratch Building TE Gemini 1/24 th scale
» Scratch Built Trailers
» What am i building? *now i know*
» Scratch bilt chem tankers
» Scratch Building TE Gemini 1/24 th scale
» Scratch Built Trailers
» What am i building? *now i know*
» Scratch bilt chem tankers
Page 1 of 1
Permissions in this forum:
You cannot reply to topics in this forum