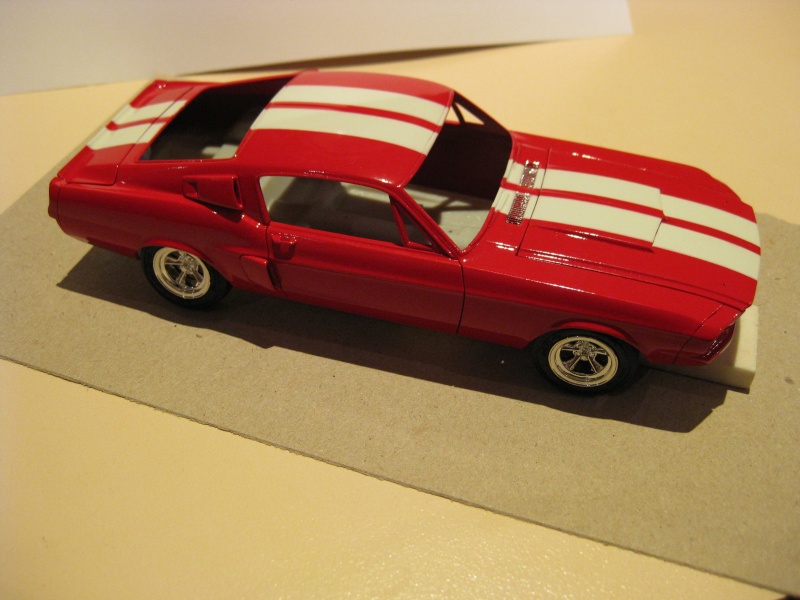
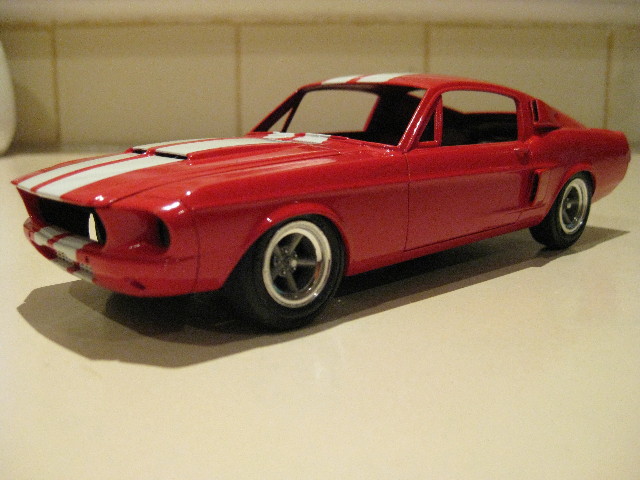
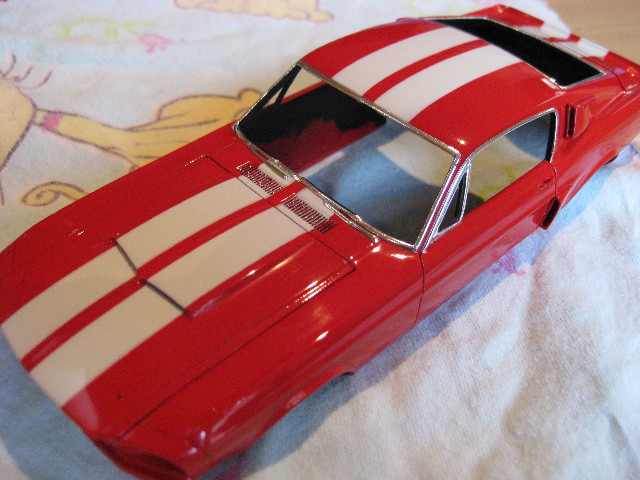
My little pony - '67 shelby GT 350
+6
RS2000
allan
frank
tezza43
tjjr07
Bryce
10 posters
Page 1 of 2
Page 1 of 2 • 1, 2 

Bryce- Moderator
-
 Number of posts : 3329
Location : Melbourne
Registration date : 2008-05-10
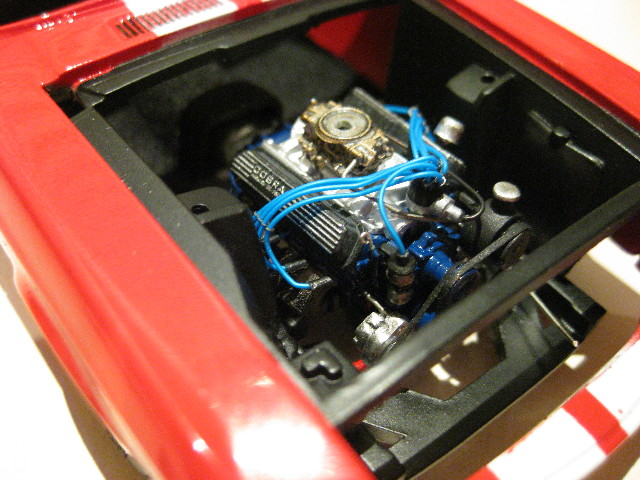
 Engine update
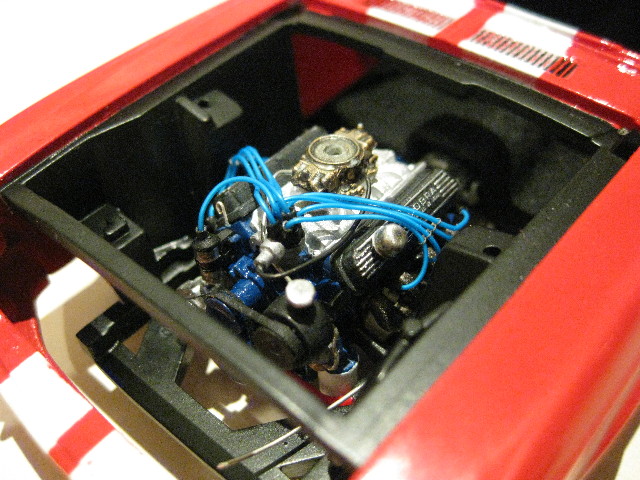
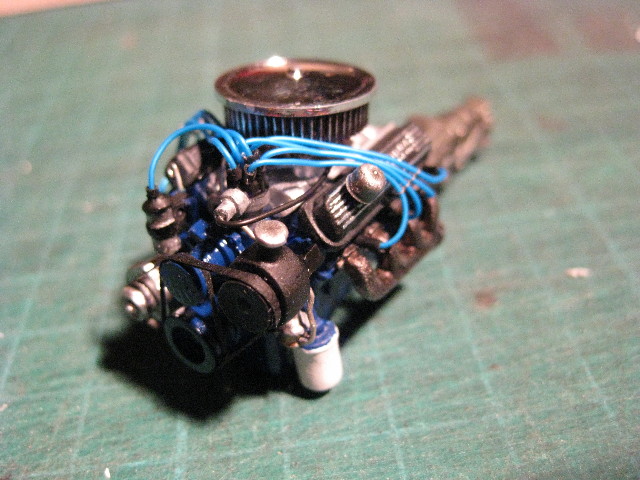
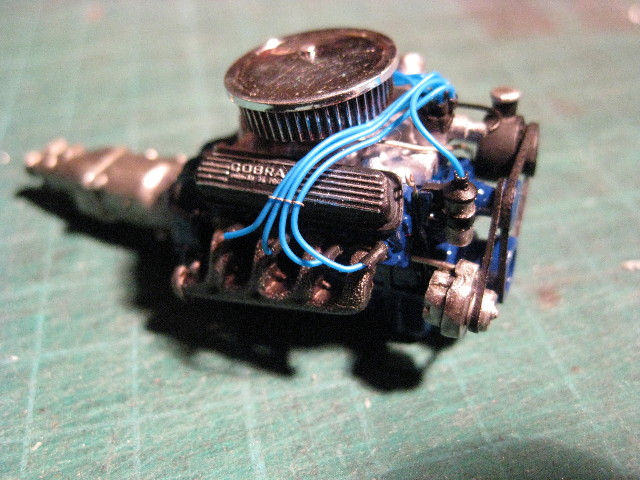
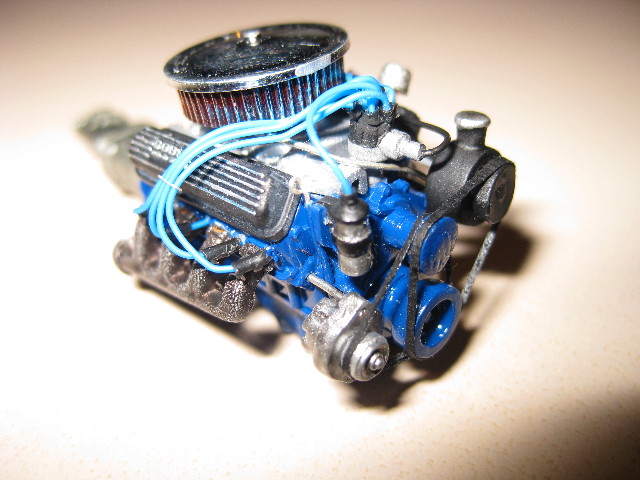
Finished the engine tonight. It's a really nice kit this one, but a couple of strange omissions. No oil flter and no power steering pump, so added these from my parts stash. I also found the fan a bit ugly, so have gone with a thermo mounted on the radiator and changed the carb and aircleaner to the Revell '32 units. Here's some pics:




Bryce- Moderator
-
 Number of posts : 3329
Location : Melbourne
Registration date : 2008-05-10
 Re: My little pony - '67 shelby GT 350
thats 1 tidy lil windsor, great detail work.
you have to tell me, what do you use to tie your ignition leads together so neatly???
you have to tell me, what do you use to tie your ignition leads together so neatly???

tjjr07- I Love this place

-
 Number of posts : 796
Age : 42
Location : lockeyer valley qld
Registration date : 2008-03-21
 Re: My little pony - '67 shelby GT 350
Nice work Bryce - don't know about the kit, but the real Mustang isn't sitting so low either? Must be quite a difference between the kit and the real car. Did you finally sort out the seat belts?

tezza43- AMCC ADDICT

-
 Number of posts : 4318
Age : 81
Location : Mornington, Victoria
Registration date : 2008-03-21
 Re: My little pony - '67 shelby GT 350
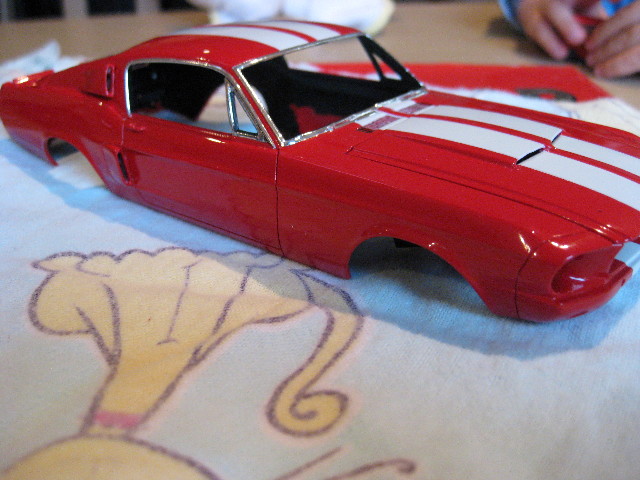
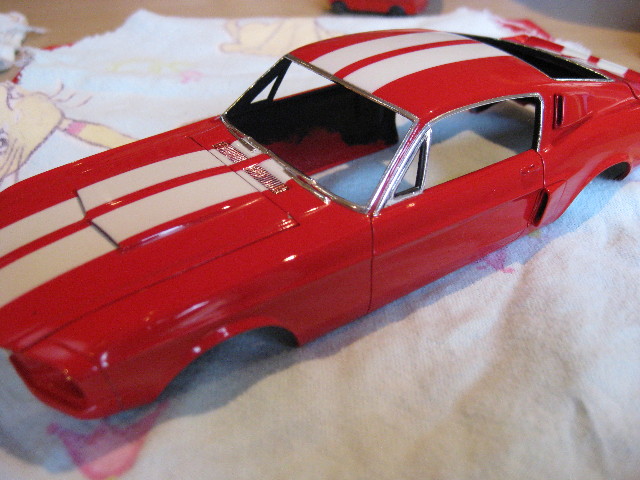
Nice paint job Bryce. Are the stripes painted or decals.
frank- I should be working on Models

-
 Number of posts : 442
Age : 85
Location : Watsonia, Victoria
Registration date : 2008-03-22
 cool
cool
thats cool looking pony car.

allan- AMCC ADDICT

-
 Number of posts : 10406
Age : 67
Location : East Maitland
Registration date : 2008-03-31
 Re: My little pony - '67 shelby GT 350
Thanks guys. I'll try and get the interior and chassis painted this weekend.
Frank - stripes are decals, but I was a bit disappointed (as usual) when I put them on. They weren't terribly white and they didn't go all the way to the bottom of the car or inside the grill surround as they do on the real cars. So after trying to touch them up and ending up with two shades of white, I masked the whole car up and shot a coat of white lacquer over all of them. Looks better, although if you look very close you can just see the different coloured decal edges,
Terry - you're right. The real cars don't sit that low and as per all Fords of the late 60s tend to have saggy arses, but I wanted to go for more of a club racer feel, so want this one to sit lower all round. In terms of seat belts, I'm still a bit confused as the pics you posted show buckles at the roll cage and that doesn't seem to match my references which appear to have them hard mounted at the cage. Also do you know how the floor tensioners worked? Where they inertia reel or manually adjusted? Can't seem to find any references for those so I'm still a bit confused as to how the four points came together...
Todd - spark plug wire separators are photoetch from Model Car Garage. Very fiddly to work with but look good. Maybe we can try and source a local supplier through this forum - anyone know how to photoetch?

Bryce- Moderator
-
 Number of posts : 3329
Location : Melbourne
Registration date : 2008-05-10
 Interior
Been working on the inside today. These '67 'stangs have satin aluminium panels on the door trim and dashboards, so I thought it would be easier to paint that first and then use a liquid mask while I paint the main colour.
Here are the door panels and dashboard in Metalizer aluminium: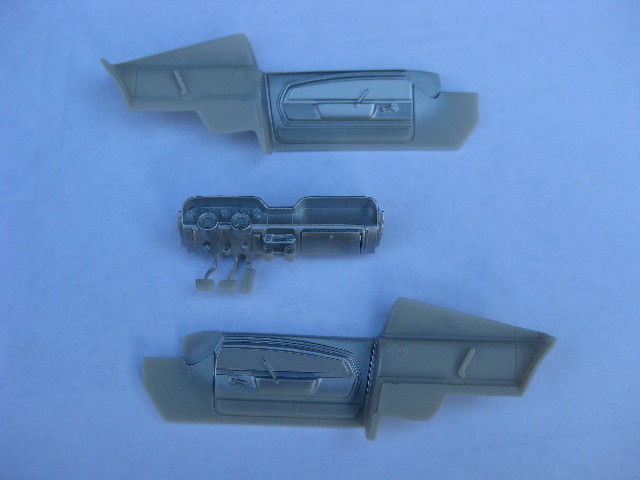
While that was drying I foiled what I think is an air vent/courtesy light so that I can rub the black paint off later and leave the highlights:

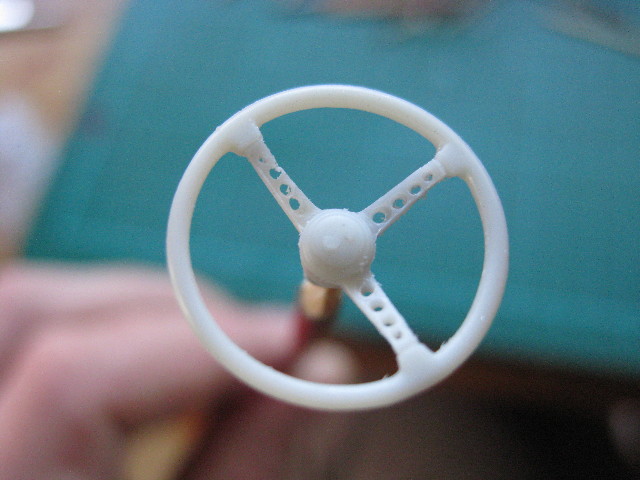
And also drilled some holes in the steering wheel:
When the aluminium was dry I applied a liquid mask to protect it while I painted black:

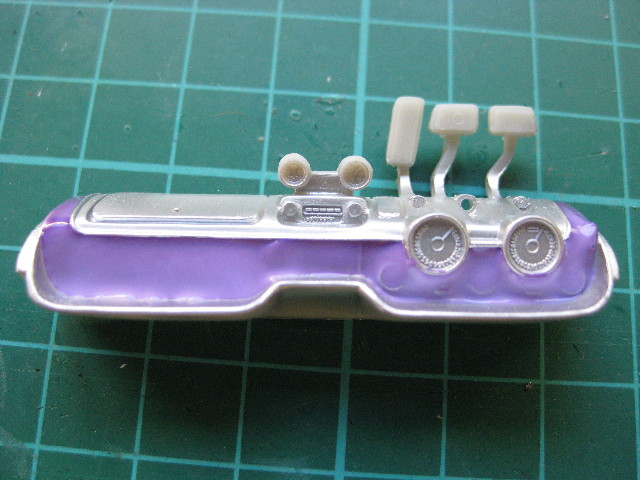

Then I painted everything black. I would normally use Humbrol enamel - I love the stuff, but as I am on a tight deadline I used Tamiya acrylics as they dry faster:

Voila - still needs a bit of a touch up and some for BMF, but all in all a good day's work I reckon:


Here are the door panels and dashboard in Metalizer aluminium:

While that was drying I foiled what I think is an air vent/courtesy light so that I can rub the black paint off later and leave the highlights:

And also drilled some holes in the steering wheel:

When the aluminium was dry I applied a liquid mask to protect it while I painted black:


Then I painted everything black. I would normally use Humbrol enamel - I love the stuff, but as I am on a tight deadline I used Tamiya acrylics as they dry faster:

Voila - still needs a bit of a touch up and some for BMF, but all in all a good day's work I reckon:


Bryce- Moderator
-
 Number of posts : 3329
Location : Melbourne
Registration date : 2008-05-10
 Re: My little pony - '67 shelby GT 350
Very clean, thanks for showing us your technique. What are you using for liquid mask? It looks easier to manage than the stuff I use, which drives me bonkers.

RS2000- I should be working on Models

-
 Number of posts : 218
Age : 48
Location : Melbourne
Registration date : 2008-05-05
 Re: My little pony - '67 shelby GT 350
RS2000 wrote:Very clean, thanks for showing us your technique. What are you using for liquid mask? It looks easier to manage than the stuff I use, which drives me bonkers.
Thanks - I use Humbrol Maskol. I have used it for years. It's fairly thick which makes it easy to apply, it dries pretty fast and comes off very easily. I have also used it to make molds of very small parts with limited success.

Bryce- Moderator
-
 Number of posts : 3329
Location : Melbourne
Registration date : 2008-05-10
 Re: My little pony - '67 shelby GT 350
Just an idea Bryce, but we have a country AMCC member who is also a member of the Mustang Owners Club (Victorian branch). Their website is http://www.mustang.org.au/
His name is Frank Hayes and he may be able to help you with your seat belt problem. John Comber may know how to get in touch with him?
His name is Frank Hayes and he may be able to help you with your seat belt problem. John Comber may know how to get in touch with him?

tezza43- AMCC ADDICT

-
 Number of posts : 4318
Age : 81
Location : Mornington, Victoria
Registration date : 2008-03-21
 Re: My little pony - '67 shelby GT 350
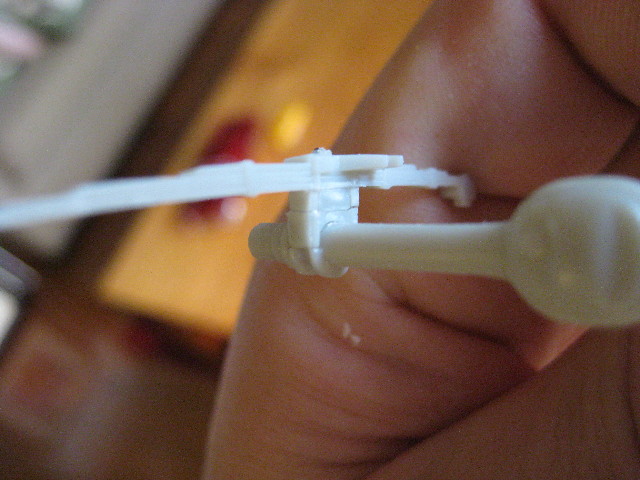
Still working on the ride height of this thing. The back was easy as it comes with separate leaf springs, so I just stuck some lowering blocks between the springs and the diff:
At the front I made some dropped spindles by cutting off the mount and and shifting it up - I thought this should be enough to fix things:

However it still wasn't low enough for my liking, so I cut off the upper A-arms and raised them up with some ... well, lowering blocks?

This of course meant that the lower A-arms, which are fixed in place, were too low. So I had to cut them off and reposition:
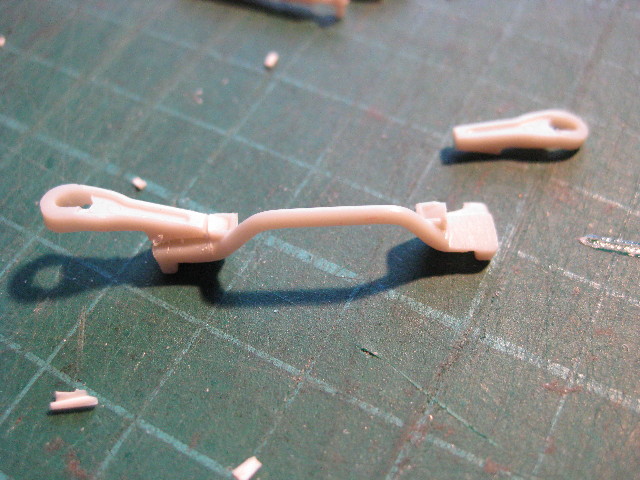

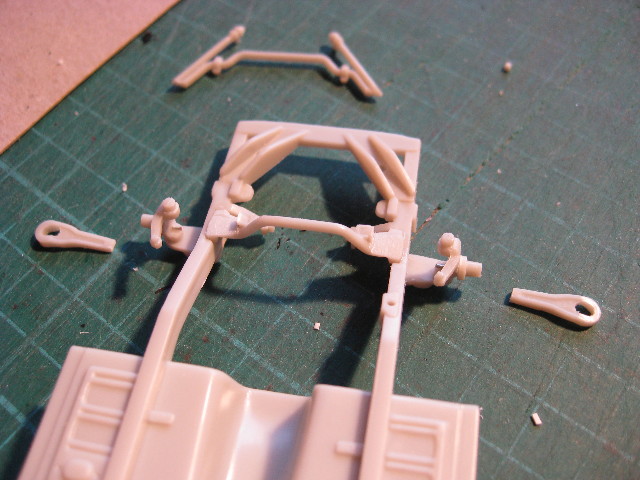
It's all good now and plenty low!



At the front I made some dropped spindles by cutting off the mount and and shifting it up - I thought this should be enough to fix things:

However it still wasn't low enough for my liking, so I cut off the upper A-arms and raised them up with some ... well, lowering blocks?

This of course meant that the lower A-arms, which are fixed in place, were too low. So I had to cut them off and reposition:


It's all good now and plenty low!


Bryce- Moderator
-
 Number of posts : 3329
Location : Melbourne
Registration date : 2008-05-10
 Re: My little pony - '67 shelby GT 350
Looking very nice Bryce, i have never tried Maskol before but it looks like it does a good job. I thought it may have pull the metaliser paint off but all was good.
 Which wheels?
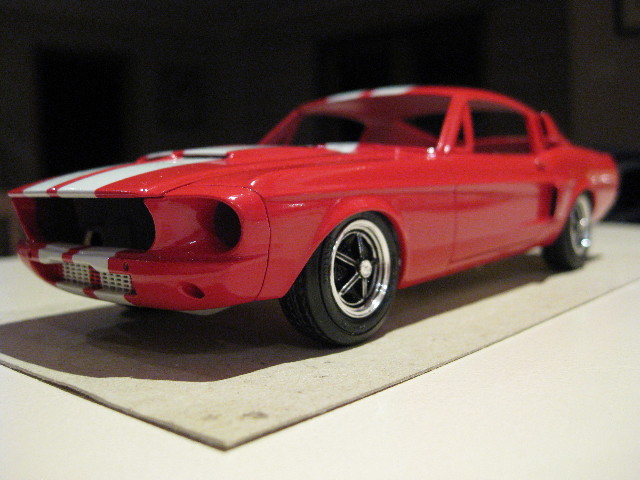
Originally I planned to use AR Torque Thrust D's on this for a club racer type look, but apart from wanting to use them on another project, after painting them up I thought they looked a bit plain:

So then I pulled out the Kelsey Hayes wheels that came in the kit and gave them a coat of black and I reckon they look pretty good:
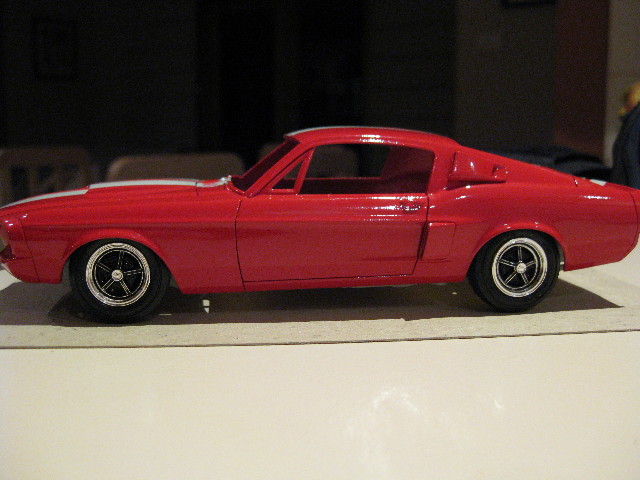
So what do people think?

So then I pulled out the Kelsey Hayes wheels that came in the kit and gave them a coat of black and I reckon they look pretty good:

So what do people think?

Bryce- Moderator
-
 Number of posts : 3329
Location : Melbourne
Registration date : 2008-05-10
 Re: My little pony - '67 shelby GT 350
Shunter wrote:Looking very nice Bryce, i have never tried Maskol before but it looks like it does a good job. I thought it may have pull the metaliser paint off but all was good.
I've used it for years and it works great - not too sticky, more like a latex coating. It's great for the old AMT kits with molded in exhausts. You can paint the exhaust first, then maskol it and paint the chassis/floorplan black. Highly recommended.

Bryce- Moderator
-
 Number of posts : 3329
Location : Melbourne
Registration date : 2008-05-10
 Re: My little pony - '67 shelby GT 350
this is coming along really well, the ride hieght is perfect, and the wheels look a treat tucked under there.
liquid mask??? what the??? might have to find some and try it out.
the way your going here, you'll be finished in no time...
liquid mask??? what the??? might have to find some and try it out.
the way your going here, you'll be finished in no time...

tjjr07- I Love this place

-
 Number of posts : 796
Age : 42
Location : lockeyer valley qld
Registration date : 2008-03-21
 Re: My little pony - '67 shelby GT 350
I have used Maskol for years, both for model work and for art (pastel and watercolour painting), although with pastels I use a clear fixative first. It's a top product.
Bryce the Mustang is looking much better with its new height - just lowered enough to look like it means business.
Bryce the Mustang is looking much better with its new height - just lowered enough to look like it means business.

tezza43- AMCC ADDICT

-
 Number of posts : 4318
Age : 81
Location : Mornington, Victoria
Registration date : 2008-03-21
 Re: My little pony - '67 shelby GT 350
Bit of an update. After fighting with the temperature in the garage for a few weeks (my matt black came out gray because it's been so cold), finally got some paint on the chassis last week and got some assembly done tonight, so at least it's up on wheels now:
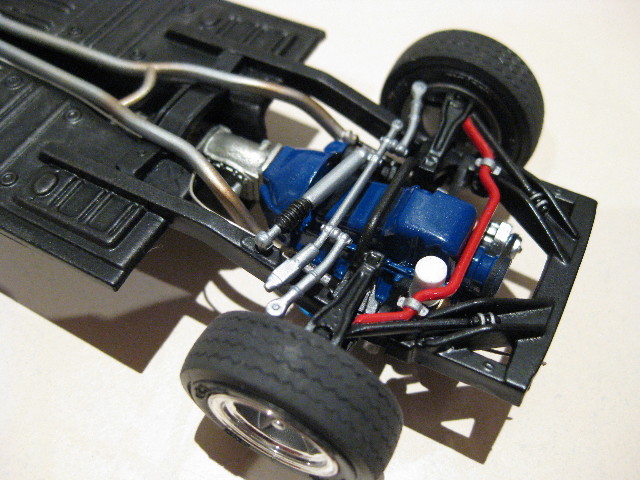

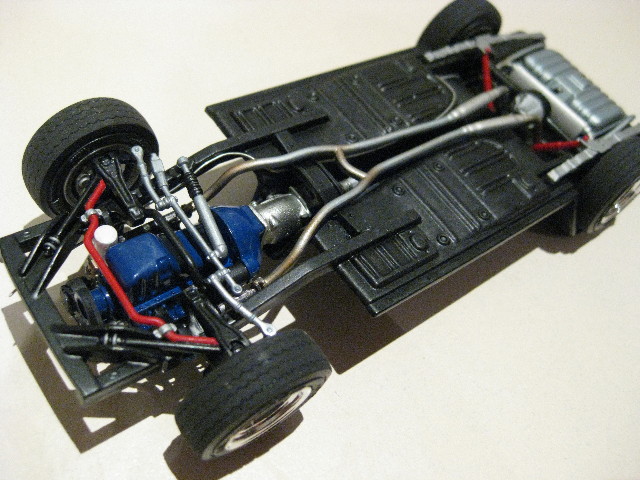
Also got some flocking on the floorboards and started foiling the interior. Man, there's a lot of brightwork inside a '67 stang - almost more foiling on the interior than on the outside!
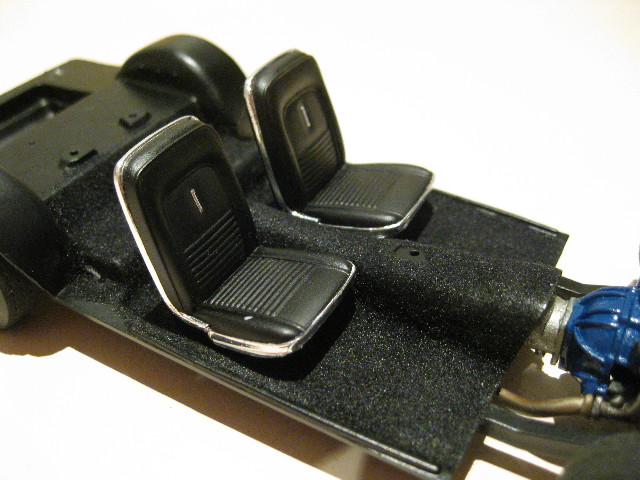


Also got some flocking on the floorboards and started foiling the interior. Man, there's a lot of brightwork inside a '67 stang - almost more foiling on the interior than on the outside!


Bryce- Moderator
-
 Number of posts : 3329
Location : Melbourne
Registration date : 2008-05-10
 Re: My little pony - '67 shelby GT 350
Looking Good! Interior looks very realistic. 

Paul- AMCC ADDICT

-
 Number of posts : 4564
Age : 49
Location : Melbourne
Registration date : 2008-03-19

Bryce- Moderator
-
 Number of posts : 3329
Location : Melbourne
Registration date : 2008-05-10
 Re: My little pony - '67 shelby GT 350
Looking good Bryce! You're spot on with that interior brightwork - almost need sunglasses to sit inside.

tezza43- AMCC ADDICT

-
 Number of posts : 4318
Age : 81
Location : Mornington, Victoria
Registration date : 2008-03-21
 Re: My little pony - '67 shelby GT 350
Back to this Mustang - I feel the pressure of a looming deadline...
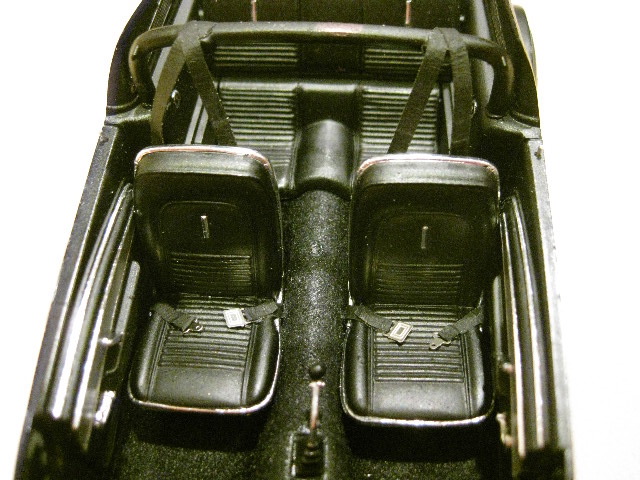
Bit of an update - been making seat belts tonight. Don't usually bother, but they're a bit of a prominent feature on these Shelby cars as they hang from the roll bar:
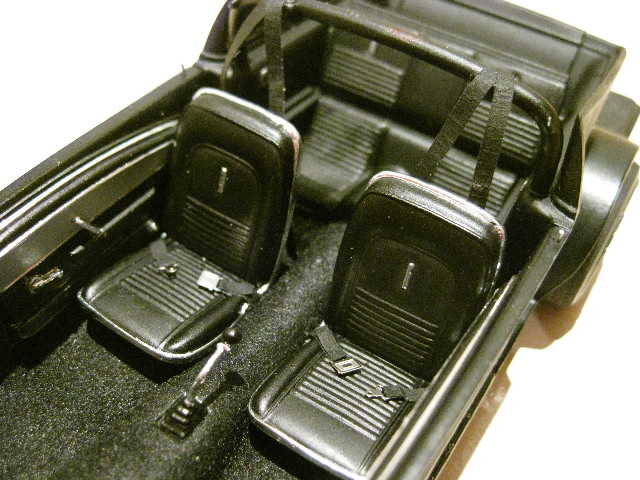

Next up a good polish of the body and FINAL ASSEMBLY!
Should hopefully have this wrapped up over the weekend so I can move onto the next deadline!
Bit of an update - been making seat belts tonight. Don't usually bother, but they're a bit of a prominent feature on these Shelby cars as they hang from the roll bar:


Next up a good polish of the body and FINAL ASSEMBLY!
Should hopefully have this wrapped up over the weekend so I can move onto the next deadline!

Bryce- Moderator
-
 Number of posts : 3329
Location : Melbourne
Registration date : 2008-05-10
 Re: My little pony - '67 shelby GT 350
awesome bryce, absolutely awesome!!!

tjjr07- I Love this place

-
 Number of posts : 796
Age : 42
Location : lockeyer valley qld
Registration date : 2008-03-21
 Re: My little pony - '67 shelby GT 350
That's come up very well Bryce - great job on the interior. Will you be putting a headliner in? A beautiful and sporty looking Mustang.

tezza43- AMCC ADDICT

-
 Number of posts : 4318
Age : 81
Location : Mornington, Victoria
Registration date : 2008-03-21

Bryce- Moderator
-
 Number of posts : 3329
Location : Melbourne
Registration date : 2008-05-10
Page 1 of 2 • 1, 2 
Page 1 of 2
Permissions in this forum:
You cannot reply to topics in this forum