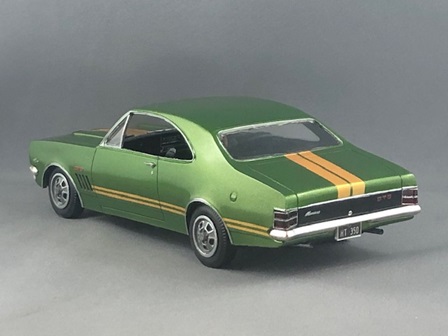
65 Corvette, display car, 1/8 scale.
+2
ozmodeler
mr casual
6 posters
Page 1 of 1
 65 Corvette, display car, 1/8 scale.
1965 Chevrolet Corvette World’s Fair display car.
By Michael Pederick, aka Mr Casual.
Where to start, I guess the beginning would be a good place, so here goes.
So, this one started because I was really enjoying one eighth scale models, like with all my Jaguar models, which are of course one eighth scale, so when I saw this part kit for sale I figured eh why not, I should be able to cobble something together with this, so I bit the bullet and bought it.
Obviously, the kit was incomplete, no biggy, knew that, but there was a lot less of the kit than I thought and it was a lot more damaged than I first thought, bummer. So what to do, well I decided at this point to smooth the front and rear pans, bumper delete, and generally make it into a racer of some sort, after a while I needed a bit of inspiration and pics to maybe follow, so went to my best little buddy, Mr & Mrs Interweb’s young fella, Google, ah google, the old farts saviour. So anyhoo, came across pics and info on this display Corvette, ‘65 of course so that was it, I was now going to build a representation of the 1965 Corvette display car, so now I’m all fired up to do this and then, POO. Being an old kit like the 1/8 Jag kits, they are very basic, bugger all detail and a few inaccuracies for good measure, so of course this is when I realized that I would have to completely build the entire chassis, part of the floor pan, most of the suspension and a whole boatload of “other” stuff, to build a half decent model. Then it was yeah, no too hard, yeah but it would look pretty cool, no still too hard, hands are getting worse etc., followed by oh to hell with it, it’s either build the thing or be a pussy, I ain’t no pussy, it was a go. There was a butt load of things to be worked out, measurements taken, drawings made and photo’s tooked, oh and then I realized that there would have to be a very careful and strict order to the different processes, especially with regards to paint and final assembly. Was it too late to back out, YES, so this thing will be built, hopefully in my lifetime, which is rapidly running out.
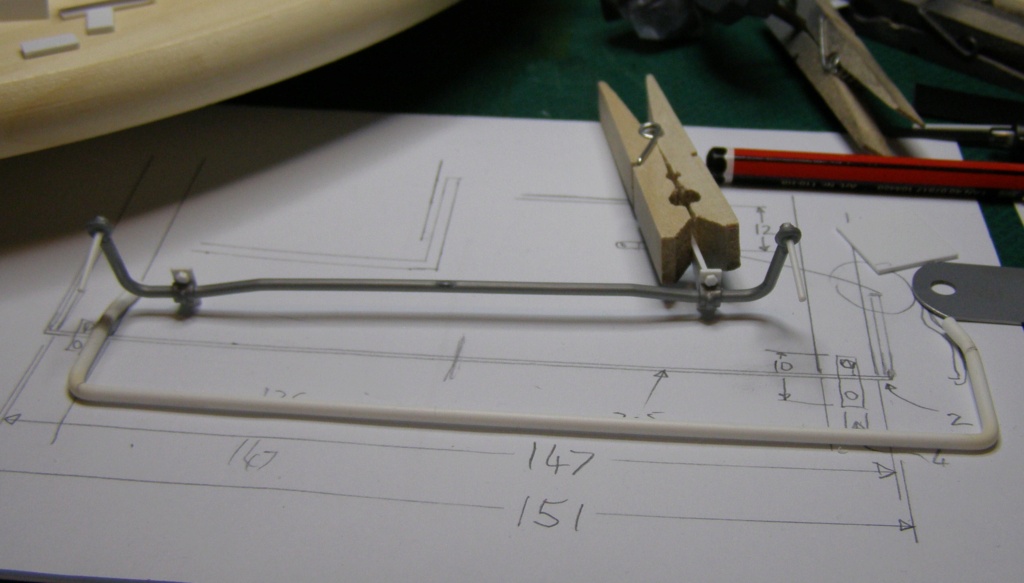
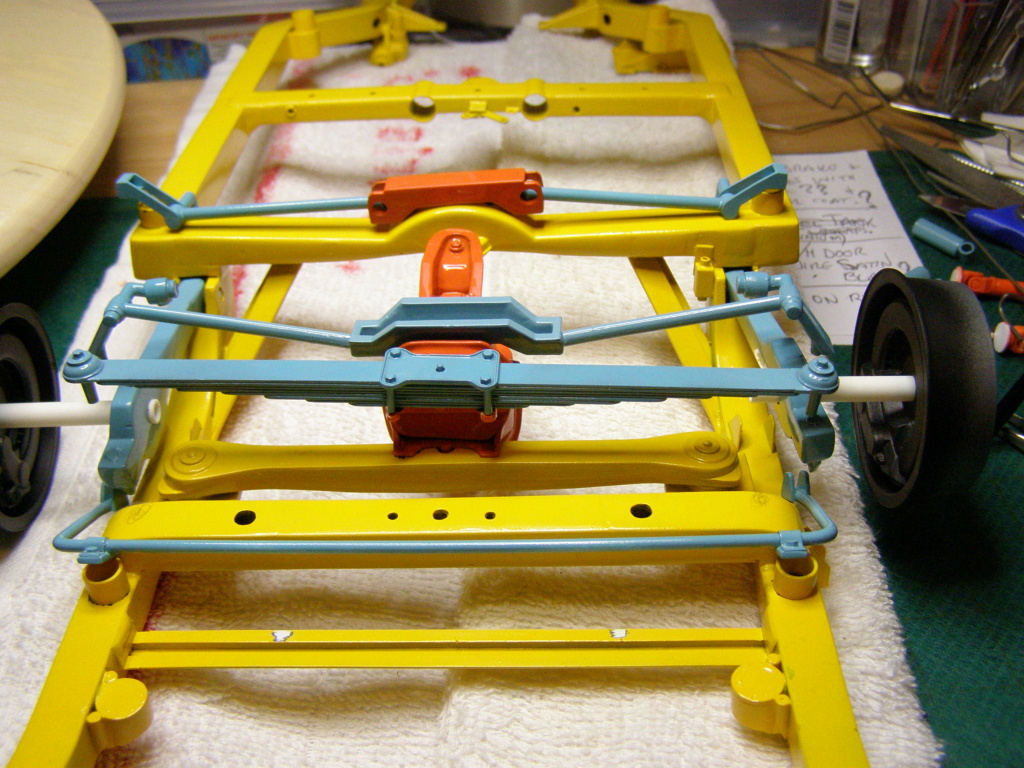
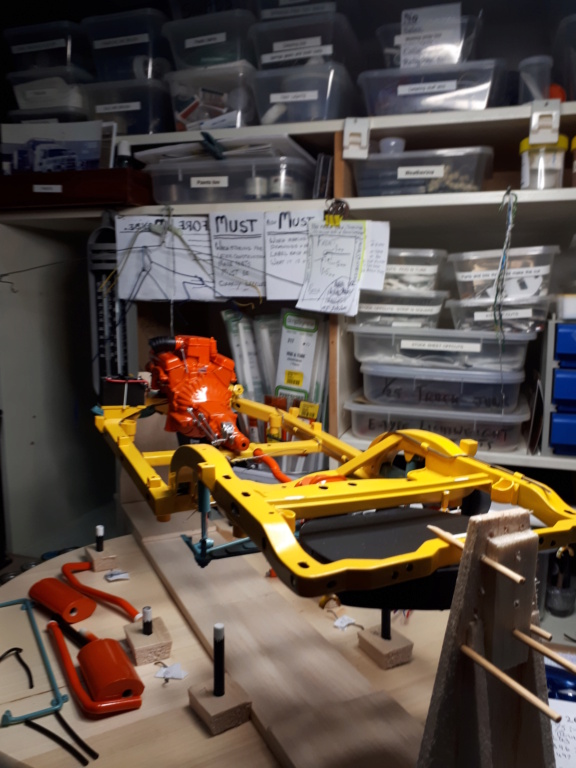
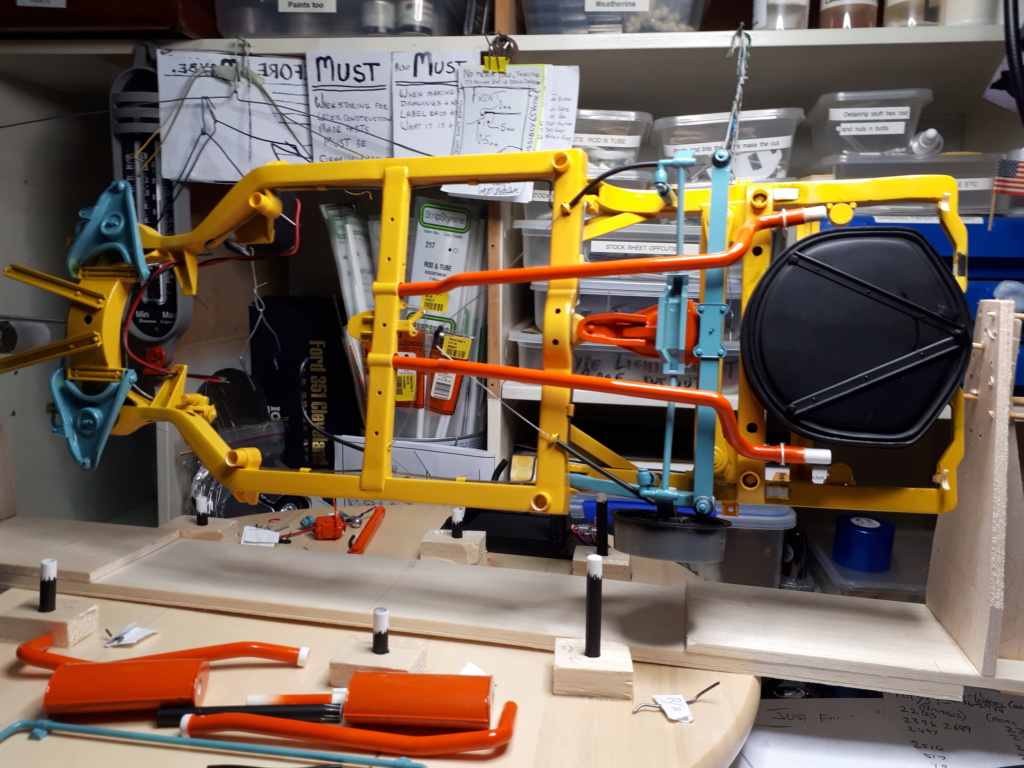
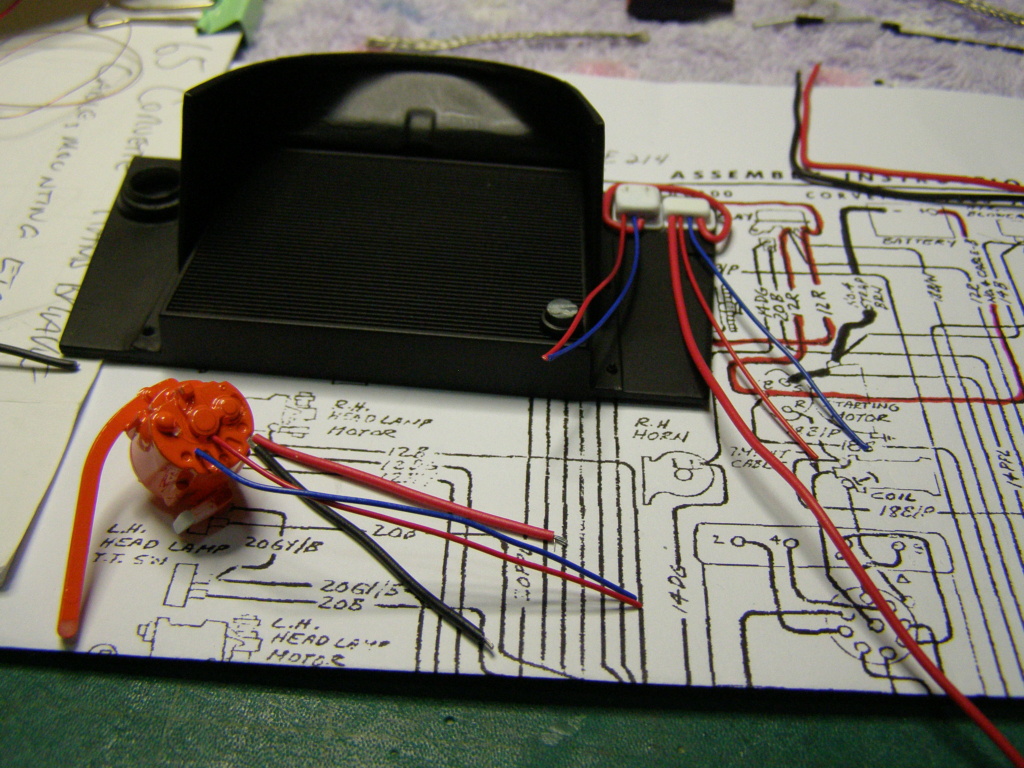
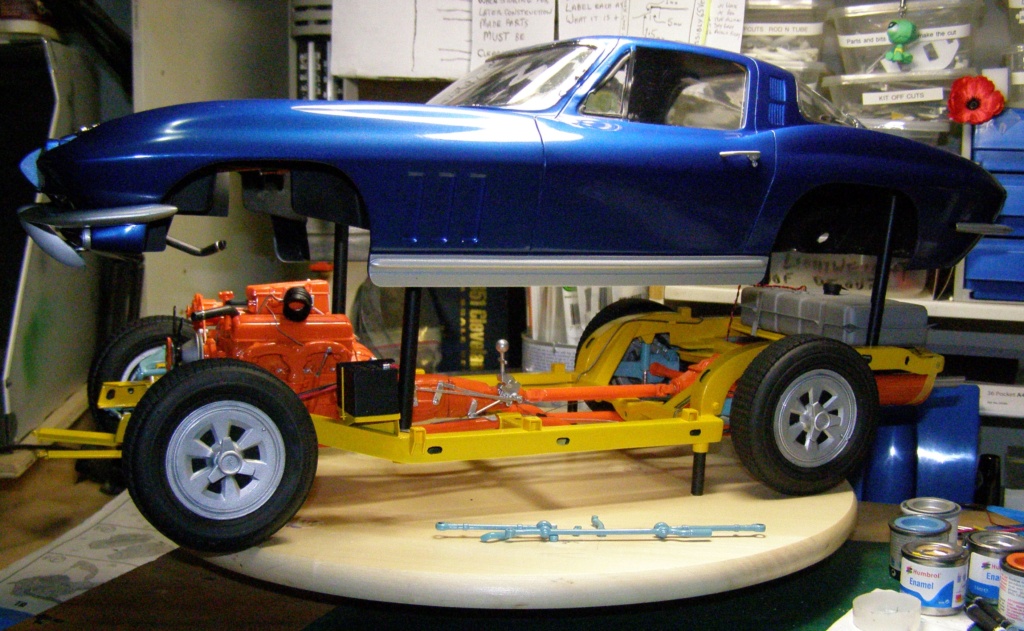
So, I started by building the entire chassis, and with the help of an actual boat load of pics, (well a hell of a lot anyway), and general info through the helping hand, and the Prince of Darkness, the seer of all, Google. With the help of the afore mentioned pics I was able to work out where to put all the holes in the right places, body mounts, engine mounts, oh and cut the steering box off and make another one for the correct hand drive side, also had to make most of the cross members, particularly the rear suspension mounts and such, so yeah there was a BLAH_BLAH_BLAH_BLAH load of scratch building, but hey that’s what this hobby is all about, well I think so, anyway. Then the firewall was not going to look anywhere near good enough, so I cut it out and built up a new one to suit correct hand drive, and while I was in that neck of the woods I scratch built the inner guards, radiator mount, rebuilt a big part of the interior tub, and then I had to alter the steering linkages, make ball joints, scratch up a sway bar and mounts, and make a battery with a battery tray, on the opposite side, along with a hold down clamp for the batt. So now I have to scratch build the entire exhaust system including mufflers, brackets and mounts, and this took me to the rear suspension where I scratch built the whole shootin’ match, the leaf spring, shocks, all the swing arms, mounts and the rear sway bar with brackets and mounts, at this stage I realized that I would have to make half of the spare tyre cubby hole plus add a bit of detail. Of course I had to scratch build the fuel tank, straps and brackets to suit etc. including filler neck and the spill tray thingy, also, while I was in this area anyway I thought I’d check the exhaust and mufflers for fit clearance and make mounting bracketry, which meant I had to trial fit the spare wheel thingy ‘cause the muff’s run very close, so with lackey bands, string and a bit of balsa with some sticky tape I got that nightmare taken care of. Another few parts I wasn’t looking forward to making was the drive shaft and the two half shafts, just too many uni joints to think about, thank all that is great and right for Shapeways who make a real nice bit of kit, that went well. OK, now to have a look at the actual drive line, hoboy what a can of worms got opened up here, starting at the top we have the weird looking early GM fuel injection box kinda thingy, which is ok in itself, it’s just that there is no detail, at all, none, so a big swan dive into the parts, spares, junk collected for just in case, and general bits and bobs that ya tend to collect over the (far too many) years, found some wire of different sizes and started bending cutting, throwing in the bin getting another piece and bending and cutting, etc etc, I managed to get reasonably close, close of course is a relative term, so with some paint and a bit of bluff and bluster it should look half ok.
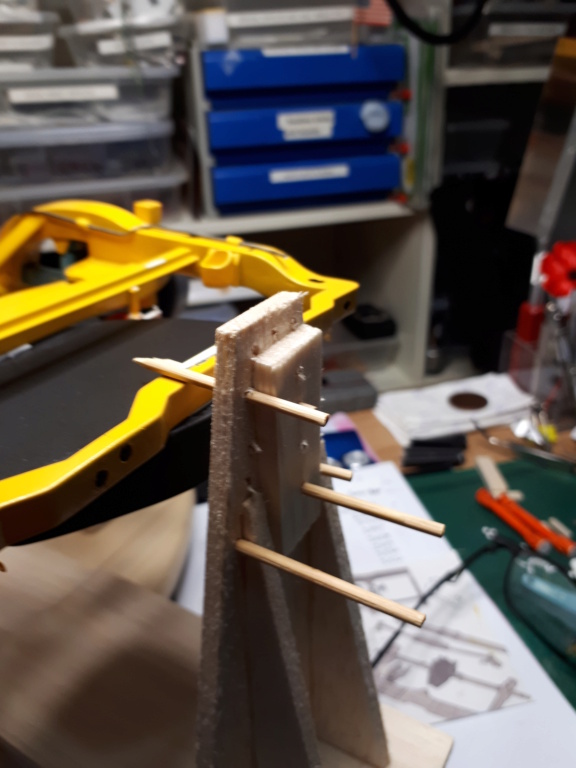
Another thing I did with this model, I “opened” a closed part, and it was my first attempt so I’m a bit scared, but I’ve opened the correct hand side door, wow did this open a giant can of worms, it meant I had to fabricate the inner panels of the door, and the door opening, hinges, (that turned out to be a lot, a huge lot harder than I could have imagined, had swing open and shut without catching, binding or dropping, holy BLAH_BLAH_BLAH_BLAH on a cracker, finally got done but man it was a struggle, I contemplated gluing the door back shut quite a few times. While I was contemplating the demise of the car I noticed that the fuel filler was bleh, so I drilled out the opening, modified the emblem/fuel cap to suit and put a hinge on it so it works too. Sometime later, (this can mean anything from a few minutes to a couple of months), I thought, well the whole point of this thing was to display everything to Joe public, so I realized that just having the chassis laying there not doing or showing anything I’d better add a couple of pretties or something, so I made all the fuel lines, brake lines and the hand brake cables with lever and return spring, then I had to work out where to put receiver tube blocks for the columns that are going to hold the body up off the chassis so it is then the display car I’m trying to copy. It’s around about here that I realized all the body mounts are just too small, so it was a case of hack them all off and make a whole new set, hopefully the right size this time, as I’m only eyeballing all this from photos I’ve gleaned from the interweb.

mr casual- AMCC NEWBIE!

-
 Number of posts : 27
Age : 72
Location : Alkimos, Perth, Western Australia
Registration date : 2010-04-05
 Re: 65 Corvette, display car, 1/8 scale.
Hey Mr. casual, this project sounds interesting can you post some pics ?

ozmodeler- I should be working on Models

-
 Number of posts : 437
Age : 65
Location : Nowra
Registration date : 2012-04-16
 Re: 65 Corvette, display car, 1/8 scale.
Aw mate I would like nothing better, but so far all my attempts to do so have failed miserably, fear not I haven't given up, (yet) so I'll keep trying and see how we go.
Michael.
Michael.

mr casual- AMCC NEWBIE!

-
 Number of posts : 27
Age : 72
Location : Alkimos, Perth, Western Australia
Registration date : 2010-04-05
 Re: 65 Corvette, display car, 1/8 scale.
when you open a window to post something there is a group of icon along the top of the box, move your cursor over them untill you find one that says host an image, click on that and another box will open, click on the select an image icon and it should open your files on your computer, then select the pics you want to post, and click on send all and your images will appear in this box, next to each image will be 3 rows of gobblydygook put your cursor on the middle row and select copy, then past this into your post, click on host images again and it will open the box and your images will still be there, repeat this process untill you have pasted all your images and then preview your post, if its ok then send

dv8v8- AMCC ADDICT

-
 Number of posts : 5689
Location : Rockhampton QLD
Registration date : 2008-04-26

mr casual- AMCC NEWBIE!

-
 Number of posts : 27
Age : 72
Location : Alkimos, Perth, Western Australia
Registration date : 2010-04-05
 Re: 65 Corvette, display car, 1/8 scale.
you are welcome but still not quite there, the link you have posted takes me to the pics, Very impressive work, but the pics dont appear on this page, it looks to me as if you have copied the top line out of the 3 options, try copying and pasting the one below that and see how that works

dv8v8- AMCC ADDICT

-
 Number of posts : 5689
Location : Rockhampton QLD
Registration date : 2008-04-26
 Well it looks like I finally dun good, and as far as I can tell all the pics are now in the post, and thanks again for your guidance and patients. Michael.
[u rl=https://servimg.com/view/15242077/68]
 [/url][url=https
 ://servimg.com/view/15242077/66]
 [/url][url
 =https://servimg.com/view/15242077/71]
 [/url][url=h
 ttps://servimg.com/view/15242077/69]
 [/url]
 img.com/view/15242077/73]
 [/url][url
 =https://servimg.com/view/15242077/76]
 [/url]
 g.com/view/15242077/77]
 [/url]
 rvimg.com/view/15242077/78]
 [/url]
 242077/81]
 [/url]
 m/view/15242077/83]
 [/url]
 .com/view/15242077/84]
 [/url]
 42077/87]
 [/url]
 42077/89]
 [/url]
 rl=https://servimg.com/view/15242077/68]
 [/url][url=https
 ://servimg.com/view/15242077/66]
 [/url][url
 =https://servimg.com/view/15242077/71]
 [/url][url=h
 ttps://servimg.com/view/15242077/69]
 [/url]
 img.com/view/15242077/73]
 [/url][url
 =https://servimg.com/view/15242077/76]
 [/url]
 g.com/view/15242077/77]
 [/url]
 rvimg.com/view/15242077/78]
 [/url]
 242077/81]
 [/url]
 m/view/15242077/83]
 [/url]
 .com/view/15242077/84]
 [/url]
 42077/87]
 [/url]
 42077/89]
 [/url]

mr casual- AMCC NEWBIE!

-
 Number of posts : 27
Age : 72
Location : Alkimos, Perth, Western Australia
Registration date : 2010-04-05
 Re: 65 Corvette, display car, 1/8 scale.
yup you got it, keep posting updates, the corvette looks good

dv8v8- AMCC ADDICT

-
 Number of posts : 5689
Location : Rockhampton QLD
Registration date : 2008-04-26
 Re: 65 Corvette, display car, 1/8 scale.
Love your work. Paint job looks great, and the overall concept is very cool.

ozmodeler- I should be working on Models

-
 Number of posts : 437
Age : 65
Location : Nowra
Registration date : 2012-04-16
 Re: 65 Corvette, display car, 1/8 scale.
Hey, Thanks man, I've had to put it on the back burner for a tick as I need to finish a build for a friend, so the poor old vette will just have to wait a beat.

mr casual- AMCC NEWBIE!

-
 Number of posts : 27
Age : 72
Location : Alkimos, Perth, Western Australia
Registration date : 2010-04-05
 Re: 65 Corvette, display car, 1/8 scale.
Cool Vette in the making.

allan- AMCC ADDICT

-
 Number of posts : 10406
Age : 67
Location : East Maitland
Registration date : 2008-03-31

Jezza- I should be working on Models

-
 Number of posts : 381
Age : 69
Location : Gosnells West. Aust.
Registration date : 2020-05-22
 Re: 65 Corvette, display car, 1/8 scale.
G'day to you "Jezza" and thanks for the comment.
Michael Pederick (mr casual)
Michael Pederick (mr casual)

mr casual- AMCC NEWBIE!

-
 Number of posts : 27
Age : 72
Location : Alkimos, Perth, Western Australia
Registration date : 2010-04-05
Jezza likes this post
 Re: 65 Corvette, display car, 1/8 scale.
Having seen a few of your builds over the years I can't wait to see this finished, looks great
Stovebolt- AMCC NEWBIE!

-
 Number of posts : 22
Age : 64
Location : Wundowie, Western Australia
Registration date : 2009-06-24
Jezza likes this post
 OK, so here goes with the second instalment on this insane build that I probably should never have started but I did and this is where we are. Things in my model world are happening less often and with bigger no model work gaps, the pain levels have becom
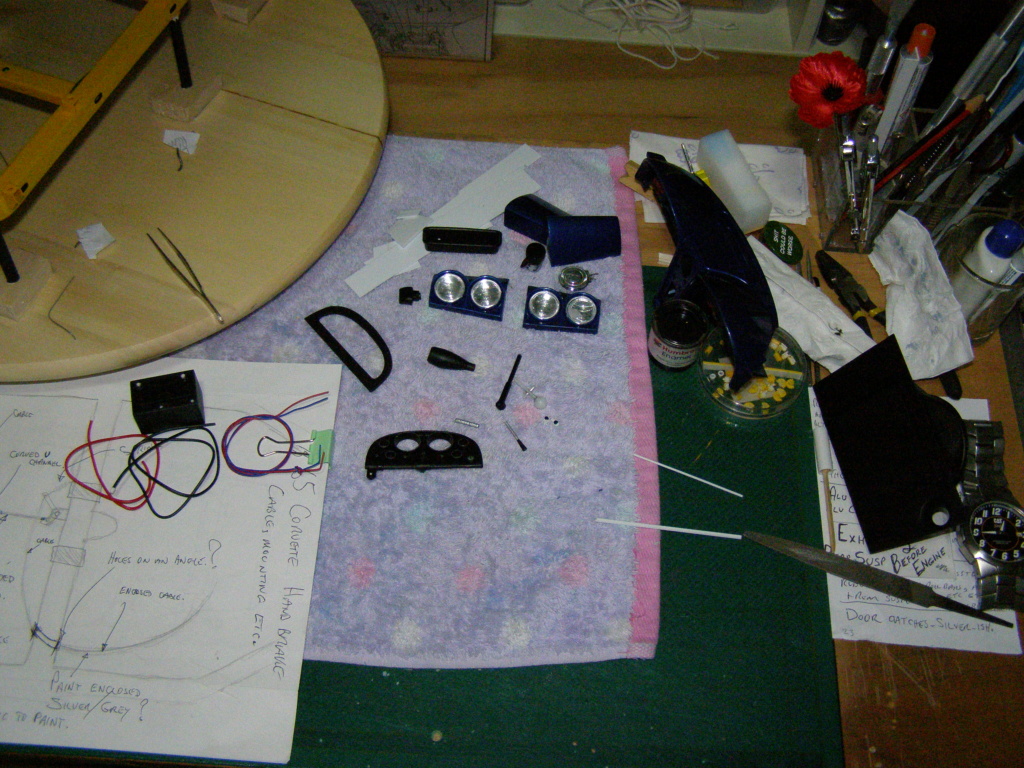
 OK, so here goes with the second instalment on this insane build that I probably should never have started but I did and this is where we are. Things in my model world are happening less often and with bigger no model work gaps, the pain levels have become much worse and I’m having trouble maintaining any kind of consistency with the model building, plus my hands and fingers are also getting harder to manipulate and control which is kinda handy for model building, especially when ya build so far from box stock that you sometimes forget what ya started out with. Well to my great (read, fricken awesome) surprise, a sigh and a bit of a puffed out chest, I realized that I have actually basically finished this giant monstrosity which leaves me with slightly mixed feelings. I’ve been building this beasty on and off over the last five and a half years, there were many many times when the bin looked like a damn fine place to store this bastard thing but each time I relented and just put it back on the shelf, the other thing (very big, huge) that I have found is that as time marches on my abilities are diminishing and I can only spend less and less time at the bench and the biggest (also read, huge) thing I can’t come to terms with is my ability to make parts accurately and to make nicer finishers and of course any detailing. Please don’t get me wrong, I’m absolutely and positively not I repeat not looking for sympathy in any way shape or form, as I realize there are a lot more people out there with conditions/constraints and a whole heap more far worse off than me, all I’m (hopefully) trying to do is simply state my case and share some of my problems in my modelling endeavours, I also do not want to offend anyone. Oh I missed a bit, along with everything else I was getting the turntable with the entire chassis, complete drive line and few other sundry bits and pieces (you can see where this is going can’t you) so I dropped the whole #@%&%%@# shootin match and I said, well darn that’s inconvenient, well I coulda, you weren’t there. The thing is I can see where and how this model has slowly but surely gone downhill in the fit and finish to the point where I’m really not at all happy with car but I’ve decided to keep it and enter it in any up and coming comps.










mr casual- AMCC NEWBIE!

-
 Number of posts : 27
Age : 72
Location : Alkimos, Perth, Western Australia
Registration date : 2010-04-05
dv8v8 and Stovebolt like this post
 Re: 65 Corvette, display car, 1/8 scale.
Model Car Spectacular on July 10th Michael
Stovebolt- AMCC NEWBIE!

-
 Number of posts : 22
Age : 64
Location : Wundowie, Western Australia
Registration date : 2009-06-24
 Re: 65 Corvette, display car, 1/8 scale.
Damn, I'd better extractus digitalis, and get this thing finished plus a few more that are, "not quite finished", so thanks muchly for the hurry up.
Michael.
Michael.

mr casual- AMCC NEWBIE!

-
 Number of posts : 27
Age : 72
Location : Alkimos, Perth, Western Australia
Registration date : 2010-04-05
 Re: 65 Corvette, display car, 1/8 scale.
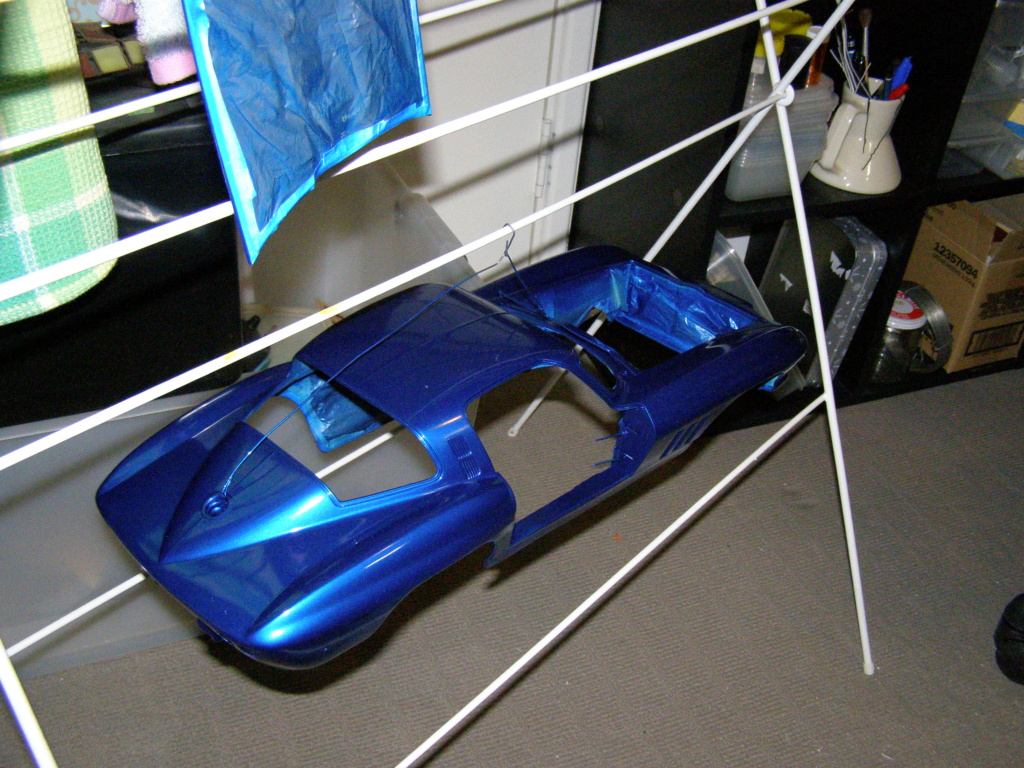
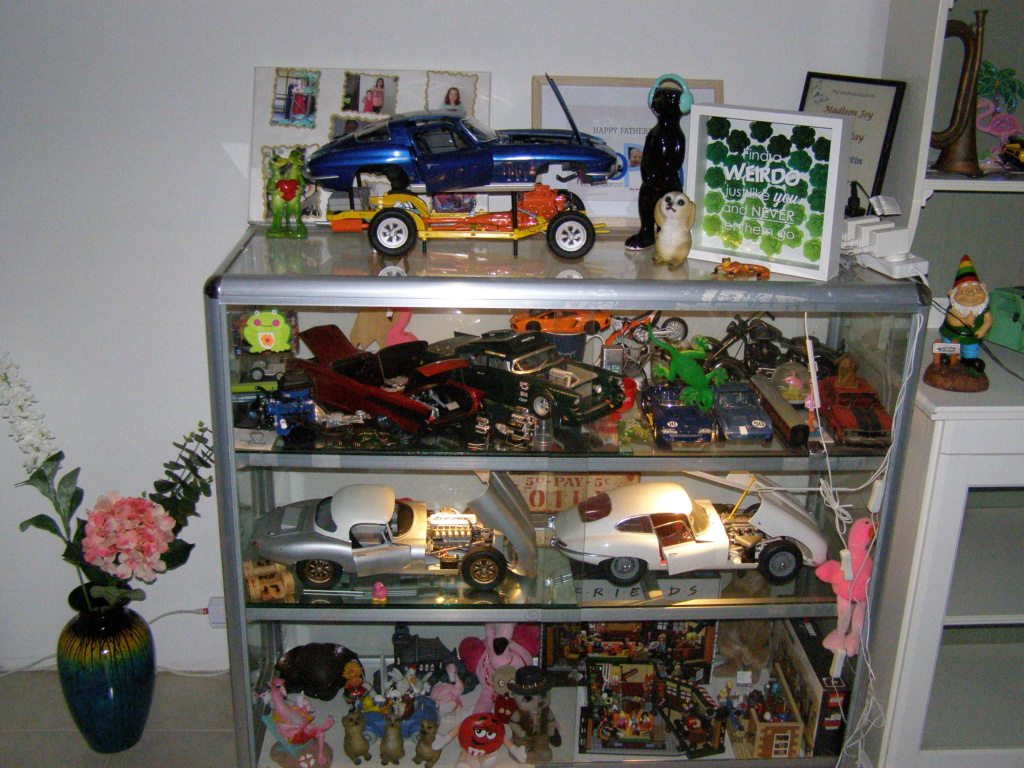
So here we is, at the (nearly) finally finished model of the ’65 Chevrolet Corvette display car for the ’65-6 motor shows around the continental United States. There has been a lot (hell of a lot) of re-do’s, changes and repairs, oh so many repairs, as I said before this thing has (on and off, mostly off) been on the go/stop for about five and a half years, and some parts have been made for years and are showing signs of time not being kind to them, like rubs, repair scars and paint scratches and strange dents in the paint here and there and I am not about to start from scratch and redo the whole damn car. I realize that my rendition is not all that close to the original, but I could only use what I had on hand and do it with my diminishing skill set, so bottom line, here it is and I hope some of you actually like it. I’d love to hear comments and criticism on this one, I think mostly ‘cause it took so long to finish.
Kind regards
Michael.




Kind regards
Michael.


mr casual- AMCC NEWBIE!

-
 Number of posts : 27
Age : 72
Location : Alkimos, Perth, Western Australia
Registration date : 2010-04-05
 Re: 65 Corvette, display car, 1/8 scale.
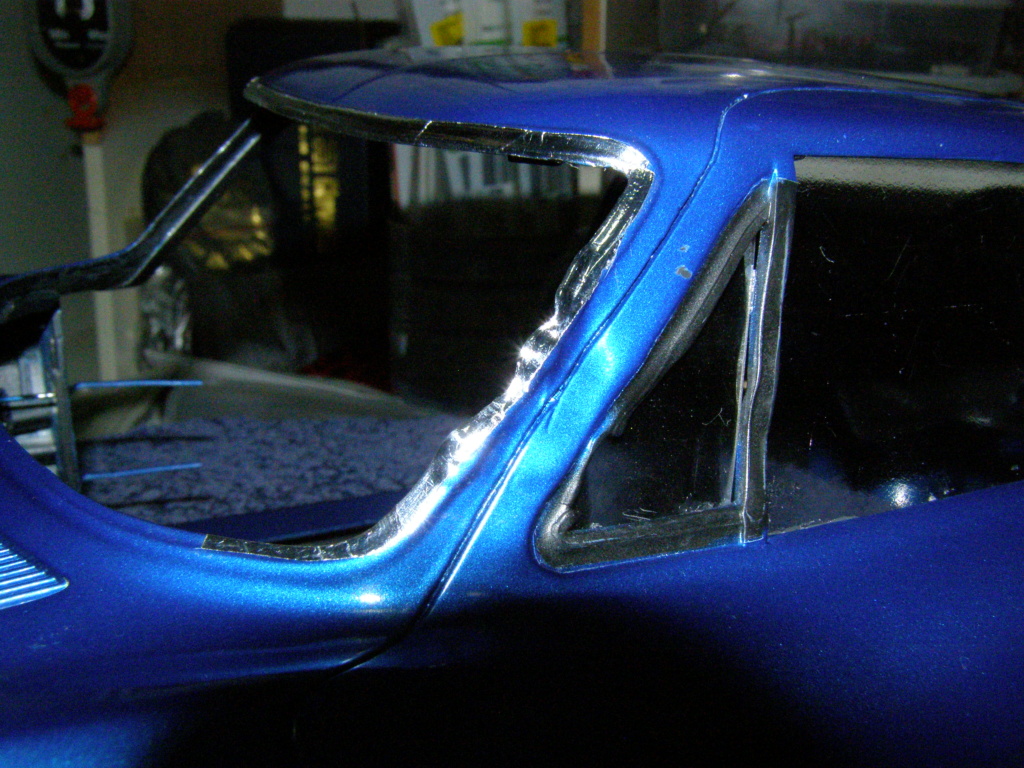
Well, whoda thunked that would happen, I’ll be seventy in a few weeks and I have finally been bested by a freakin model, after building models on and off for nearly sixty years, models of all kinds from sailing ships (these buggers are hard so my hats off to anyone who builds them) The Thermopylae, battle ships, The Yamato, then turned to building cars and trucks only, mostly cars. As time has marched on (way too fast) I’ve drifted towards the bigger scales until now where I only build 1/12 and 1/8 scale, and I don’t build for the sake of building, I only build cars that a, I really like b, cars and trucks that I have owned, also I should point out that being Australian when I say truck I mean trucks or as you call them, big rigs or tractors, tractors are for farming, and what you call trucks or more correctly pick-up trucks we call them ute’s. Potato potarto, no one really cares as it’s just a fun hobby after all. Ok, now to the model that bested me, as you may have read in my previous two posts on this model being the 65 display Corvette has been a mongrel rollercoaster of a build for me, so many parts to make and then remake and just so many redoes’ of all kinds including the right hand (drivers) door, this dear sweet piece of shi…..plastic just would not paint nicely for some unknown reason that I was not privy to, so on the fourth repaint I finally got it right, so I let it cure for a couple of days. As this was the last major part and the last painted part I was glad to be finally fitting it, so it was carefully wet sanded (I wet sand everything) then polished, beautiful, so now I added the door handle (external) the interior side and window, with inside portion only having very limited gluing spots I applied the glue pressed the panel on and realized it was not going to stick well so decided to clamp it (gently), I even put a piece of cloth on outside to protect the new paint job and set it aside last night and this morning took the clamps off to inspect my new master piece, turned it and then I saw it. I just wanted to cry, smash it all to bits and burn the whole bastard mess, but I did none of that, instead I wet sanded as far as I dared then polished the living snot out of it, all to avail, the only way to fix it properly would be to crack it all apart (again) then strip it repaint etc and reassemble etc, but nup, I decided it can just go on the car as is, model 1, builder 0.
Kind regards
Michael.


Kind regards
Michael.


mr casual- AMCC NEWBIE!

-
 Number of posts : 27
Age : 72
Location : Alkimos, Perth, Western Australia
Registration date : 2010-04-05

dv8v8- AMCC ADDICT

-
 Number of posts : 5689
Location : Rockhampton QLD
Registration date : 2008-04-26
 Re: 65 Corvette, display car, 1/8 scale.
G'day gents, one thing I forgot to explain, all the chrome that isn't there, originally when I first got the busted up partial kit I had planned to hot rod it in some way so I stripped all the chrome and , well when I changed my addled mind it was too late so just soldier on with wot ya got.
Kind regards
Michael.
Kind regards
Michael.

mr casual- AMCC NEWBIE!

-
 Number of posts : 27
Age : 72
Location : Alkimos, Perth, Western Australia
Registration date : 2010-04-05
 Similar topics
» 1/8 scale revell corvette
» Model Display at Rockin Rods
» Choosing A Display Base for your model.
» Table Top Cruisers Model Car Club display
» QMHE DRAGSTRIP DISPLAY CONTROL TOWER
» Model Display at Rockin Rods
» Choosing A Display Base for your model.
» Table Top Cruisers Model Car Club display
» QMHE DRAGSTRIP DISPLAY CONTROL TOWER
Page 1 of 1
Permissions in this forum:
You cannot reply to topics in this forum