Scratch built Dizzy, 1 & 2 (distributor)
2 posters
Page 1 of 1

Scratch built Dizzy, 1 & 2 (distributor)
![]() by Unforgiven Wed 29 Jul 2009, 9:32 am
by Unforgiven Wed 29 Jul 2009, 9:32 am
OK guy's now don't think for a minute that this tutorial, Is by far the word on building wired distributor's, their are I'm sure many way's to do this, but I have found that, this Is the easiest, and It does Enhance you're build.
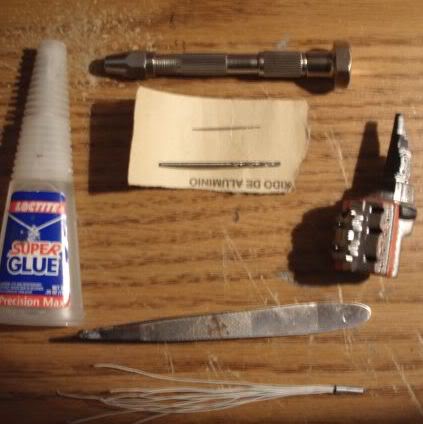
Now here Is a list of a few things you will need, plus I will include picture's so you can match things up If you need to.
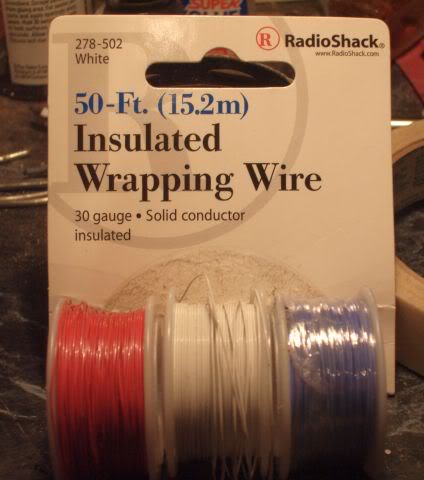
A roll and or rolls of 30 gauge solid core insulated wrapping wire, It comes in Red, White, and Blue, now I'm sure It might come any kolor so long as It's 30 gauge, I got mine from my local Radio Shack store:
Note: It's about 3 to 4 bucks a roll, and It comes In 50 foot rolls, how many can you build?
NOTE: Yes you can paint the wire to any kolor you like, we will get to that In a few
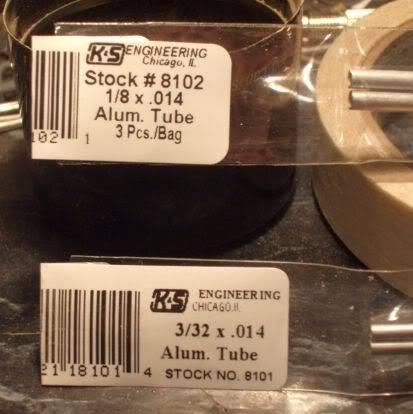
Now you need to get aluminum tubing, one size Is 1/8" x.014, and It comes 12" or longer depending on Ware you get It.
The next size Is 3/32" x.014, and It too comes 12" or longer.
NOTE: Mine came 3 tube's to a pack at about 2.50 a pack, I got mine from my local Ace Hardware store,
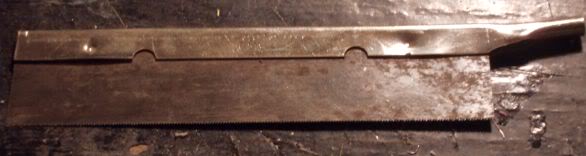
A fine tooth hobby saw, which I'm sure you already have
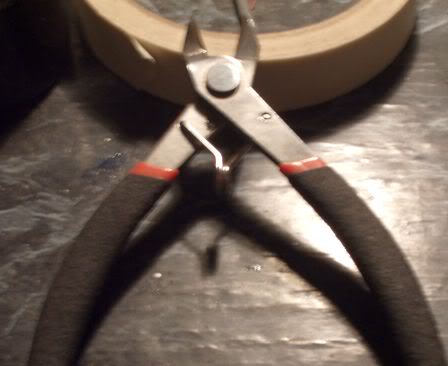
A pair of wire snips I got the flush cut, 5" pair, from Radio Shack, at about 5.00, now what you use Is up to you, I find these are easier to handle
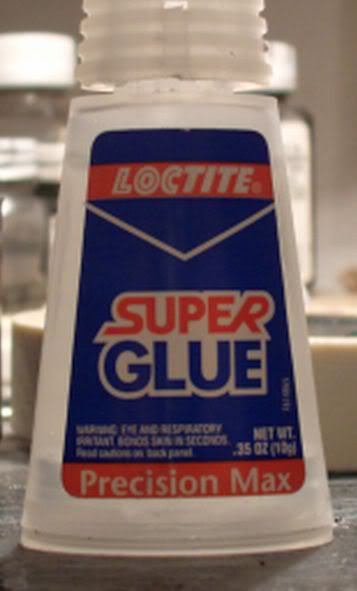
Now you need some super glue, and or CA glue, because CA glue Is not that cheep I have been using, loctite super glue, and I can't remember Ware I got It, but you get the drift
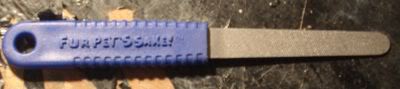
Now you need some sort of file, round, flat, nail, any file will work, I use a metal file that's used to file the toe nail's, of dog's, I got a grooming kit from wal-mart and it had the file In It so why not, my dog ain't gonna use it
Now that you have all the supplies, let's get to making!!!!
First thing you're gonna wanna do Is cut strands of you're wire, I do mine about 4" to 5" long, you're gonna wanna cut 9 for a v8, and 7 for a in-line 6, or 5 for 4 cylinder'
NOTE: If you don't want to add a coil then you know you will only need 8 for v8 and 6 for in-line 6 and 4 for 4 cylinder, etc,etc,
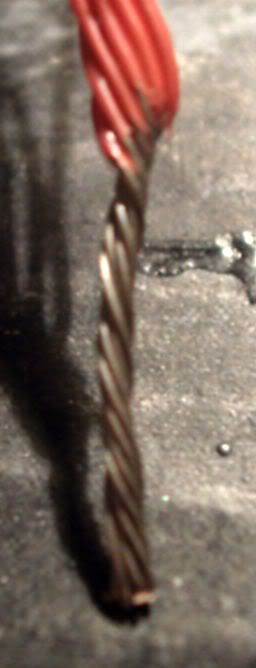
Then you're gonna strip about 1/2" off the end of you're wire,
Now before you twist the wire and after you have striped It you can paint the wire, and hang It up to dry, you can do this with a brush, or spray, remember light mist coat's, after It has dried a few day's then twist the bare wire, like this.
NOTE: I have been told that you can dye the wire, using Rit Dye, now fallow the directions on the box of dye, and don't cook In the pan you use the dye In, but you will have to dye about a 3 foot piece of wire for about 1 to 2 minute's, 2 or 3 time's to get the depth of kolor you want, now I have not try'd this myself so you will be on you're own...
Now you're gonna cut you're aluminum tubing, you first cut the 3/32" tubing about a 1/4" long, what you use to hold the tubing Is up to you I would suggest a vice, a pair of vice grip's will work just don't smash the tube, I hold mine by hand, It's hard to cut but It works for me
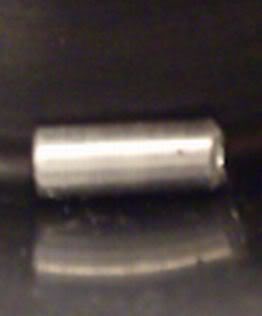
Now that you have made the cut, take a file, and gently file the cut end, and deburr the hole.
Now you're gonna cut from the 1/8" tubing, you're gonna cut a piece about 1/8" long, now do the trick with the file again.
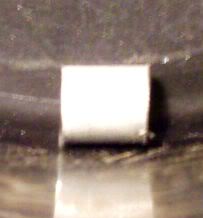
NOTE: the length you cut these tube's, Is really up to you but remember you will have to trim some off to get the look you want, I do mine just like I described, It's just easier for me
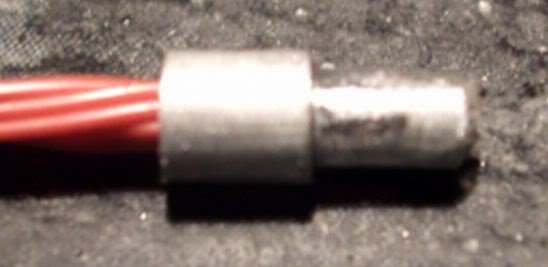
Now take the striped, twisted end of you're wire, and slide It into the tube you cut 1/4" long, so It looks kinda like this
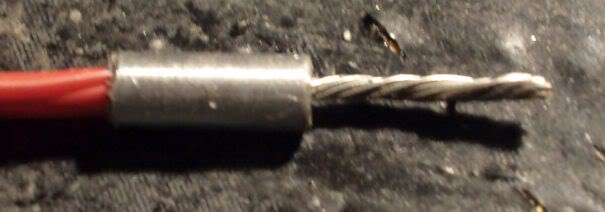
Now at this point I hold the wire up by the striped end and drop 2 drop's of super glue down the hole next to the wire, one drop, wait till it falls into the hole then I add the other drop, lay It down let the glue set,
now trim the excess wire, and you should have something that looks like this
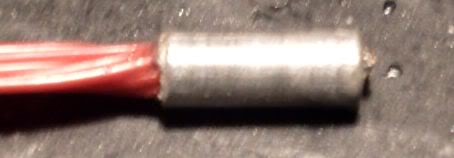
Now for the fun part, you're gonna take that other piece of tube, yeah the one you cut 1/8" long and slide it over the piece with the wire sticking out of it, slide It from Ware you trimmed the wire, add a drop of super glue to the tube you're sliding up, slide the other tube up just past the wire's sticking out at the other end, now add a drop of super glue inside of that next to the wire's, not to far just enough to hide the smaller tube, let the glue set and you should have something like this
Now you can polish this up, or paint the big part with whatever color, you want.
NOTE: Now if you want to turn this Into a magneto, then all you will have to do is, Is before you slide the 1/8" tube over the other one is cut slits across the top, then after the glue sets, splay you're wires in the cuts, then take a piece of plastic or kolor'd epoxy and cover over the wire's, so It looks like the wire's come out the side's
NOTE: you can also use the 3/32" tube as a coil just cut you're self a piece as long as you want or need, and put you're 9th wire in it and glue, then glue where you need,
NOW REMEMBER DO NOT TRIM THE 9TH WIRE TO FIT THE ENGINE BLOCK YOU WANT TO LEAVE THAT LONG TILL YOU FIND OUT WARE YOU WILL PUT THE COIL...
Heck I made this distributor In about 30 min, the one on the motor is rude and is coming off, this one will replace that one,
and If you wanna know for about 20 buck's Worth of these supplies you can build roughly about 141 distributor's SO HOW'S THAT FOR ECONOMICS...
Like I said before this Is not the finale word on building these, and It will take practice to get the best result's, take your time, If you mess up well don't give up you have 140 more try's to get the one you want built, so enjoy have fun add some enhancements to you're build..
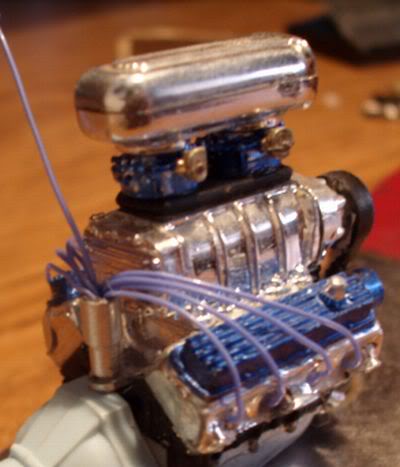
I should add a picture of the finished distributor, so I'm gonna show one I did, no It's not perfect but It will give you guy's some Idea,
I hope all will use this as only a guide, I try'd to explain It simple, and with allot of picture's so you could see, how It's all done thru all the instruction's.
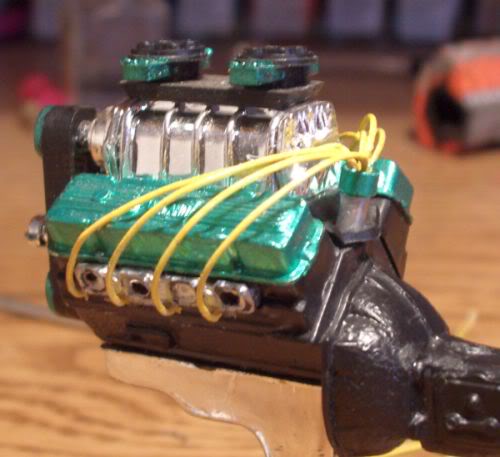
Here is a picture of a wiring I did after painting the wire's yellow
UPDATE: 11/14
Hay I have found aluminum tubing 1/16" x.014 would look better as a coil, I think, for 1/25 scale, haven't try'd It yet but It looks like It will work just fine...
Now here Is a list of a few things you will need, plus I will include picture's so you can match things up If you need to.
A roll and or rolls of 30 gauge solid core insulated wrapping wire, It comes in Red, White, and Blue, now I'm sure It might come any kolor so long as It's 30 gauge, I got mine from my local Radio Shack store:
Note: It's about 3 to 4 bucks a roll, and It comes In 50 foot rolls, how many can you build?
NOTE: Yes you can paint the wire to any kolor you like, we will get to that In a few
Now you need to get aluminum tubing, one size Is 1/8" x.014, and It comes 12" or longer depending on Ware you get It.
The next size Is 3/32" x.014, and It too comes 12" or longer.
NOTE: Mine came 3 tube's to a pack at about 2.50 a pack, I got mine from my local Ace Hardware store,
A fine tooth hobby saw, which I'm sure you already have
A pair of wire snips I got the flush cut, 5" pair, from Radio Shack, at about 5.00, now what you use Is up to you, I find these are easier to handle
Now you need some super glue, and or CA glue, because CA glue Is not that cheep I have been using, loctite super glue, and I can't remember Ware I got It, but you get the drift
Now you need some sort of file, round, flat, nail, any file will work, I use a metal file that's used to file the toe nail's, of dog's, I got a grooming kit from wal-mart and it had the file In It so why not, my dog ain't gonna use it
Now that you have all the supplies, let's get to making!!!!
First thing you're gonna wanna do Is cut strands of you're wire, I do mine about 4" to 5" long, you're gonna wanna cut 9 for a v8, and 7 for a in-line 6, or 5 for 4 cylinder'
NOTE: If you don't want to add a coil then you know you will only need 8 for v8 and 6 for in-line 6 and 4 for 4 cylinder, etc,etc,
Then you're gonna strip about 1/2" off the end of you're wire,
Now before you twist the wire and after you have striped It you can paint the wire, and hang It up to dry, you can do this with a brush, or spray, remember light mist coat's, after It has dried a few day's then twist the bare wire, like this.
NOTE: I have been told that you can dye the wire, using Rit Dye, now fallow the directions on the box of dye, and don't cook In the pan you use the dye In, but you will have to dye about a 3 foot piece of wire for about 1 to 2 minute's, 2 or 3 time's to get the depth of kolor you want, now I have not try'd this myself so you will be on you're own...
Now you're gonna cut you're aluminum tubing, you first cut the 3/32" tubing about a 1/4" long, what you use to hold the tubing Is up to you I would suggest a vice, a pair of vice grip's will work just don't smash the tube, I hold mine by hand, It's hard to cut but It works for me
Now that you have made the cut, take a file, and gently file the cut end, and deburr the hole.
Now you're gonna cut from the 1/8" tubing, you're gonna cut a piece about 1/8" long, now do the trick with the file again.
NOTE: the length you cut these tube's, Is really up to you but remember you will have to trim some off to get the look you want, I do mine just like I described, It's just easier for me
Now take the striped, twisted end of you're wire, and slide It into the tube you cut 1/4" long, so It looks kinda like this
Now at this point I hold the wire up by the striped end and drop 2 drop's of super glue down the hole next to the wire, one drop, wait till it falls into the hole then I add the other drop, lay It down let the glue set,
now trim the excess wire, and you should have something that looks like this
Now for the fun part, you're gonna take that other piece of tube, yeah the one you cut 1/8" long and slide it over the piece with the wire sticking out of it, slide It from Ware you trimmed the wire, add a drop of super glue to the tube you're sliding up, slide the other tube up just past the wire's sticking out at the other end, now add a drop of super glue inside of that next to the wire's, not to far just enough to hide the smaller tube, let the glue set and you should have something like this
Now you can polish this up, or paint the big part with whatever color, you want.
NOTE: Now if you want to turn this Into a magneto, then all you will have to do is, Is before you slide the 1/8" tube over the other one is cut slits across the top, then after the glue sets, splay you're wires in the cuts, then take a piece of plastic or kolor'd epoxy and cover over the wire's, so It looks like the wire's come out the side's
NOTE: you can also use the 3/32" tube as a coil just cut you're self a piece as long as you want or need, and put you're 9th wire in it and glue, then glue where you need,
NOW REMEMBER DO NOT TRIM THE 9TH WIRE TO FIT THE ENGINE BLOCK YOU WANT TO LEAVE THAT LONG TILL YOU FIND OUT WARE YOU WILL PUT THE COIL...
Heck I made this distributor In about 30 min, the one on the motor is rude and is coming off, this one will replace that one,
and If you wanna know for about 20 buck's Worth of these supplies you can build roughly about 141 distributor's SO HOW'S THAT FOR ECONOMICS...
Like I said before this Is not the finale word on building these, and It will take practice to get the best result's, take your time, If you mess up well don't give up you have 140 more try's to get the one you want built, so enjoy have fun add some enhancements to you're build..
I should add a picture of the finished distributor, so I'm gonna show one I did, no It's not perfect but It will give you guy's some Idea,
I hope all will use this as only a guide, I try'd to explain It simple, and with allot of picture's so you could see, how It's all done thru all the instruction's.
Here is a picture of a wiring I did after painting the wire's yellow
UPDATE: 11/14
Hay I have found aluminum tubing 1/16" x.014 would look better as a coil, I think, for 1/25 scale, haven't try'd It yet but It looks like It will work just fine...

Unforgiven- I should be working on Models

- Number of posts : 441
Registration date : 2009-02-25
Re: Scratch built Dizzy, 1 & 2 (distributor)
![]() by Unforgiven Wed 29 Jul 2009, 9:36 am
by Unforgiven Wed 29 Jul 2009, 9:36 am
PART 2
OK now you have built a wired distributor, now what Mr Professor?.
NOTE: The block I will be using Is for example purpose only...
Well now here Is a small tutorial on putting It to the engine block. Here Is a list of thing's you will need.
Pin Vise,
Micro drill bit, Size 74 (.0255) or 72 (.025 ), Which ever size you can see the holes,
Small drill bit, Size 3/32",
Super glue,
Tweezer's,
The wired Distributor,
And you're victim,
 ,
,
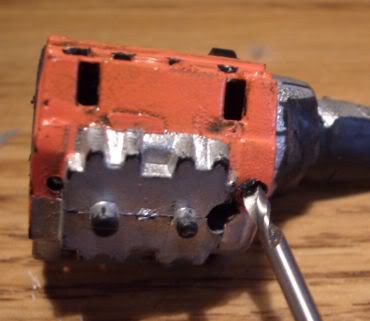
First drill a hole In the back, or front, whichever end you want the distributor, anyway drill a hole with the 3/32" drill bit, we will drill into the back of the block
 ,
,
 ,
,
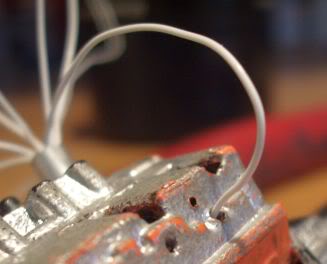
Now you will need a small drop of super glue on the shaft of the distributor, and Insert the distributor Into the block like this, preferably straighter then I have done, but this Is only a test subject so It don't matter for me,
NOTE: you can do this next step before you put the distributor In or after, whatever makes It easy for you,
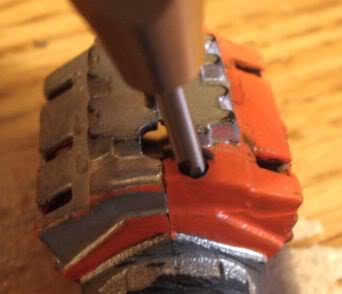
Now we will take and drill hole's In our heads on the block, using the micro bit, size 72, or 74, you will need to eyeball this and get them all to line up, you can I'm sure go on-line and do a search for the block you are building to see exactly where the spark plug's are on a 1:1 engine, and I know you know you will have to do 4 per side for a v8 and 6 on one side for a straight 6
NOTE: be sure you don't put the hole's where you're going to put the header's, the kit header's or If you make kustom headers, I find that if I line up the header's I can pretty much place the wire's from there,
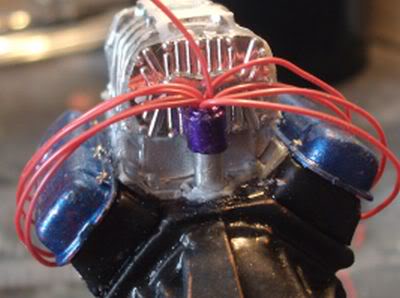
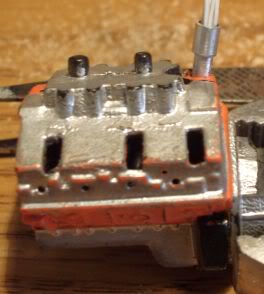
Now take and splay out you're wire's, run them to the hole's you drilled, and trim to fit the block, leave a little wire to put into the hole, you will then add a drop of super glue to the end of the wire, and insert the wire, I find that use'ng tweezers help's to hold the wire and tweek the wire to fit into the hole,

NOTE: If you're going to use a coil then you need to leave one wire, as close to center, of the distributor, long and uncut, once you cut a piece for you're coil and place It In the engine area, then trim that wire to length,
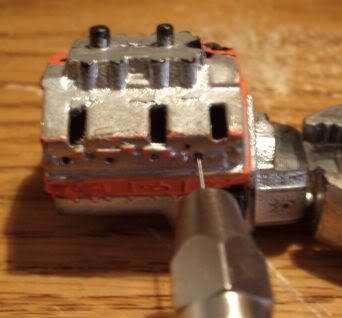
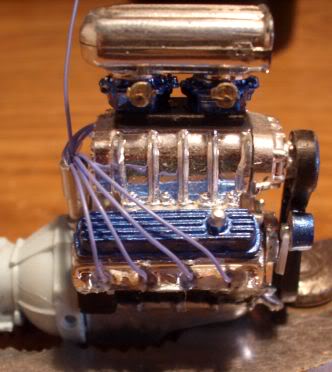
Now just take you're time, and with some work, you will have something that kinda looks like this
 ,
,
NOTE: You can get wire separators, and what not from place's and or people who sell photo etched dress up stuff.
Hope this will help every one to create an enhanced build, and maybe help out those who are looking for something new to add to their build.s
OK now you have built a wired distributor, now what Mr Professor?.
NOTE: The block I will be using Is for example purpose only...
Well now here Is a small tutorial on putting It to the engine block. Here Is a list of thing's you will need.
Pin Vise,
Micro drill bit, Size 74 (.0255) or 72 (.025 ), Which ever size you can see the holes,
Small drill bit, Size 3/32",
Super glue,
Tweezer's,
The wired Distributor,
And you're victim,
,First drill a hole In the back, or front, whichever end you want the distributor, anyway drill a hole with the 3/32" drill bit, we will drill into the back of the block
,,Now you will need a small drop of super glue on the shaft of the distributor, and Insert the distributor Into the block like this, preferably straighter then I have done, but this Is only a test subject so It don't matter for me,
NOTE: you can do this next step before you put the distributor In or after, whatever makes It easy for you,
Now we will take and drill hole's In our heads on the block, using the micro bit, size 72, or 74, you will need to eyeball this and get them all to line up, you can I'm sure go on-line and do a search for the block you are building to see exactly where the spark plug's are on a 1:1 engine, and I know you know you will have to do 4 per side for a v8 and 6 on one side for a straight 6
NOTE: be sure you don't put the hole's where you're going to put the header's, the kit header's or If you make kustom headers, I find that if I line up the header's I can pretty much place the wire's from there,
Now take and splay out you're wire's, run them to the hole's you drilled, and trim to fit the block, leave a little wire to put into the hole, you will then add a drop of super glue to the end of the wire, and insert the wire, I find that use'ng tweezers help's to hold the wire and tweek the wire to fit into the hole,
NOTE: If you're going to use a coil then you need to leave one wire, as close to center, of the distributor, long and uncut, once you cut a piece for you're coil and place It In the engine area, then trim that wire to length,
Now just take you're time, and with some work, you will have something that kinda looks like this
,NOTE: You can get wire separators, and what not from place's and or people who sell photo etched dress up stuff.
Hope this will help every one to create an enhanced build, and maybe help out those who are looking for something new to add to their build.s
Unforgiven- I should be working on Models
- Number of posts : 441
Registration date : 2009-02-25
Re: Scratch built Dizzy, 1 & 2 (distributor)
![]() by slowlylearning Wed 29 Jul 2009, 10:16 am
by slowlylearning Wed 29 Jul 2009, 10:16 am
another awesome tutorial, thanks mate, very informative!  For the aussies out there wondering where to get the wire, if you dont have a radio shack around (its an american chain?) crazy clarks and the other $2 shops have this wire, and Iv been able to find it in those colours plus pink, grey, green, blue and heaps of others. If your having trouble finding wire and you'v got old unused mouses, keyboards etc, cut the cord off and slice out the wire... iv found that the cord that connects the screen to the tower has about 6 different colours in it, and some 2tone ones. Wire seperators are pretty simple to make, just drill some holes in thin styrene and cut around em... Thanks for the tutorial Unforgiven, its really easy to understand with all the pics
slowlylearning- AMCC ADDICT

-
 Number of posts : 1533
Age : 33
Location : Bris
Registration date : 2008-09-28
» Scratch Built Trailers
» 2/3 scratch built 1920 Harly board racer
» ford explorer airbagged, on sills with scratch built chassis & billets
» Easy Wired Distributor
» scratch building engine bay?
» 2/3 scratch built 1920 Harly board racer
» ford explorer airbagged, on sills with scratch built chassis & billets
» Easy Wired Distributor
» scratch building engine bay?
Page 1 of 1
Permissions in this forum:
You cannot reply to topics in this forum