Photoshop stuff
+8
Andrew J
Bryce
allan
zenrat
Paul
Bill Page
Mustang_67
tezza43
12 posters
Page 2 of 2
Page 2 of 2 •  1, 2
1, 2

Andrew J- I should be working on Models

-
 Number of posts : 407
Age : 42
Location : Sydney
Registration date : 2010-10-28
Re: Photoshop stuff
![]() by madaz77 Fri 23 Aug 2013, 10:35 am
by madaz77 Fri 23 Aug 2013, 10:35 am
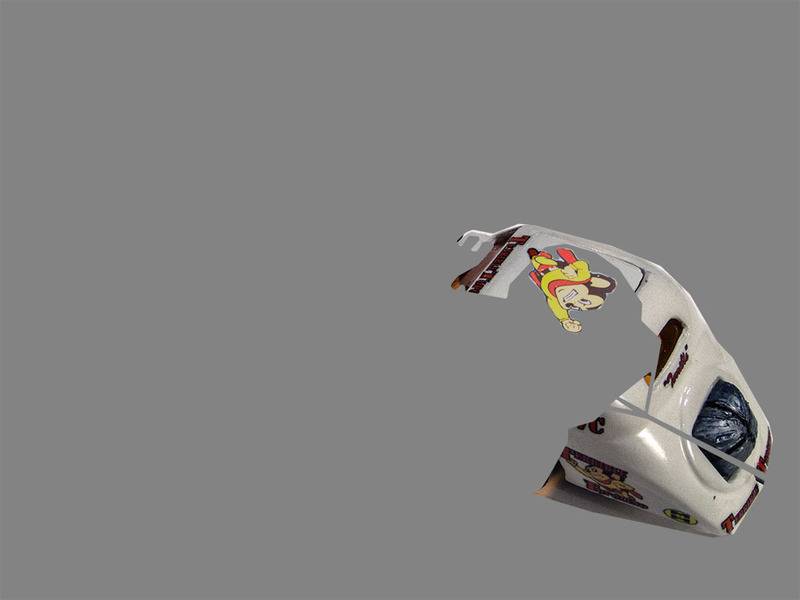
Thought I would post a few pics of some chops I have done at various stages..
Some Chops from cruises..


Some "Graphic art", for lack of a better term..


A couple of 3d renders im working on (just thought I would throw those in )
)


Some Chops from cruises..
Some "Graphic art", for lack of a better term..
A couple of 3d renders im working on (just thought I would throw those in
madaz77- AMCC NEWBIE!

- Number of posts : 7
Age : 43
Location : Adelaide
Registration date : 2013-07-31
Re: Photoshop stuff
![]() by Bernard Kron Fri 23 Aug 2013, 1:35 pm
by Bernard Kron Fri 23 Aug 2013, 1:35 pm
Some very cool work shown so far!
I do a lot of Photoshop stuff involving model cars and cars in general. Here are some examples.
One thing I do is personal T-Shirt art. I make graphics and then send them off to an on-line service which prints them on a t-shirt for you. It's a cheap way to have a one of a kind...
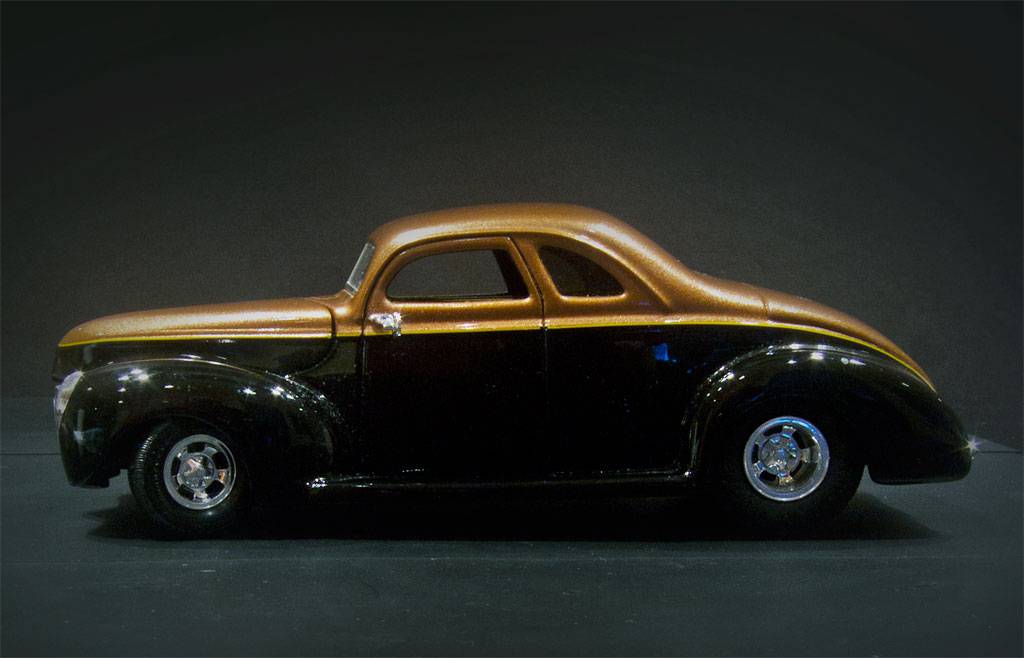
Here's a design I did based on a drawing by the great automotive artist of the late 40's, Gus Maanum (if you go to the SCTA web site their store will sell you a wonderful portfolio of 10 of his drawings for 10USD). I added the text and Hilborn logo...:

Sometimes I include my own models in some logo art for a T-Shirt:

Here's a similar logo I did for a friend to celebrate his beautifully done chopped Revelll '40 Ford:

And here's one based on one of my (less beautifully done) models:

I'm also in the habit of combining logo art with my models when I first post the completed build on line. I generally give them descriptive names:


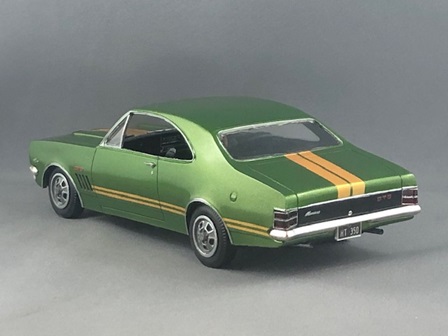
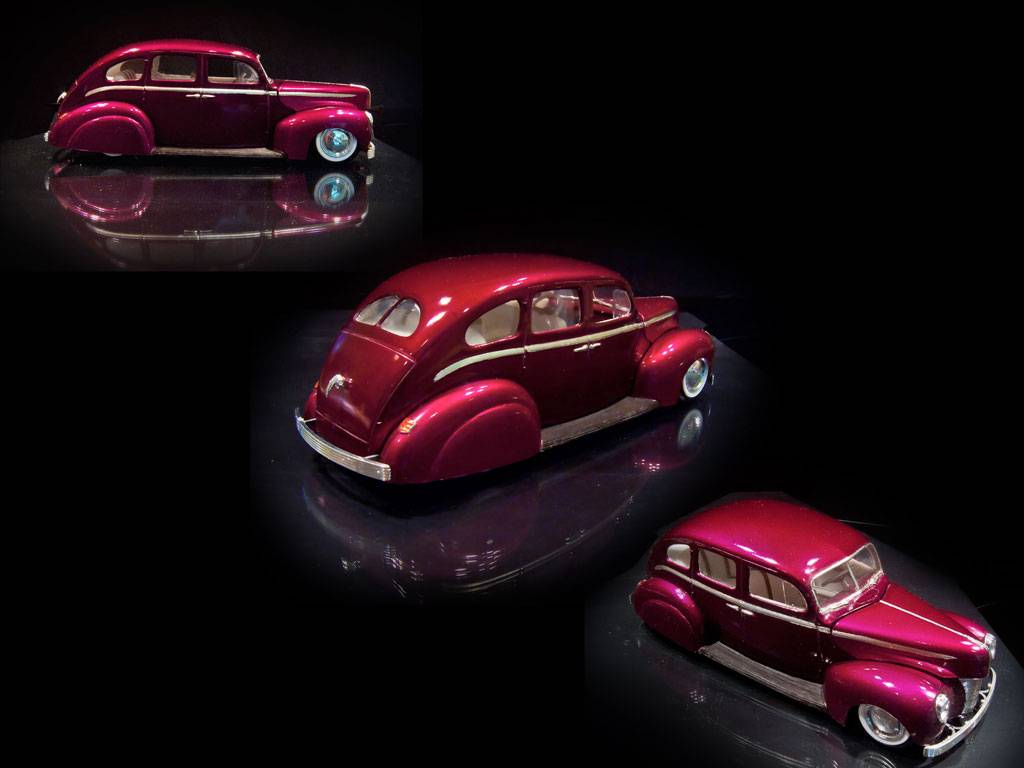
As you can see I've been struggling with the popular The Rodder's Journal black background style. It involves a lot of heavy Photoshop work. Here's the classic TRJ profile shot. It's a repeat from another post but it's probably the best one in this style I've done. The trick is to shoot in low light and still keep the colors true and everything in sharp focus. Photoshop is used to manipulate the contrast and saturation of the image and to drop out the background unobtrusively.

And lastly, it's always fun to combine models with "real" photographs:


I do a lot of Photoshop stuff involving model cars and cars in general. Here are some examples.
One thing I do is personal T-Shirt art. I make graphics and then send them off to an on-line service which prints them on a t-shirt for you. It's a cheap way to have a one of a kind...
Here's a design I did based on a drawing by the great automotive artist of the late 40's, Gus Maanum (if you go to the SCTA web site their store will sell you a wonderful portfolio of 10 of his drawings for 10USD). I added the text and Hilborn logo...:
Sometimes I include my own models in some logo art for a T-Shirt:
Here's a similar logo I did for a friend to celebrate his beautifully done chopped Revelll '40 Ford:
And here's one based on one of my (less beautifully done) models:
I'm also in the habit of combining logo art with my models when I first post the completed build on line. I generally give them descriptive names:
As you can see I've been struggling with the popular The Rodder's Journal black background style. It involves a lot of heavy Photoshop work. Here's the classic TRJ profile shot. It's a repeat from another post but it's probably the best one in this style I've done. The trick is to shoot in low light and still keep the colors true and everything in sharp focus. Photoshop is used to manipulate the contrast and saturation of the image and to drop out the background unobtrusively.
And lastly, it's always fun to combine models with "real" photographs:

Bernard Kron- I should be working on Models
- Number of posts : 464
Age : 76
Location : Seattle, Washington USA
Registration date : 2013-08-18
mgy125- AMCC ADDICT

- Number of posts : 1679
Age : 88
Location : Moldovia
Registration date : 2010-06-24
Re: Photoshop stuff
![]() by tezza43 Mon 30 Sep 2013, 4:16 pm
by tezza43 Mon 30 Sep 2013, 4:16 pm
Love your work Bernard. I'm sure we'd all like to see more when you get a chance. Well done mate.


tezza43- AMCC ADDICT
- Number of posts : 4318
Age : 80
Location : Mornington, Victoria
Registration date : 2008-03-21
Re: Photoshop stuff
![]() by Bernard Kron Sun 06 Oct 2013, 2:18 pm
by Bernard Kron Sun 06 Oct 2013, 2:18 pm
Thanx! Here's some more P-shop stuff.
This one is a combination of black-background experiments and logo art for a '27T lo-boy I did a couple of years back:

I also use Photoshop to design my own decals. Here's a modification of the Dragmaster decal so that it would show properly on a model I did lasy year. I don't have the capbility to print white or metallics, I use a simple inkjet printer which "assumes" white paper as your background medium, so I modified the colors to print on cleqr.


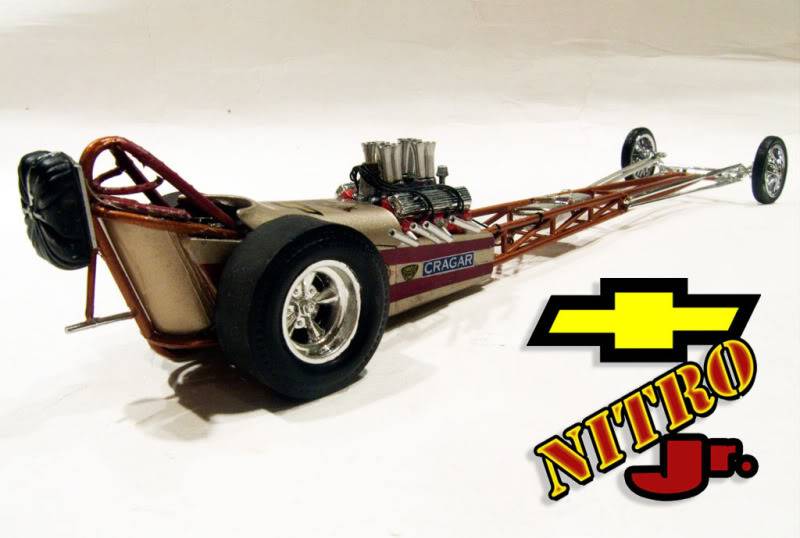
Here's another decal/logo combo on a digger:

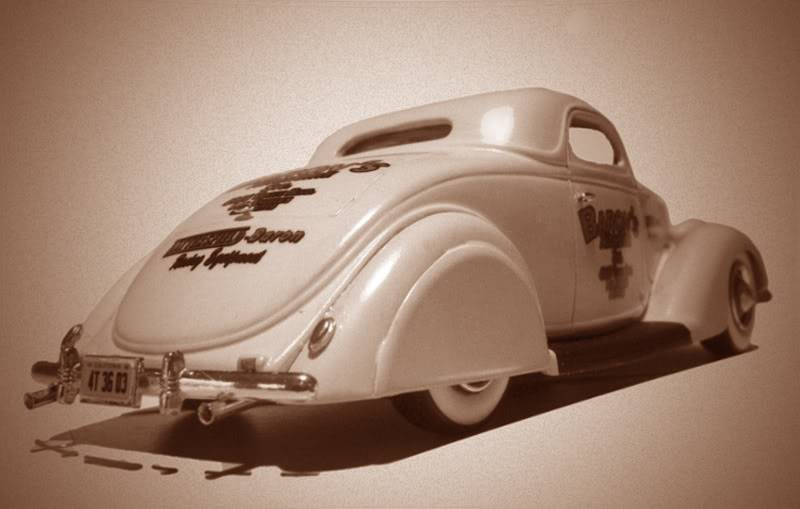
And lastly, here's a '36 Ford I did. It's a fantasy tribute to Frank Baron, the hot rodder and engineer who made the first 4 carb manifolds for flathead Ford's. sold under the Tattersfield-Baron name. The logo design for Tattersfield-Baron was taken from an actual ad in a 1948 edition of Hot Rod Magazine but the other logo is my design.

This one is a combination of black-background experiments and logo art for a '27T lo-boy I did a couple of years back:
I also use Photoshop to design my own decals. Here's a modification of the Dragmaster decal so that it would show properly on a model I did lasy year. I don't have the capbility to print white or metallics, I use a simple inkjet printer which "assumes" white paper as your background medium, so I modified the colors to print on cleqr.
Here's another decal/logo combo on a digger:
And lastly, here's a '36 Ford I did. It's a fantasy tribute to Frank Baron, the hot rodder and engineer who made the first 4 carb manifolds for flathead Ford's. sold under the Tattersfield-Baron name. The logo design for Tattersfield-Baron was taken from an actual ad in a 1948 edition of Hot Rod Magazine but the other logo is my design.
Bernard Kron- I should be working on Models
- Number of posts : 464
Age : 76
Location : Seattle, Washington USA
Registration date : 2013-08-18
Re: Photoshop stuff
![]() by tezza43 Tue 19 Nov 2013, 7:09 am
by tezza43 Tue 19 Nov 2013, 7:09 am
Bernard that is magazine quality work. Well done mate.
tezza43- AMCC ADDICT
- Number of posts : 4318
Age : 80
Location : Mornington, Victoria
Registration date : 2008-03-21
Re: Photoshop stuff
![]() by Bernard Kron Thu 21 Nov 2013, 3:52 pm
by Bernard Kron Thu 21 Nov 2013, 3:52 pm
Thanx! I think of graphics and photography as integral with my car modeling, but car modeling itself takes the lead!
Bernard Kron- I should be working on Models
- Number of posts : 464
Age : 76
Location : Seattle, Washington USA
Registration date : 2013-08-18
Re: Photoshop stuff
![]() by Bernard Kron Mon 09 Dec 2013, 12:16 am
by Bernard Kron Mon 09 Dec 2013, 12:16 am
I've recently switched full-time to using a tripod and the self-timer on my camera. I've banished camera shake forever and can exactly replicate a photo. This has allowed me to fool around in P-Shop making see-through "cutaways". Here are a couple of examples from my most recent completion:


Bernard Kron- I should be working on Models
- Number of posts : 464
Age : 76
Location : Seattle, Washington USA
Registration date : 2013-08-18
 Nice work
blatdriver- AMCC ADDICT
- Number of posts : 1550
Age : 47
Location : Wagga
Registration date : 2011-04-22
Re: Photoshop stuff
![]() by tezza43 Wed 12 Mar 2014, 1:25 pm
by tezza43 Wed 12 Mar 2014, 1:25 pm
Love those "phantom" illustrations Bernard. I am in awe of your work mate. Hope you can post more soon. 
tezza43- AMCC ADDICT
- Number of posts : 4318
Age : 80
Location : Mornington, Victoria
Registration date : 2008-03-21
Re: Photoshop stuff
![]() by Bernard Kron Sun 25 Oct 2015, 1:08 pm
by Bernard Kron Sun 25 Oct 2015, 1:08 pm
For some reason I was thinking about this thread the other day and realized I hadn't posted some stuff to it in a lonnnnng time - I hadn't realized how long! Anyway, have any of you guys done some more cool stuff since?
I've been working some more on cutaway and "ghost" views of my models. I think I've made a lot of progress and thought I'd post two of them here. Racing cars are especially suited to this because I generally build them with removable bodies.
Here's a dirt track car I did last year that got the cutaway treatment:

Next is my most recently completed car, a Fiat Competition Coupe. A member on another board asked how I did the cutaways so I included a sequence showing the steps involved.
First I take 2 pictures that are identical in every way - lighting, angle, any Photoshop processing, etc. - one with the body in place and one with the body removed. I use a tripod and a timer so, if I'm very careful not to move the car everything will line up exactly.


Then I make a copy of the body areas that I want to leave intact or to fade away. These are pasted into the chassis-only shot and processed as "layers", as they are called in Photoshop lingo. Layers can be given varying degrees of transparency so they can be made to be see-through panels. In some areas I "remove" the bodywork entirely. Here's a composite shot of the bodywork layers that where applied over the chassis shot:
And here's the final result:

I've been working some more on cutaway and "ghost" views of my models. I think I've made a lot of progress and thought I'd post two of them here. Racing cars are especially suited to this because I generally build them with removable bodies.
Here's a dirt track car I did last year that got the cutaway treatment:

Next is my most recently completed car, a Fiat Competition Coupe. A member on another board asked how I did the cutaways so I included a sequence showing the steps involved.
First I take 2 pictures that are identical in every way - lighting, angle, any Photoshop processing, etc. - one with the body in place and one with the body removed. I use a tripod and a timer so, if I'm very careful not to move the car everything will line up exactly.


Then I make a copy of the body areas that I want to leave intact or to fade away. These are pasted into the chassis-only shot and processed as "layers", as they are called in Photoshop lingo. Layers can be given varying degrees of transparency so they can be made to be see-through panels. In some areas I "remove" the bodywork entirely. Here's a composite shot of the bodywork layers that where applied over the chassis shot:

And here's the final result:

Last edited by Bernard Kron on Sun 25 Oct 2015, 1:24 pm; edited 1 time in total
Bernard Kron- I should be working on Models
- Number of posts : 464
Age : 76
Location : Seattle, Washington USA
Registration date : 2013-08-18
Re: Photoshop stuff
![]() by Bernard Kron Sun 25 Oct 2015, 1:23 pm
by Bernard Kron Sun 25 Oct 2015, 1:23 pm
The tripod was a huge breakthrough in my photography. I've also learned to be more subtle about my photo-processing. As a result I've gone back and re-photographed some earlier models using my improved techniques. Here are a few examples that I thought turned out well; they are all quite heavily worked over in Photoshop:


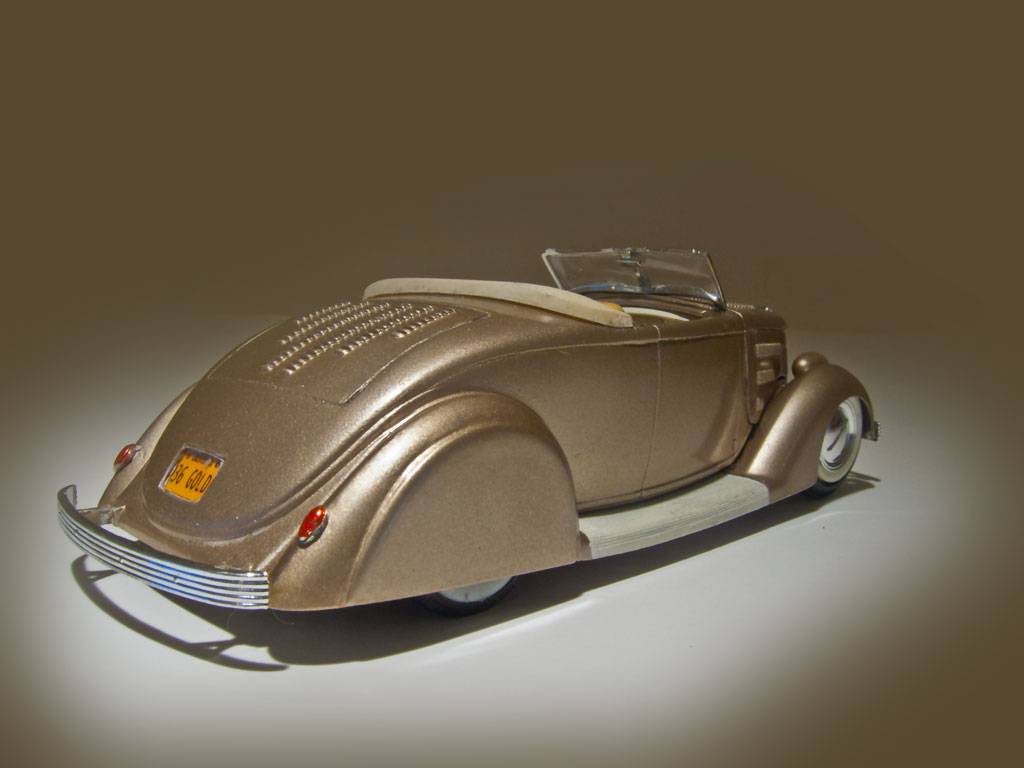
This is a beautiful full-custom '40 Ford Coupe Street Rod my friend Raul Perez did. I have always admired it (when I grow up I want to build models this good...). One day he actually gave it to me! So, of course, I photographed it:


This is a beautiful full-custom '40 Ford Coupe Street Rod my friend Raul Perez did. I have always admired it (when I grow up I want to build models this good...). One day he actually gave it to me! So, of course, I photographed it:


Bernard Kron- I should be working on Models
- Number of posts : 464
Age : 76
Location : Seattle, Washington USA
Registration date : 2013-08-18
Re: Photoshop stuff
![]() by Bernard Kron Sat 15 Oct 2016, 8:43 am
by Bernard Kron Sat 15 Oct 2016, 8:43 am
I decided to create a door logo decal for the model I’m working on right now, a ’34 Ford LoBoy Pickup. I wanted a prototypic hot rod as part of the image, and I can’t think of a more iconic hot rod than the Bob McGee ’32 Ford Highboy roadster. So I went web searching for the proper picture to process in Photoshop for the decal art. Here’s a step by step on the process I used.
First, the original color photo I found.

First thing was to cut out the basic image from the background and convert it to black and white in order to simplify the data for further processing.

Next thing to do was to convert the photo image into something resembling a line drawing. I used the “photocopy” rendering filter to pickout the edges of the highlights in the phot. Then I cleaned up the flat areas by filling them with white.

With something drawing-like I then could fill in the broad areas with color. The upholstery is brown and in this version the body is black.

Here it is in red.

And finally the black version incorporated in the decal art.

Thanx for lookin’,
B.
Bernard Kron- I should be working on Models
- Number of posts : 464
Age : 76
Location : Seattle, Washington USA
Registration date : 2013-08-18
Page 2 of 2 • 1, 2
» Gypsy Queen
» Rat Rod without too much rust
» The Beast and Hero - and some other stuff too
» Shoey's stuff
» Some old stuff of mine
» Rat Rod without too much rust
» The Beast and Hero - and some other stuff too
» Shoey's stuff
» Some old stuff of mine
Page 2 of 2
Permissions in this forum:
You cannot reply to topics in this forum|
|
|