2006 Camaro - Pro Streeter
+4
tezza43
homers customs
allan
Andrew J
8 posters
Page 1 of 1
 2006 Camaro - Pro Streeter
Hey Guys
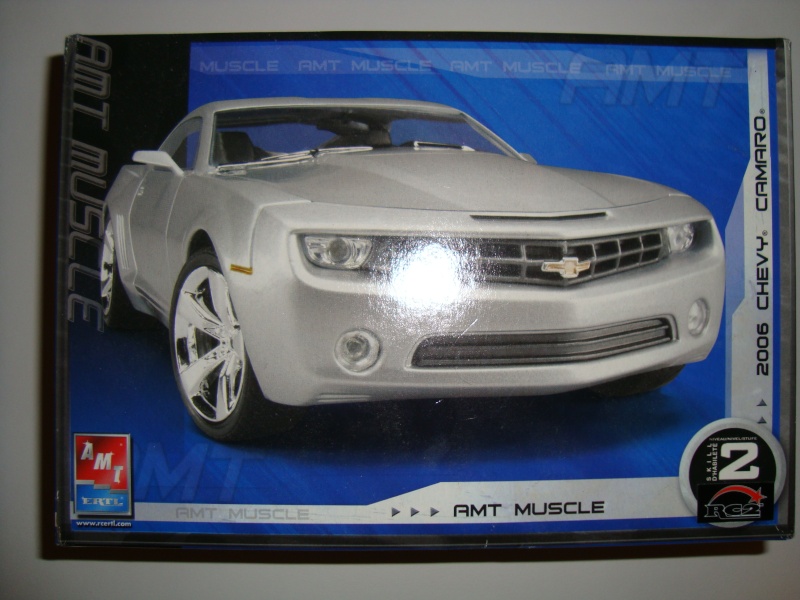
Here is another one that I have in the build. Its the AMT 2006 Camaro.
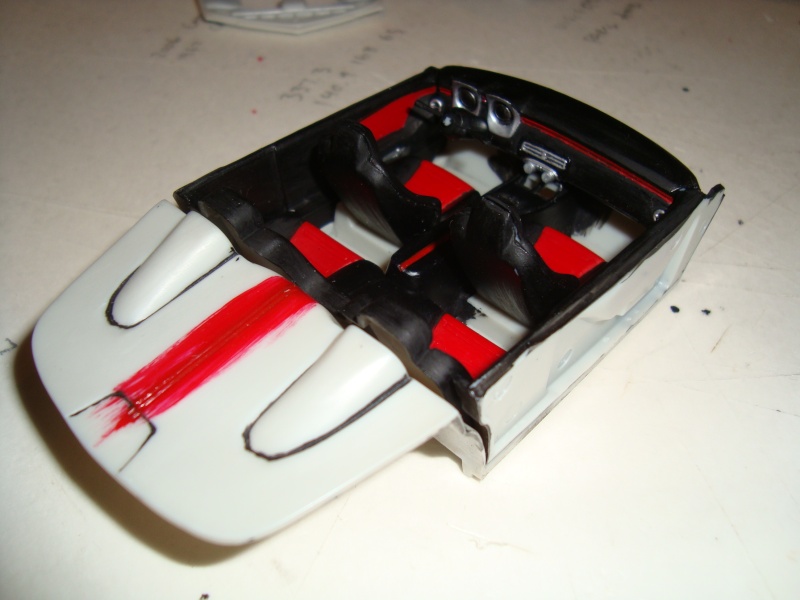
So far I have started the interior and the engine. I want to redo the seats so they are all completely red rather than the two tone black/red. I am not too happy with them. I will flock the floor and I am currently working on the dash as I am not too happy with how it comes with the kit.. As for the engine it is pretty much done. I was considering putting a turbo on it but once I realised the work involved plumbing up a manifold and running the pipework I convinced myself otherwise. The kit has a pretty cool engine bay cover that I will use to keep it nice and tidy.

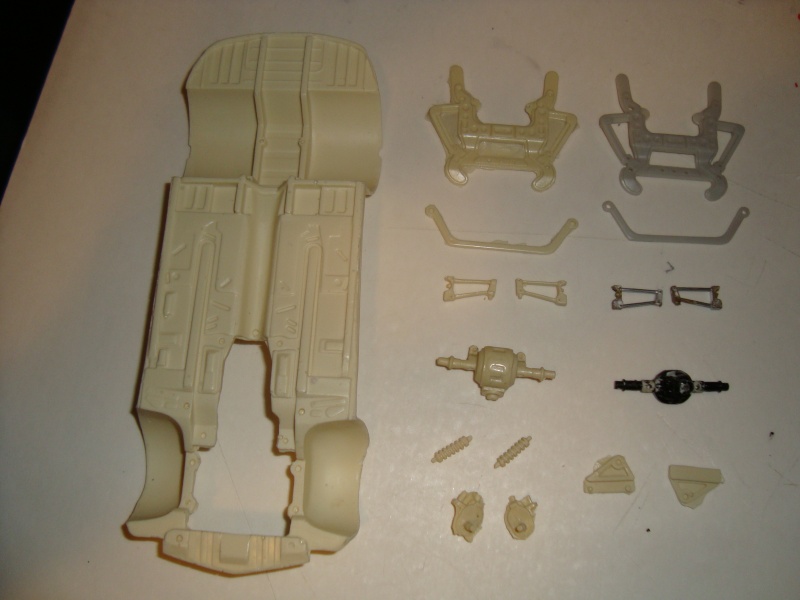
I bought a resin Pro Stock chassis kit for this one off ebay so I can get the right stance and gives me the opportunity to put the big fat wheels and tyres on the back. The parts on the right in the pic are from the kit and my parts box that I will be using instead of the resin ones to make life a little easier on my myself as this is the first time I will be working with resin. I am sure I will find something to use the resin parts on in the future. I already have a destination for the diff. stay tuned......
The following pics are the ones I am sure you want to see. Quick test fit with the chassis and the interior tub all works pretty good although I need to shave a little off the back of the chassis but no big deal. This is the stance I am aiming for also. There is no chance of getting it any lower on the back as I would like without screwing around with the resin which I dont want to do yet. Not with my building experience anyway. The wheels you see in the pic are the ones that I will be using although the centres will be black. They are from a 1:24 diecast car. I am planning on a two tone paint job for this one. Red at the top and Black at the bottom with a silver pinstripe.
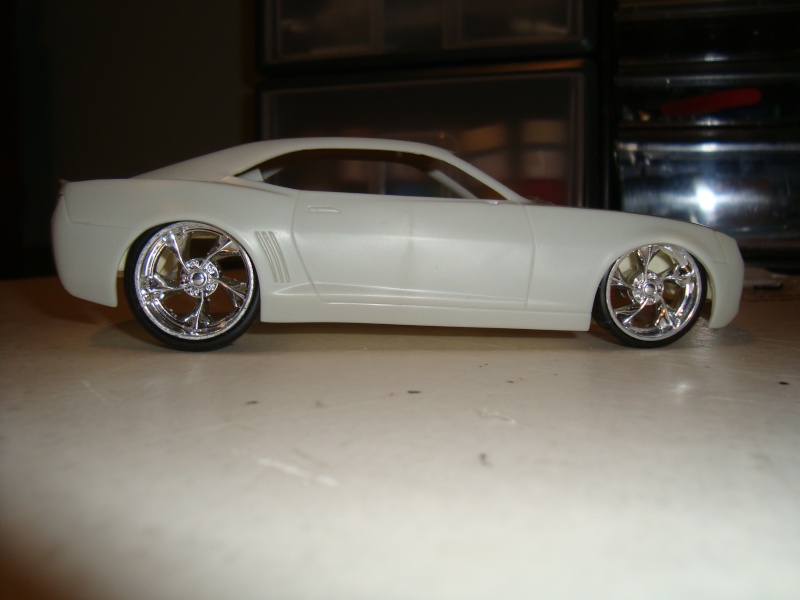
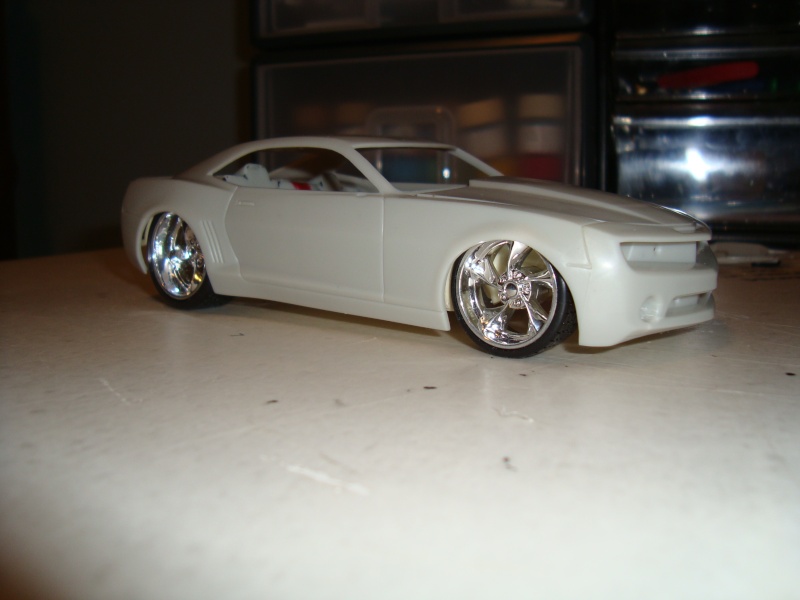

Not sure on body mods yet, but I am thinking of shaving the door handles and filling the flutes in the rear guards and also the little air intake above the grill. Anything more than this and I am asking for trouble and another 12 month build. lol.
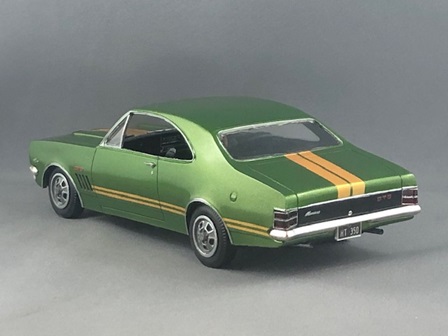
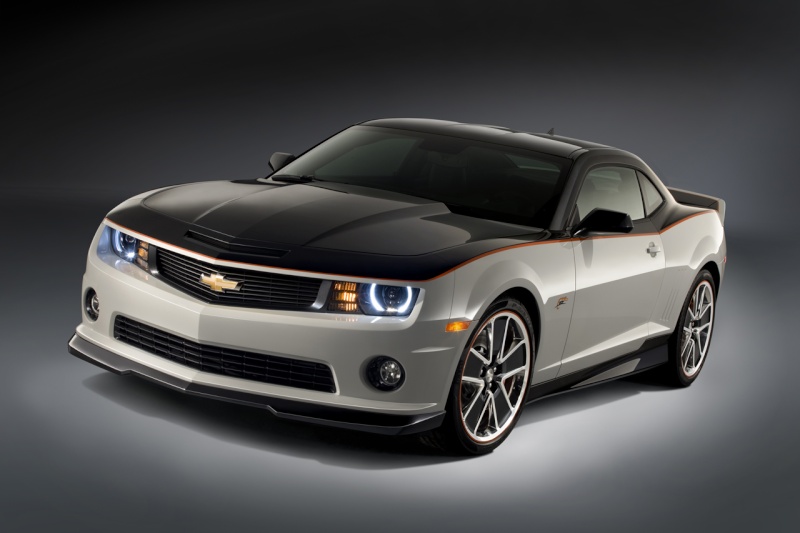
Here is the inspiration for the paint scheme.
I hope you like.
AJ
Here is another one that I have in the build. Its the AMT 2006 Camaro.

So far I have started the interior and the engine. I want to redo the seats so they are all completely red rather than the two tone black/red. I am not too happy with them. I will flock the floor and I am currently working on the dash as I am not too happy with how it comes with the kit.. As for the engine it is pretty much done. I was considering putting a turbo on it but once I realised the work involved plumbing up a manifold and running the pipework I convinced myself otherwise. The kit has a pretty cool engine bay cover that I will use to keep it nice and tidy.


I bought a resin Pro Stock chassis kit for this one off ebay so I can get the right stance and gives me the opportunity to put the big fat wheels and tyres on the back. The parts on the right in the pic are from the kit and my parts box that I will be using instead of the resin ones to make life a little easier on my myself as this is the first time I will be working with resin. I am sure I will find something to use the resin parts on in the future. I already have a destination for the diff. stay tuned......

The following pics are the ones I am sure you want to see. Quick test fit with the chassis and the interior tub all works pretty good although I need to shave a little off the back of the chassis but no big deal. This is the stance I am aiming for also. There is no chance of getting it any lower on the back as I would like without screwing around with the resin which I dont want to do yet. Not with my building experience anyway. The wheels you see in the pic are the ones that I will be using although the centres will be black. They are from a 1:24 diecast car. I am planning on a two tone paint job for this one. Red at the top and Black at the bottom with a silver pinstripe.


Not sure on body mods yet, but I am thinking of shaving the door handles and filling the flutes in the rear guards and also the little air intake above the grill. Anything more than this and I am asking for trouble and another 12 month build. lol.
Here is the inspiration for the paint scheme.

I hope you like.
AJ

Andrew J- I should be working on Models

-
 Number of posts : 407
Age : 42
Location : Sydney
Registration date : 2010-10-28
 Re: 2006 Camaro - Pro Streeter
Will be watching this  turning one of these is to a Pro street is a cool idea,good colour idea too.
 turning one of these is to a Pro street is a cool idea,good colour idea too.

allan- AMCC ADDICT

-
 Number of posts : 10406
Age : 67
Location : East Maitland
Registration date : 2008-03-31
 Re: 2006 Camaro - Pro Streeter
awesom so far will keep an eye on this one

homers customs- Legend Poster

-
 Number of posts : 1193
Age : 47
Location : launceston tasmania
Registration date : 2010-05-08
 Re: 2006 Camaro - Pro Streeter
I enjoy our detailed descriptions of your builds Andrew, as it's much easier to follow what's happening. It's also interesting to see a more modern car being modified to Pro Street status. Keep us posted.


tezza43- AMCC ADDICT

-
 Number of posts : 4318
Age : 81
Location : Mornington, Victoria
Registration date : 2008-03-21
 Re: 2006 Camaro - Pro Streeter
Cheers guys.
Tezza, sometimes I think I go overboard with what I am planning to do but at least I know someone appreciates it. lol
Cheers
AJ
Tezza, sometimes I think I go overboard with what I am planning to do but at least I know someone appreciates it. lol
Cheers
AJ

Andrew J- I should be working on Models

-
 Number of posts : 407
Age : 42
Location : Sydney
Registration date : 2010-10-28
 Re: 2006 Camaro - Pro Streeter
Hi fellas
I have finally been getting a bit done over the last couple of weeks on a few of the builds. I think this place is starting have an influence.
I have re done the interior and made some changes to the dash. The most obvious changes are the red seats, flocked floor and the only other change is a different gear knob from my parts box.
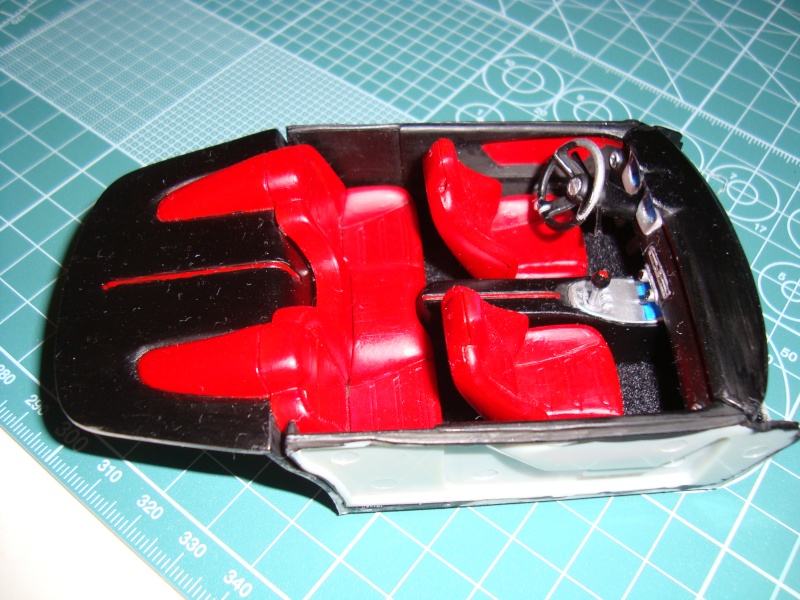
I didnt like the gauges that were moulded into the dash, so I drilled them out and made these ones up.

I have also started on the body mods. Bogged everything I thought would look out of place on a pro tourer, so that meant pretty much everything except for the door and boot gaps. I even bogged all the bumper and side skirt panel gaps to get a one piece effect.
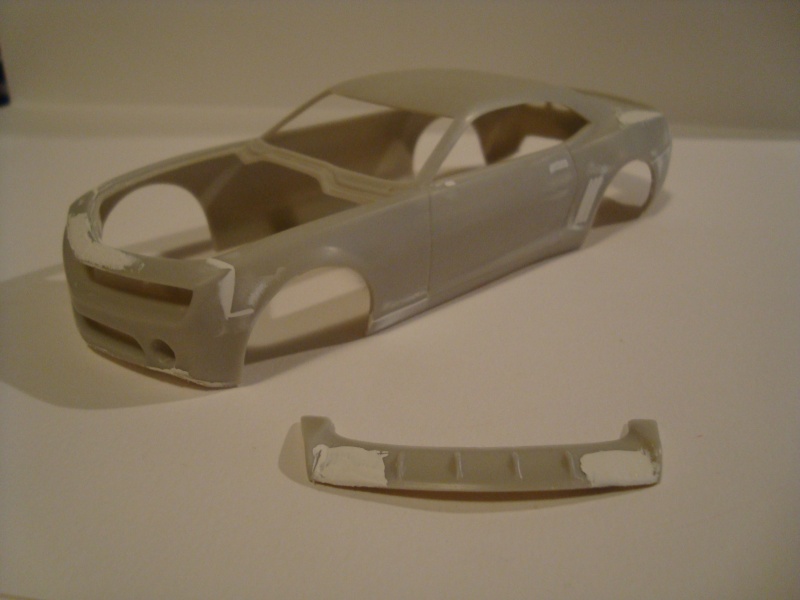
I also filled in the exhaust outlets in the rear diffuser. I am planning on using a set of pipes that dump before the diff so didnt see a point in having holes in rear end for no reason.
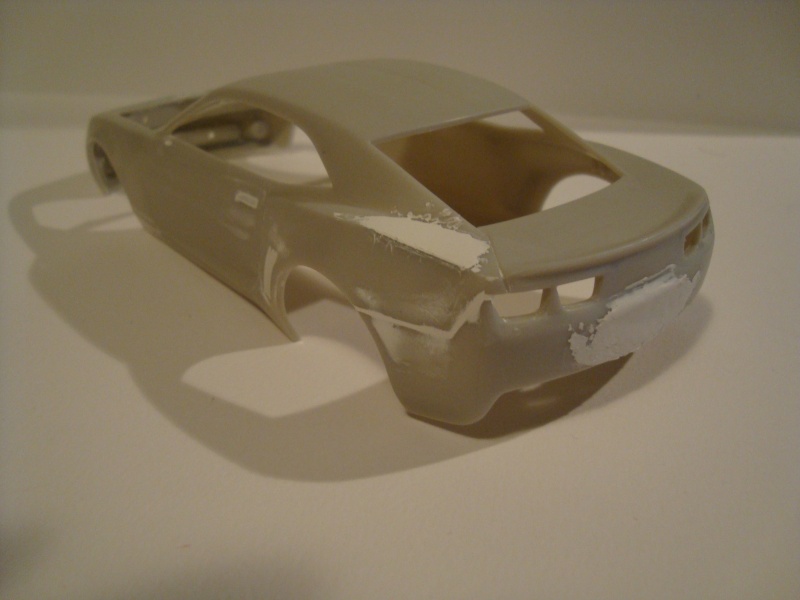
Just need to do a final sand get some primer on it to make sure it all looks ok. so far so good.
Let me know what you think.
Cheers
AJ
I have finally been getting a bit done over the last couple of weeks on a few of the builds. I think this place is starting have an influence.
I have re done the interior and made some changes to the dash. The most obvious changes are the red seats, flocked floor and the only other change is a different gear knob from my parts box.

I didnt like the gauges that were moulded into the dash, so I drilled them out and made these ones up.

I have also started on the body mods. Bogged everything I thought would look out of place on a pro tourer, so that meant pretty much everything except for the door and boot gaps. I even bogged all the bumper and side skirt panel gaps to get a one piece effect.

I also filled in the exhaust outlets in the rear diffuser. I am planning on using a set of pipes that dump before the diff so didnt see a point in having holes in rear end for no reason.

Just need to do a final sand get some primer on it to make sure it all looks ok. so far so good.
Let me know what you think.
Cheers
AJ

Andrew J- I should be working on Models

-
 Number of posts : 407
Age : 42
Location : Sydney
Registration date : 2010-10-28
 Re: 2006 Camaro - Pro Streeter
Dude Thats Evil!! cant wait to see this one in the showroom!

Bones

Bones

chopper- Glue Sniffer

-
 Number of posts : 74
Age : 43
Location : bonbeach,melbourne
Registration date : 2011-04-17
 Re: 2006 Camaro - Pro Streeter
Hi guys
While I was at it with the 32, I thought I would play around with this one too.
Not much done. Rubbed all the bog back on the body which I had to redo because I had left it without an undercoat. It had all shrunk and left sink holes everywhere. No biggy but rubbing it all back including the putty that had been sitting on it for the last 11 months was a bit of a pain.
I have given it an undercoat. I am pretty happy with how it has turned out. Door handles, flutes in the rear guards, fuel filler, scoop in front of the bonnet, bumper gap lines and rear number plate recess have all been deleted.
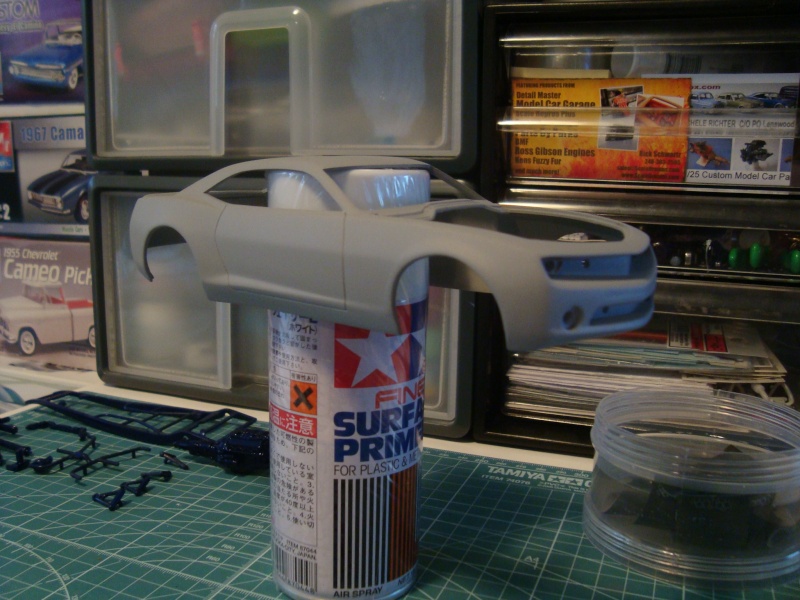
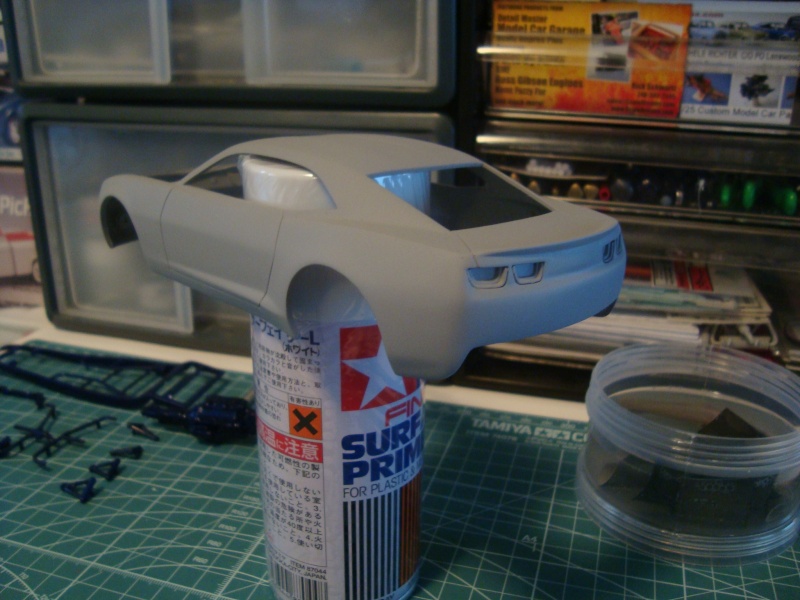
I also filled in the exhaust outlets in the rear pan. This was a bit tricky but I think I nailed it.
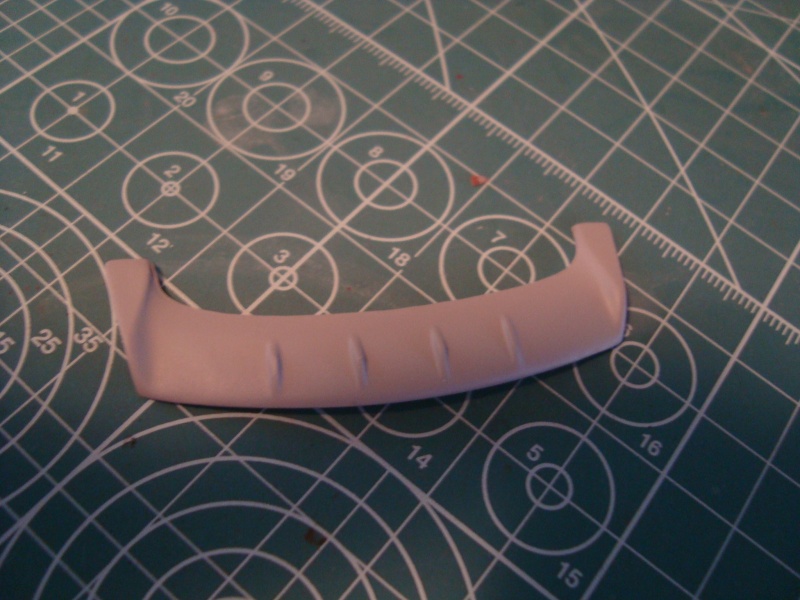
The resin tubbed chassis wasnt as good as I thought on closer inspection. Shape and form was fine, but there ended up being a gazillion pin holes in areas that were hard to get to. Pretty much in every crease and fold line. None in any of the smooth areas. Go figure. I had a good crack at filling these spots and have given it an undercoat. I will give it another good looking over tomorrow.
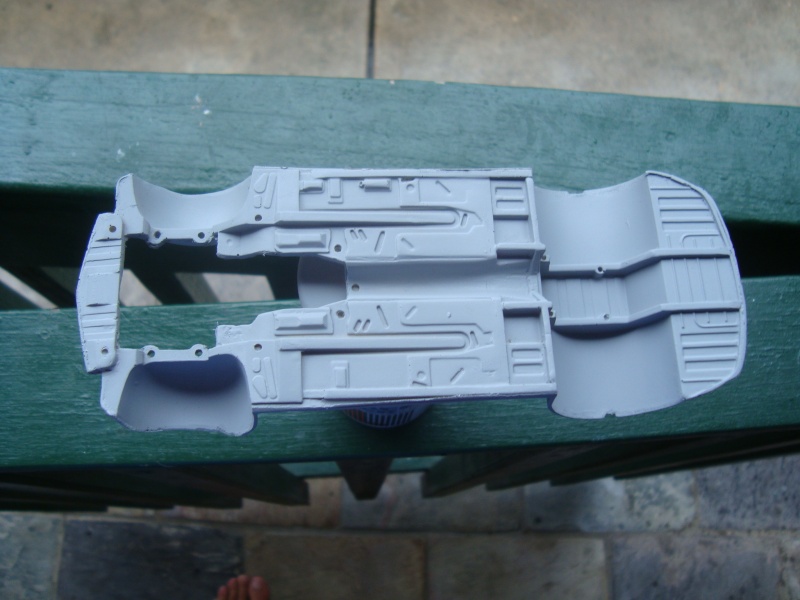
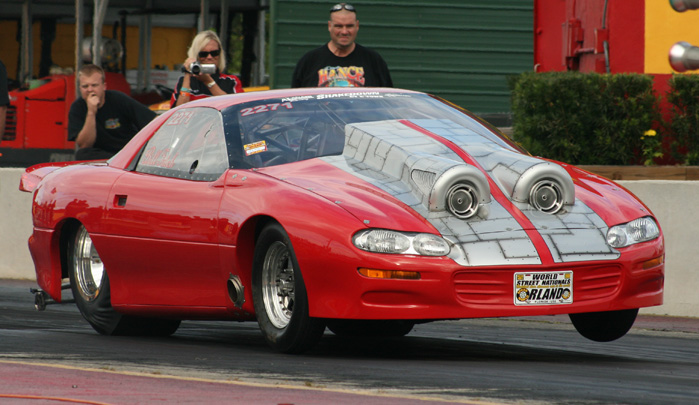
I have also changed my mind on the engine again and have decided to go twin turbo with this one, so I am currently trying my best to scratchbuild a manifold and intake for this purpose which is a new exercise for me. I probably should be practising the basics first but I am a glutton for punishment. I am using the kit motor because the chassis is made to suit this engine as it was casted with the original front part of the kit chassis grafted to some sort of pro stock rear section. I found some exhaust manifolds in my parts box for the turbos which will save me some hassle. Once I have some progress builds of the manifold and intake and a mock up of the engine, I will post them up. Since I am going the twin turbo route, I have also decided to run the exhausts out the front guards behind the front wheels, turbo drag car style like below although my turbos wont be sticking out as far as this crazy nut has done.
As for the interior, I have decided to go a bit crazy here as well. I will be using the kit interior tub but I am going to chop the rear seat section out to show the tubs and fit a fuel cell, battery box, fuel pumps etc. I am going to have a go at scratching a roll cage out of evergreen tube for this one too. Since there wont be a rear seat in this one, I figured that the kit front seats wont suffice for a car that essentially would be a 1200+ hp monster in 1:1 so I am using a set of buckets from an AMT Pro Street Superbee. I am yet to do any of this work yet, but thought I would share my thoughts and bore you a little bit more.
I really need to learn how to abbreviate alot of my postings, I know.
Anyway, I have decided to not do anything more to this one besides the engine until I get the 32 finished.
Wish me luck and let me know your thoughts.
Cheers
AJ
While I was at it with the 32, I thought I would play around with this one too.
Not much done. Rubbed all the bog back on the body which I had to redo because I had left it without an undercoat. It had all shrunk and left sink holes everywhere. No biggy but rubbing it all back including the putty that had been sitting on it for the last 11 months was a bit of a pain.
I have given it an undercoat. I am pretty happy with how it has turned out. Door handles, flutes in the rear guards, fuel filler, scoop in front of the bonnet, bumper gap lines and rear number plate recess have all been deleted.


I also filled in the exhaust outlets in the rear pan. This was a bit tricky but I think I nailed it.

The resin tubbed chassis wasnt as good as I thought on closer inspection. Shape and form was fine, but there ended up being a gazillion pin holes in areas that were hard to get to. Pretty much in every crease and fold line. None in any of the smooth areas. Go figure. I had a good crack at filling these spots and have given it an undercoat. I will give it another good looking over tomorrow.

I have also changed my mind on the engine again and have decided to go twin turbo with this one, so I am currently trying my best to scratchbuild a manifold and intake for this purpose which is a new exercise for me. I probably should be practising the basics first but I am a glutton for punishment. I am using the kit motor because the chassis is made to suit this engine as it was casted with the original front part of the kit chassis grafted to some sort of pro stock rear section. I found some exhaust manifolds in my parts box for the turbos which will save me some hassle. Once I have some progress builds of the manifold and intake and a mock up of the engine, I will post them up. Since I am going the twin turbo route, I have also decided to run the exhausts out the front guards behind the front wheels, turbo drag car style like below although my turbos wont be sticking out as far as this crazy nut has done.

As for the interior, I have decided to go a bit crazy here as well. I will be using the kit interior tub but I am going to chop the rear seat section out to show the tubs and fit a fuel cell, battery box, fuel pumps etc. I am going to have a go at scratching a roll cage out of evergreen tube for this one too. Since there wont be a rear seat in this one, I figured that the kit front seats wont suffice for a car that essentially would be a 1200+ hp monster in 1:1 so I am using a set of buckets from an AMT Pro Street Superbee. I am yet to do any of this work yet, but thought I would share my thoughts and bore you a little bit more.
I really need to learn how to abbreviate alot of my postings, I know.
Anyway, I have decided to not do anything more to this one besides the engine until I get the 32 finished.
Wish me luck and let me know your thoughts.
Cheers
AJ

Andrew J- I should be working on Models

-
 Number of posts : 407
Age : 42
Location : Sydney
Registration date : 2010-10-28
 Re: 2006 Camaro - Pro Streeter
Mate I like this thing. To look right a model (or car) has to have the right attitude & you have hit it. Can you get a wide body kit for these things? Don't shorten you notes. Too often we miss a detail that is worth learning about either so we can admire it or learn from it. Looking forward to the finished beast
Nota- I should be working on Models

-
 Number of posts : 193
Age : 70
Location : Maitland
Registration date : 2011-12-02
 Re: 2006 Camaro - Pro Streeter
great work- this is going to look awesome.

silverfox- Legend Poster

-
 Number of posts : 1181
Age : 72
Location : hunter valley
Registration date : 2012-02-23
 Re: 2006 Camaro - Pro Streeter
looking good so far 


allan- AMCC ADDICT

-
 Number of posts : 10406
Age : 67
Location : East Maitland
Registration date : 2008-03-31
 Re: 2006 Camaro - Pro Streeter
Nice!! will look mean when it's finished, I'll be watching..

RetrospectKustoms- AMCC ADDICT

-
 Number of posts : 2475
Age : 44
Location : Barossa Valley, So Aus
Registration date : 2011-12-14
 Re: 2006 Camaro - Pro Streeter
Nota wrote:Mate I like this thing. To look right a model (or car) has to have the right attitude & you have hit it. Can you get a wide body kit for these things? Don't shorten you notes. Too often we miss a detail that is worth learning about either so we can admire it or learn from it. Looking forward to the finished beast
Cheers mate. Im not sure about a wide body conversion, although I did contemplate making one, but most of the custom stuff I am doing this I am doing myself, so I am not too keen on overwhelming myself too much.
Thanks for the comments fellas.
Cheers
AJ

Andrew J- I should be working on Models

-
 Number of posts : 407
Age : 42
Location : Sydney
Registration date : 2010-10-28
 Similar topics
» 2006 Camaro
» 2006 Monaro
» fj pro streeter
» 1954 ish? Maserati "PRO STREETER"
» '63 Impala Tuff Streeter OPINIONS PLEASE
» 2006 Monaro
» fj pro streeter
» 1954 ish? Maserati "PRO STREETER"
» '63 Impala Tuff Streeter OPINIONS PLEASE
Page 1 of 1
Permissions in this forum:
You cannot reply to topics in this forum