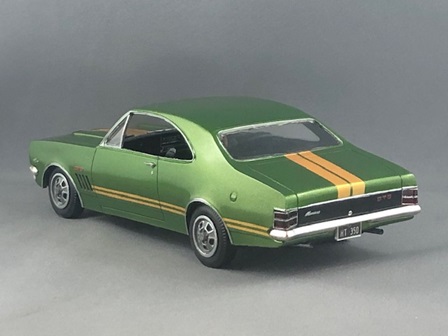
XE Falcon S-Pack ** so anyway 8 years later- **
+108
Deaf as
nosaj76
Antwon
Jerry Ol'55
Torry
blatdriver
window
MM
wizz83
frank
codea
VintageJDM
BluBlood
Johno
Dino84
Jade043
ozibimmer
frozono
Brootal
luchoteam
Michaelw
Iansmodels
Murphy51
ozmodeler
silverfox
Yugster
70cudatj
bandidomotorsport
Stuntman Mike
bluedog
cdansie
spector
Siggs
otherunicorn
The Bronze
Mustang_67
Yahshu
RetrospectKustoms
Nota
dufasdave
Tubman
hqmon
Carps
Bigdaddy0
Shunter
baZOOKa
Deadly
SPIKE426
ToranaDan
ausbuilder
DeeCee
RS2000
fanof124
Bantoft
stevegt738
Adam Clark
stump
michael
ratsmann
southy
zenrat
corrupted
Captain BF
ADAMTEP
aussie muscle
xm-221
PTEAZA
modelmaker
Geoff
gxcoupe
doorslammerfan
ProBee
HDT143
mopar68
HAMMOSZED
Tillerman
mgy125
Kane
dv8v8
Clutch
spiritman
checkmate
Alfaholic
The Goose
Bear
harley fan
Andrew J
con$truktive
AJ
truges
micsmav
allan
Chris
grey six
fat141
stoongee
bennyg
miwi
Bryce
ChevyFan
tezza43
sports850
slowlylearning
ourcircus
Shoey
Marshie
Paul
ShawnS
112 posters
Page 35 of 36
Page 35 of 36 •  1 ... 19 ... 34, 35, 36
 Re: XE Falcon S-Pack ** so anyway 8 years later- **
Brilliant work! 


Carps- AMCC ADDICT

-
 Number of posts : 3168
Age : 34
Location : Could be anywhere.
Registration date : 2008-03-21
 Re: XE Falcon S-Pack ** so anyway 8 years later- **
I fade the tires with a light wash of Dust (off-white) acrylic that came in my weathering set. it gives them a slight grey colour that seems about right. alternatively a wash of black and dark brown to give it a road grime look.
very bad tires:

Grimy tires:

very bad tires:

Grimy tires:

I find that hard to believe. i've done plenty of convincing weathered cars, but never able to get a flawless showroom look.DeeCee wrote: i know that weathering is a lot harder than making the buggers shine, great job mate.
 Re: XE Falcon S-Pack ** so anyway 8 years later- **
 I'm lost for words
mouse- I should be working on Models

-
 Number of posts : 174
Age : 52
Location : qld australia
Registration date : 2012-01-25
 Re: XE Falcon S-Pack ** so anyway 8 years later- **
Happy New year all.
Still pondering the tyre weathering for the trailer but there is more work on the body to show you.
Lets start with the interior roof.
I made the sun visors, light and grab handles.

It's been a long time since I showed you a how-to for anything so here's a quickie for making many of the same type of flat part.
Cut the styrene pieces to slightly larger than the final size.

Using small drops of super glue, glue the pieces to each other.

Carve, grind and sand the block to the required shape.


Separate the parts with a sharp blade then clean them up as required.
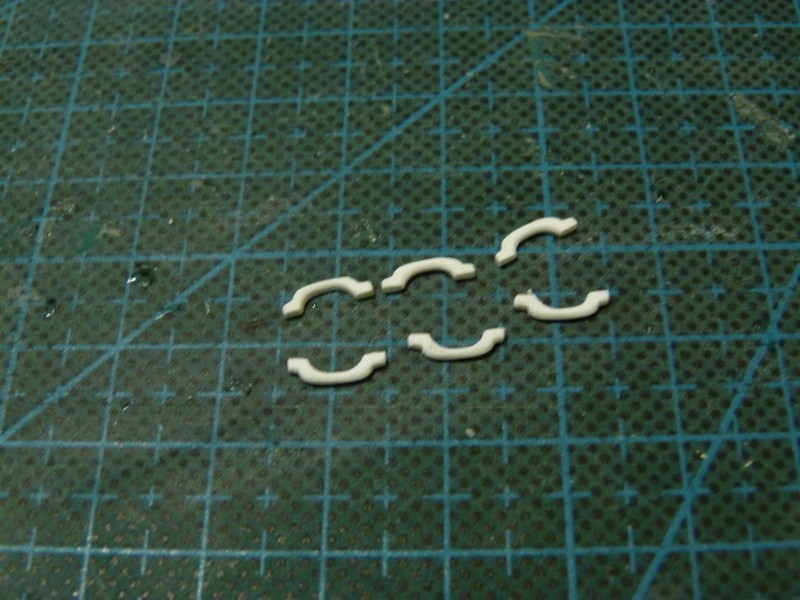
I did the sun visors in the same way.
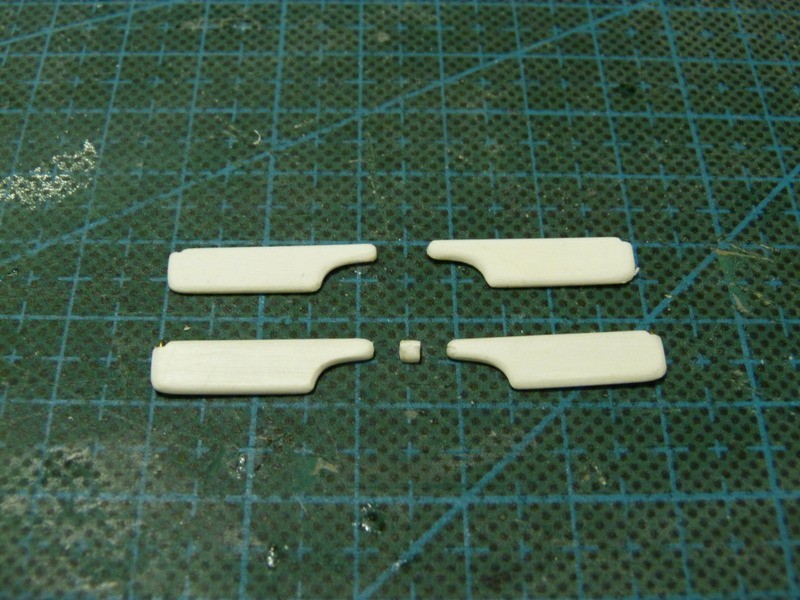
The next challenge was to get the window glass to sit closer to the outside of the window frame. The only way to do this was to alter the thickness of the pillars around the inside of the frames. I also decided to add a filler piece inside to create a channel for the clear styrene sheet to sit in.


Ditto for the rear windows.


The clear styrene window pieces shaped and ready to go. I decided to have both rear passenger windows fully wound up, the front passenger window wound down 2/3rds and the drivers window fully wound down.


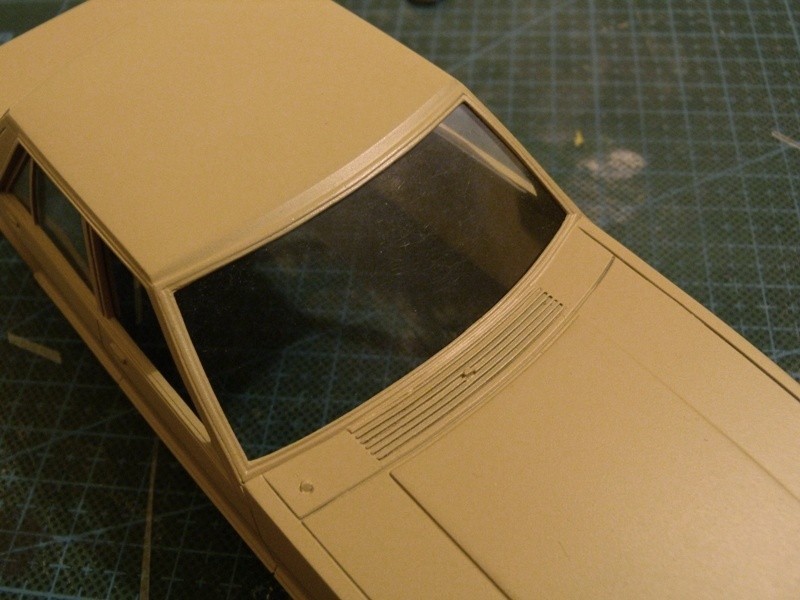

Even after 4 years things still turn to crap. I had to strip and re-spray the primer on the body after it went soft when I had to handle the body frequently during the work on the interior. All went well until an unexpected gust of wind (on a calm day) sent the body on a 3ft downwards trip to the cement path causing damage to the rear trim around the tail lights.


Here's how I fixed that. I stuck some Tamiya tape underneath the tail light cut out and mixed up some talc and superglue and slapped it on to the damaged area.
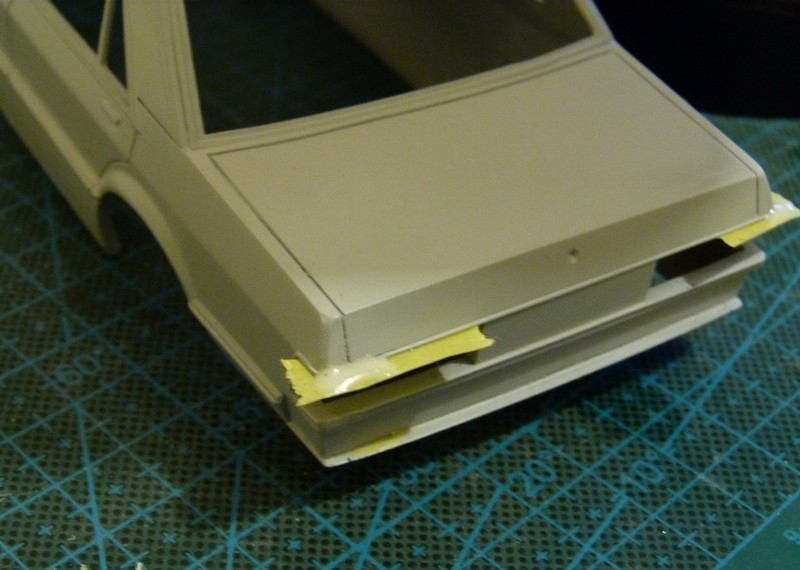
When the glue set I removed the tape,

and shaped the area to suit.
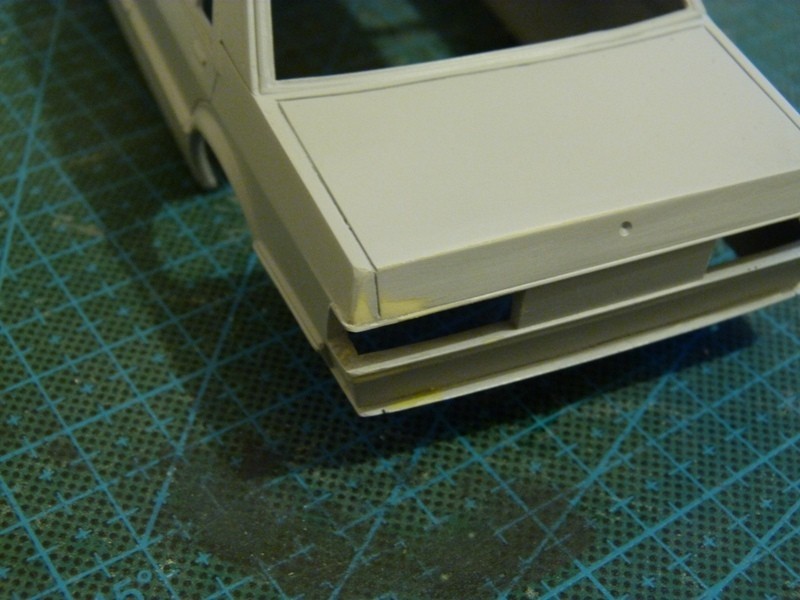
Good as gold
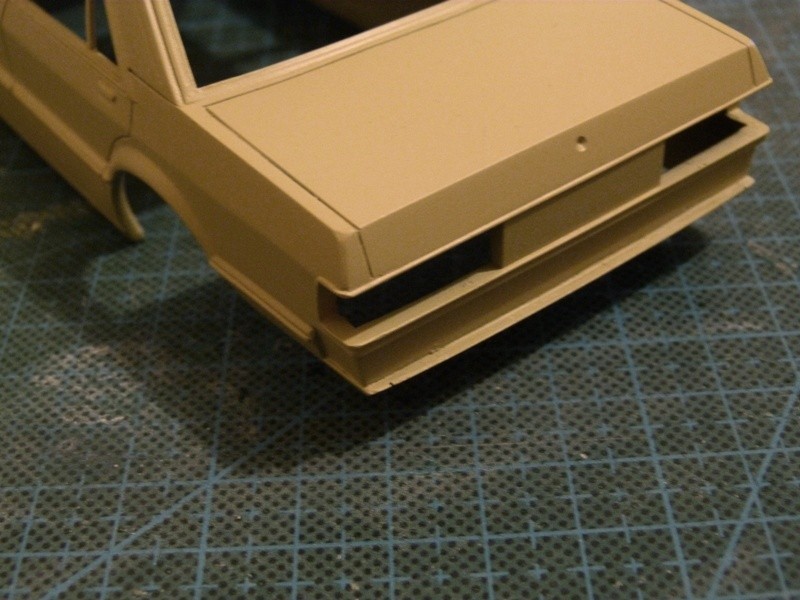
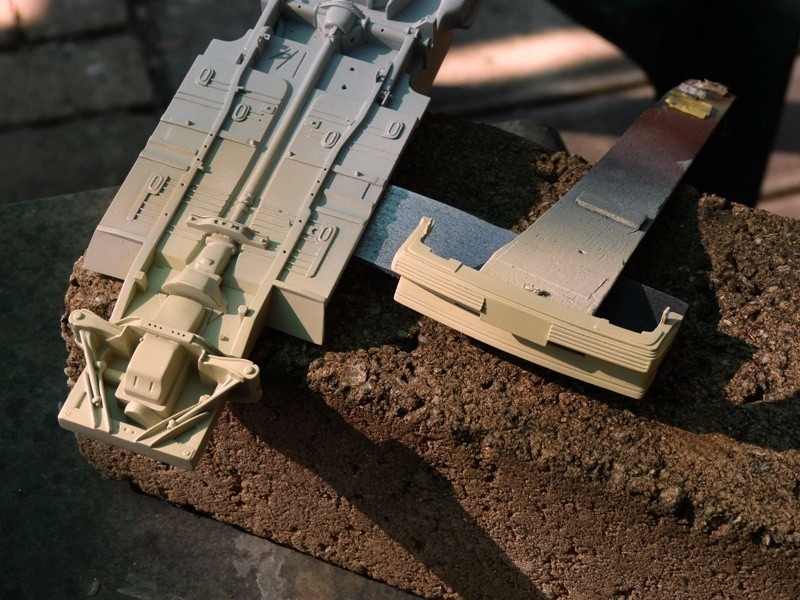
I hit the body with Tamiya TS-46 light sand for the base coat.

Mixed up some beige using Tamiya TS-7 Racing white tinted with TS-16 Yellow and AS-22 Dark earth to make a pale caramel colour.

The first coat was sprayed today.
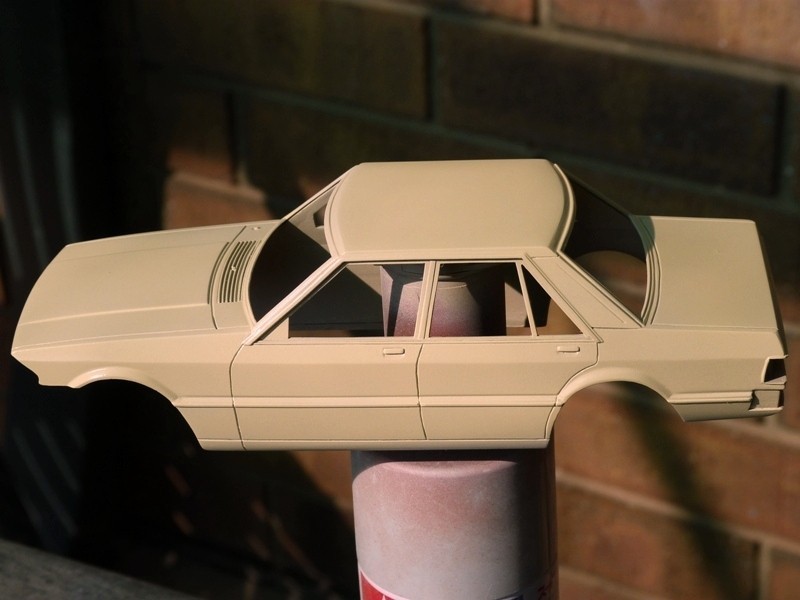

In case you were wondering what Bahama beige looks like here are some samples.
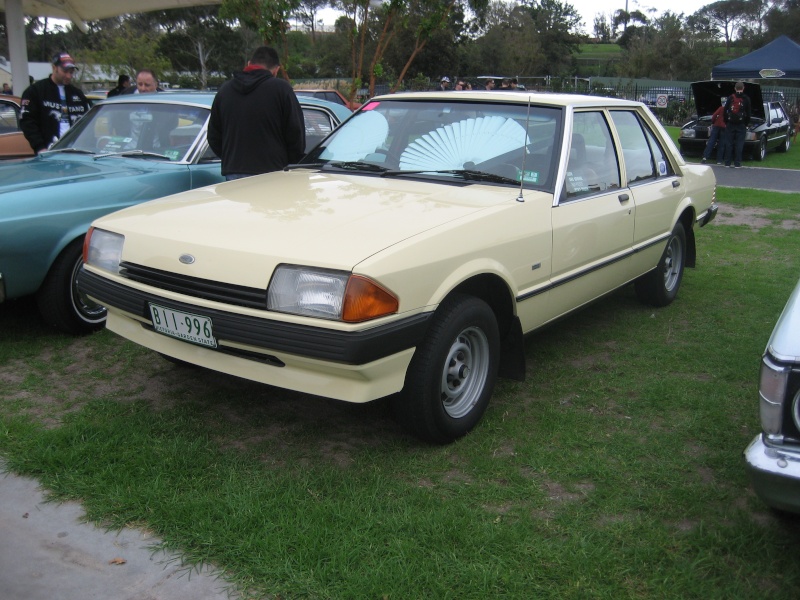
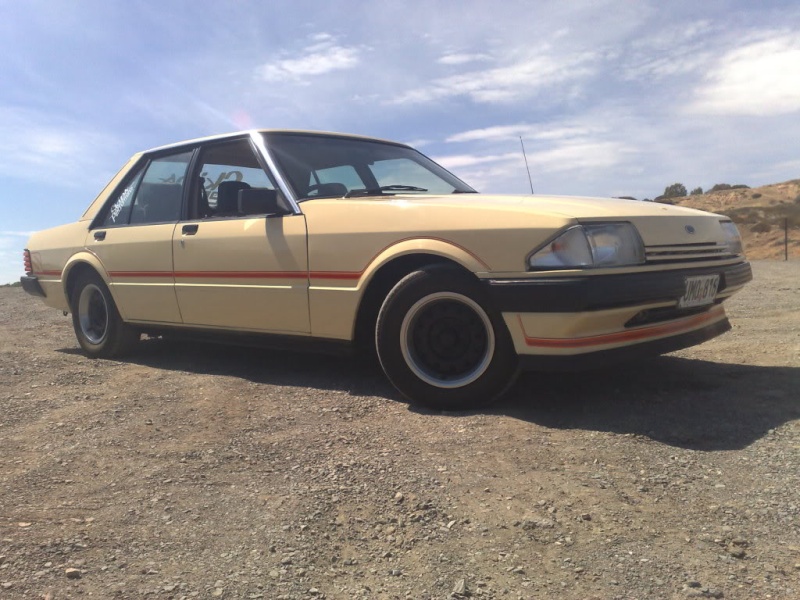
That's it for now. Very happy to finally get that first coat of paint onto the body after such a long wait.
CheersSS
Still pondering the tyre weathering for the trailer but there is more work on the body to show you.
Lets start with the interior roof.
I made the sun visors, light and grab handles.

It's been a long time since I showed you a how-to for anything so here's a quickie for making many of the same type of flat part.
Cut the styrene pieces to slightly larger than the final size.

Using small drops of super glue, glue the pieces to each other.

Carve, grind and sand the block to the required shape.


Separate the parts with a sharp blade then clean them up as required.

I did the sun visors in the same way.

The next challenge was to get the window glass to sit closer to the outside of the window frame. The only way to do this was to alter the thickness of the pillars around the inside of the frames. I also decided to add a filler piece inside to create a channel for the clear styrene sheet to sit in.


Ditto for the rear windows.


The clear styrene window pieces shaped and ready to go. I decided to have both rear passenger windows fully wound up, the front passenger window wound down 2/3rds and the drivers window fully wound down.


Even after 4 years things still turn to crap. I had to strip and re-spray the primer on the body after it went soft when I had to handle the body frequently during the work on the interior. All went well until an unexpected gust of wind (on a calm day) sent the body on a 3ft downwards trip to the cement path causing damage to the rear trim around the tail lights.


Here's how I fixed that. I stuck some Tamiya tape underneath the tail light cut out and mixed up some talc and superglue and slapped it on to the damaged area.

When the glue set I removed the tape,

and shaped the area to suit.

Good as gold

I hit the body with Tamiya TS-46 light sand for the base coat.

Mixed up some beige using Tamiya TS-7 Racing white tinted with TS-16 Yellow and AS-22 Dark earth to make a pale caramel colour.

The first coat was sprayed today.


In case you were wondering what Bahama beige looks like here are some samples.


That's it for now. Very happy to finally get that first coat of paint onto the body after such a long wait.
CheersSS
Last edited by ShawnS on Tue 06 Jan 2015, 4:06 pm; edited 1 time in total

ShawnS- I Love this place

-
 Number of posts : 565
Age : 50
Location : South Australia
Registration date : 2009-12-22
 Re: XE Falcon S-Pack ** so anyway 8 years later- **
AWESOME WORK SHAUN!!!!
This build has been mind blowing all the way through, but to see it looking like the real thing,
at the end of the build,........ just AWESOME!!!!!
This build has been mind blowing all the way through, but to see it looking like the real thing,
at the end of the build,........ just AWESOME!!!!!

DeeCee- AMCC ADDICT

-
 Number of posts : 3772
Age : 58
Location : Launceston Tas
Registration date : 2011-08-07
 Re: XE Falcon S-Pack ** so anyway 8 years later- **
WOW great colour on it. 


allan- AMCC ADDICT

-
 Number of posts : 10406
Age : 67
Location : East Maitland
Registration date : 2008-03-31
 Re: XE Falcon S-Pack ** so anyway 8 years later- **
DeeCee wrote:AWESOME WORK SHAUN!!!!
This build has been mind blowing all the way through, but to see it looking like the real thing,
at the end of the build,........ just AWESOME!!!!!
Thanks Dale but she's nowhere near the end of the build yet. With 2 of the buggers under construction I figure it's about 1/3 distance at the moment.

ShawnS- I Love this place

-
 Number of posts : 565
Age : 50
Location : South Australia
Registration date : 2009-12-22
 Re: XE Falcon S-Pack ** so anyway 8 years later- **
I want to be like you!!! And I was feeling good for modifying one of revell´s prepainted camaros... You´ve got a gift!!! Keep up the hard work!!! hope to see it finished soon, I haven´t read all of the comments, but how much time have you been working on this?
 Re: XE Falcon S-Pack ** so anyway 8 years later- **
Great work Shawn, this is just unbelievable! Words fail me!! 

Deaf as- Legend Poster

-
 Number of posts : 1353
Age : 55
Location : Clergate
Registration date : 2013-11-20
 Re: XE Falcon S-Pack ** so anyway 8 years later- **
Gabosamu wrote:, I haven´t read all of the comments, but how much time have you been working on this?
Thanks for the kind words Gabosamu. The first post of this thread was in April 2011 but I started it late March 2011, so it's been four long years so far.

ShawnS- I Love this place

-
 Number of posts : 565
Age : 50
Location : South Australia
Registration date : 2009-12-22
 Re: XE Falcon S-Pack ** so anyway 8 years later- **
ShawnS wrote:Gabosamu wrote:, I haven´t read all of the comments, but how much time have you been working on this?
Thanks for the kind words Gabosamu. The first post of this thread was in April 2011 but I started it late March 2011, so it's been four long years so far.
It´s been worth the time, it looks really amazing, I´ve been stuck also with "my return" to scale models, I bought that camaro on december 23rd and I´m barely 50% of what I want it to look like, You have a looooooot more patience than me, I don´t know if I can wait that long on a single built, hope you´re painting some other models, but I repeat it´s been worth every hour on it.
 Re: XE Falcon S-Pack ** so anyway 8 years later- **
Hows this one going 


allan- AMCC ADDICT

-
 Number of posts : 10406
Age : 67
Location : East Maitland
Registration date : 2008-03-31
 Re: XE Falcon S-Pack ** so anyway 8 years later- **
uuhhhhggg. Don't ask. It's been a bastard of a summer. I got as far as finishing the final colour coats and laying down the first clear coat and after that I found that every time I was free to do the final clear coats the weather wasn't ready for me and I had to abandon any painting plans. I think we have had the longest run of windy days here in Southern Adelaide on top of the regular hot and/or humid days that we usually get.
I have found it fairly hard to get motivated to kick off again but I think it's just a temporary setback. The project isn't abandoned it's just slightly stalled.
CheersSS
I have found it fairly hard to get motivated to kick off again but I think it's just a temporary setback. The project isn't abandoned it's just slightly stalled.
CheersSS

ShawnS- I Love this place

-
 Number of posts : 565
Age : 50
Location : South Australia
Registration date : 2009-12-22
 Re: XE Falcon S-Pack ** so anyway 8 years later- **
Love the tips and tricks mate about the glue and talc!..Pardon my ignorance but what is the theory behind mixing Windex with your paint? Keep up the good work.

nosaj76- I should be working on Models

-
 Number of posts : 104
Age : 48
Location : Adelaide, South Australia
Registration date : 2012-11-01
 Re: XE Falcon S-Pack ** so anyway 8 years later- **
nosaj76 wrote:Love the tips and tricks mate about the glue and talc!..Pardon my ignorance but what is the theory behind mixing Windex with your paint? Keep up the good work.
I was surfing through youtube trying to find tips and tricks for airbrushing acrylic paints and I stumbled across a guy who was using Windex to thin the acrylics he was using. As I didn't have any acrylic thinners on hand I thought I'd give it a go. It's not for every situation but it worked for the gold paint I used on the trailer. Pretty handy for cleaning the airbrush too.

ShawnS- I Love this place

-
 Number of posts : 565
Age : 50
Location : South Australia
Registration date : 2009-12-22
 Re: XE Falcon S-Pack ** so anyway 8 years later- **
I seen that too using windex for airbrushing acrylic, I picked up some Italeri acrylic paint its made by Vallejo. Found metho works too with both paints and is cheaper to use. Oh if you make a mistake with the paint it washes off with metho too. I use metho with the small bottles of Tamiya acrylic too. Oh one thing to watch for if you are airbrushing with metho as a thinners on a cold day you can end up with metho freezing in the paint and it goes patchy and airbrush can freeze,

allan- AMCC ADDICT

-
 Number of posts : 10406
Age : 67
Location : East Maitland
Registration date : 2008-03-31
 Re: XE Falcon S-Pack ** so anyway 8 years later- **
Thinning acrylics with metho makes them dry real quick which may be good or bad depending on what you're doing.
_________________
Fred
Badda Bing Badda Bang

zenrat- Moderator
-
 Number of posts : 6842
Age : 56
Location : Dank Northern slopes of Mount Martha, Vic
Registration date : 2008-07-17

allan- AMCC ADDICT

-
 Number of posts : 10406
Age : 67
Location : East Maitland
Registration date : 2008-03-31
 Re: XE Falcon S-Pack ** so anyway 8 years later- **
You are truly in for the long haul on this project. It is getting closer with every post. Hang in there. You do nice work.
mgy125- AMCC ADDICT

-
 Number of posts : 1679
Age : 88
Location : Moldovia
Registration date : 2010-06-24
 Re: XE Falcon S-Pack ** so anyway 8 years later- **
How's it going with this one. 


allan- AMCC ADDICT

-
 Number of posts : 10406
Age : 67
Location : East Maitland
Registration date : 2008-03-31
 Re: XE Falcon S-Pack ** so anyway 8 years later- **
The break from the build has collided with the usual winter break to form a super black hole of bugger all.  So the answer to your question Allan is-- not much mate. I've not really been doing anything model related lately, just not in the zone at the moment.
 So the answer to your question Allan is-- not much mate. I've not really been doing anything model related lately, just not in the zone at the moment.
ShawnS- I Love this place

-
 Number of posts : 565
Age : 50
Location : South Australia
Registration date : 2009-12-22
 Re: XE Falcon S-Pack ** so anyway 8 years later- **
Ok than will be watching and waiting for a up date in time.

allan- AMCC ADDICT

-
 Number of posts : 10406
Age : 67
Location : East Maitland
Registration date : 2008-03-31
 Re: XE Falcon S-Pack ** so anyway 8 years later- **
Stay with it Shawn,
I'm sure I'm not the only one who has been inspired by this monumental project. I re-read it the other night just because it was here.
We will just have to wait for the seasons to change, and the mighty Falcon will once again spread it's wings.
That was a bit deep wasn't it lol
Ian
I'm sure I'm not the only one who has been inspired by this monumental project. I re-read it the other night just because it was here.
We will just have to wait for the seasons to change, and the mighty Falcon will once again spread it's wings.
That was a bit deep wasn't it lol
Ian
min16i- AMCC NEWBIE!

-
 Number of posts : 35
Age : 54
Location : Sunny Downtown Goulburn NSW
Registration date : 2013-04-01
 Re: XE Falcon S-Pack ** so anyway 8 years later- **
Hi again.
So here I sit in the mother(f****r) of all slumps and I began pondering the future of this build and I've started thinking that perhaps I'm going about it all in the wrong way. Maybe I'm stalled because I am too personally attached to the 1:1 cars I am trying to replicate and the pressure I am putting on myself to do my memories justice is putting the bigger picture out of focus. What do I do about it ? Which direction should I head ? I started thinking about a slump buster build. What should I build ? More thinking..


I opened a box the other day wondering why it was there and what was in it and I found the third XE Falcon body/chassis and complete set of parts that I cast a couple of years ago and I was thinking maybe I should bust my slump with a Falcon that I am not attached to. Perhaps I should keep it simple without too many extra details and concentrate on the often forgotten skill of finishing a model essentially as a test run for finishing the two main builds.
I haven't made a final decision yet just thinking out loud.
Your thoughts as always are welcome.
CheersSS
So here I sit in the mother(f****r) of all slumps and I began pondering the future of this build and I've started thinking that perhaps I'm going about it all in the wrong way. Maybe I'm stalled because I am too personally attached to the 1:1 cars I am trying to replicate and the pressure I am putting on myself to do my memories justice is putting the bigger picture out of focus. What do I do about it ? Which direction should I head ? I started thinking about a slump buster build. What should I build ? More thinking..
I opened a box the other day wondering why it was there and what was in it and I found the third XE Falcon body/chassis and complete set of parts that I cast a couple of years ago and I was thinking maybe I should bust my slump with a Falcon that I am not attached to. Perhaps I should keep it simple without too many extra details and concentrate on the often forgotten skill of finishing a model essentially as a test run for finishing the two main builds.
I haven't made a final decision yet just thinking out loud.
Your thoughts as always are welcome.
CheersSS

ShawnS- I Love this place

-
 Number of posts : 565
Age : 50
Location : South Australia
Registration date : 2009-12-22
 Re: XE Falcon S-Pack ** so anyway 8 years later- **
Shaun, sometimes it just takes a good fun build to break that slump mate.
Drag out one of those bodies, slap a bloody big engine in it, a sweet set of wheels,
the right color... and before you know it, it's done!!! And you have finally finished one of your XE's..
Go for it, you can do it..
Drag out one of those bodies, slap a bloody big engine in it, a sweet set of wheels,
the right color... and before you know it, it's done!!! And you have finally finished one of your XE's..
Go for it, you can do it..

DeeCee- AMCC ADDICT

-
 Number of posts : 3772
Age : 58
Location : Launceston Tas
Registration date : 2011-08-07
Page 35 of 36 •  1 ... 19 ... 34, 35, 36
 Similar topics
» XE Falcon S-Pack
» New Years Resolution.
» 1st one in 14 years
» First build for over 30 years- 65 Chev P/up DONE!
» 69 Dodge 440 6 Pack
» New Years Resolution.
» 1st one in 14 years
» First build for over 30 years- 65 Chev P/up DONE!
» 69 Dodge 440 6 Pack
Page 35 of 36
Permissions in this forum:
You cannot reply to topics in this forum