XE Falcon S-Pack ** so anyway 8 years later- **
+108
Deaf as
nosaj76
Antwon
Jerry Ol'55
Torry
blatdriver
window
MM
wizz83
frank
codea
VintageJDM
BluBlood
Johno
Dino84
Jade043
ozibimmer
frozono
Brootal
luchoteam
Michaelw
Iansmodels
Murphy51
ozmodeler
silverfox
Yugster
70cudatj
bandidomotorsport
Stuntman Mike
bluedog
cdansie
spector
Siggs
otherunicorn
The Bronze
Mustang_67
Yahshu
RetrospectKustoms
Nota
dufasdave
Tubman
hqmon
Carps
Bigdaddy0
Shunter
baZOOKa
Deadly
SPIKE426
ToranaDan
ausbuilder
DeeCee
RS2000
fanof124
Bantoft
stevegt738
Adam Clark
stump
michael
ratsmann
southy
zenrat
corrupted
Captain BF
ADAMTEP
aussie muscle
xm-221
PTEAZA
modelmaker
Geoff
gxcoupe
doorslammerfan
ProBee
HDT143
mopar68
HAMMOSZED
Tillerman
mgy125
Kane
dv8v8
Clutch
spiritman
checkmate
Alfaholic
The Goose
Bear
harley fan
Andrew J
con$truktive
AJ
truges
micsmav
allan
Chris
grey six
fat141
stoongee
bennyg
miwi
Bryce
ChevyFan
tezza43
sports850
slowlylearning
ourcircus
Shoey
Marshie
Paul
ShawnS
112 posters
Page 1 of 36
Page 1 of 36 • 1, 2, 3 ... 18 ... 36 
 XE Falcon S-Pack ** so anyway 8 years later- **
Hi all, I've been wanting to do this one for quite a while. It will be made by doing the two sides first then joining them up with the bonnet, boot and roof. I don't plan to use a lot of kit parts just tyres and wheel backs and the steering wheel rim, everything else will be scratch built. I don't think that I'll make a detailed chassis for it either.
For our overseas members, this is a 1983 XE Ford Falcon S-Pack. There wasn't anything really special about it just a stripes and lights package. Powered by Fords reliable 4.1L (250) 6 cylinder engine.
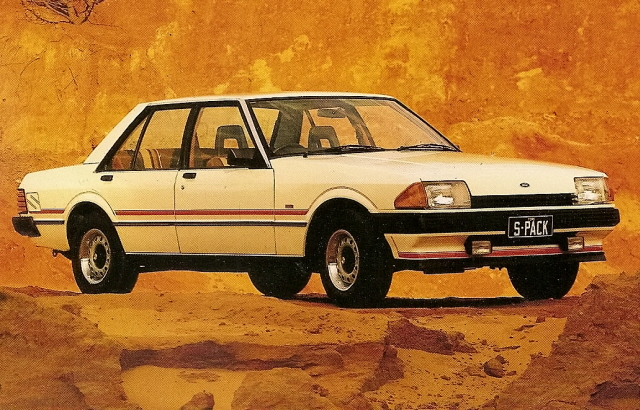
What makes it special to me though is that there were two of them in my family, My parents Monza red version,
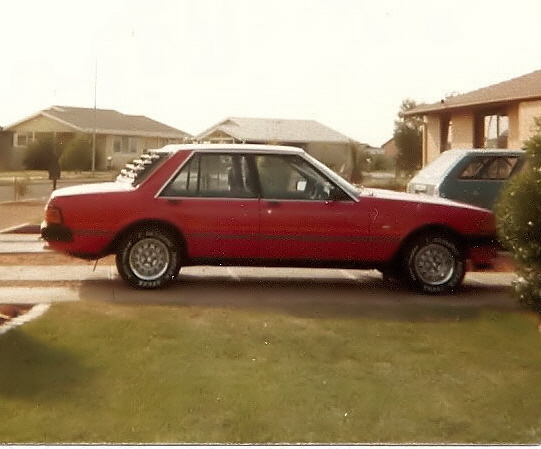
and my grand fathers beige one (no pics). As I grew up around these two cars they hold a special place in my world.
I started by using a picture from an XD brochure and cleaned it up in MS paint to get the basic line shape.

Then I used the scale calculator that Kane posted https://ozautobuilders.forumotion.com/t3753-scale-calculator-site
and upsized it to 1:24 scale using some measurements of the real car and used that as a basis to do the final transfer drawing onto the evergreen sheet.
I drew the line drawing twice onto some 0.4mm sheet and cut out the basic shape.

I tacked the two shapes together and did a little sanding and trimming to make sure they were both identical as possible and used a dremel to grind out the wheel arches. At this stage I also cut out the head light and tail light reccesses. After that was done it was time to scribe some lines.
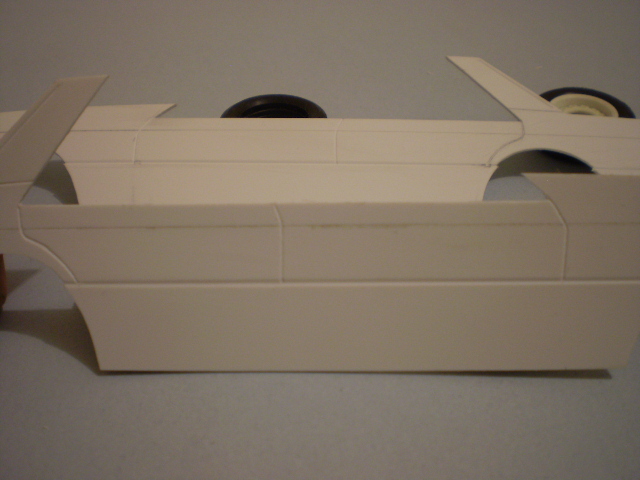
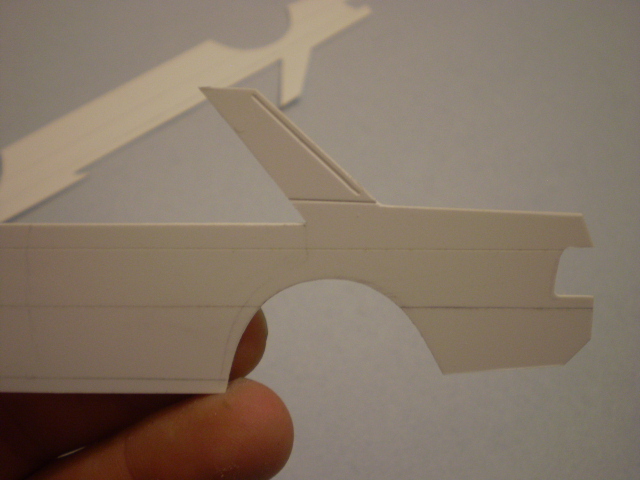
The deep crease line you can see was made by running the corner of a chisel type blade through the scribed line to make it deeper and wider.
The next step is to start to put some shape on to it. The upper lightly scribed line was gently bent backwards and filled with a thin strip of evergreen to maintain its angle.

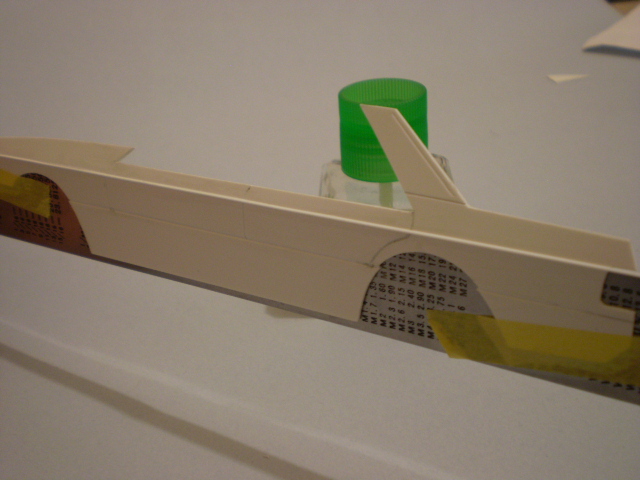
After the glue dried it was gently sanded and has kept its shape. I have also massaged the front quarter panel to give it a slight inward bend and also the bottom section was curved in as well. I added another layer of 0.4mm evergreen on the inside and on the outside bottom sections to add width and help with strength. At this stage the door lines are scribed onto the bottom section and the wheel arches are shaved out a little so I can add a strip of styrene to start the wheel arch flares.
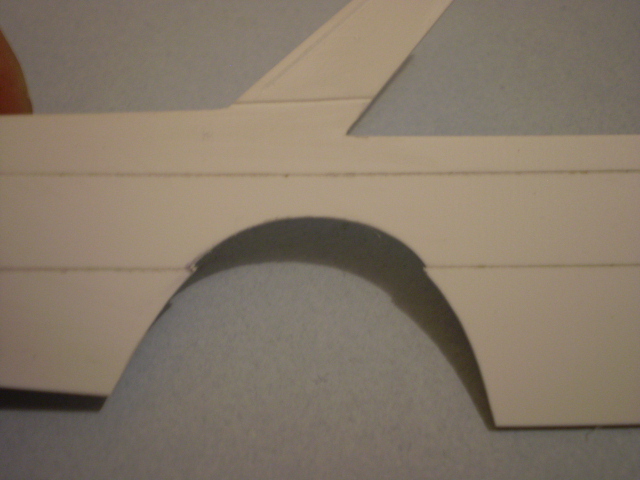
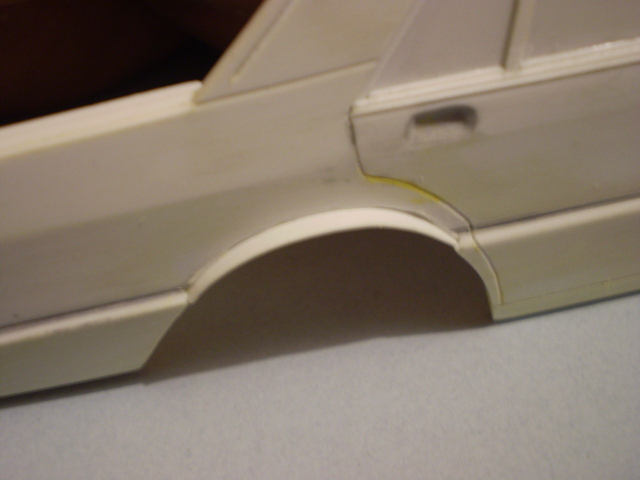
a bit of bog
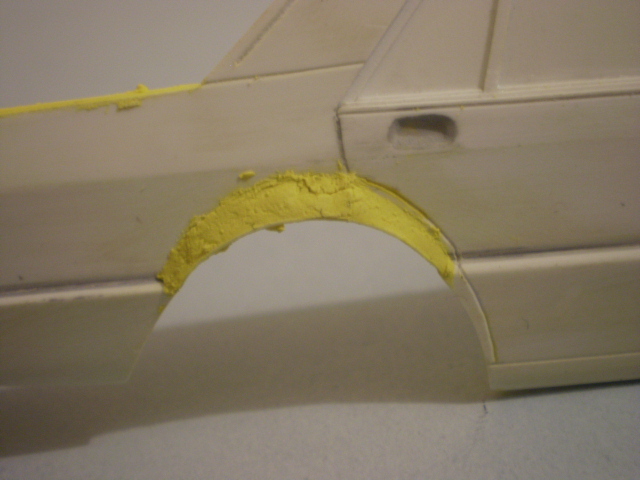
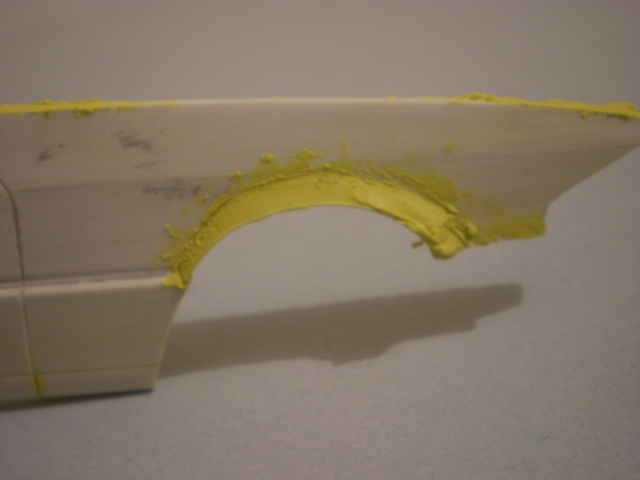
and some sanding and you have some wheel arch flares.
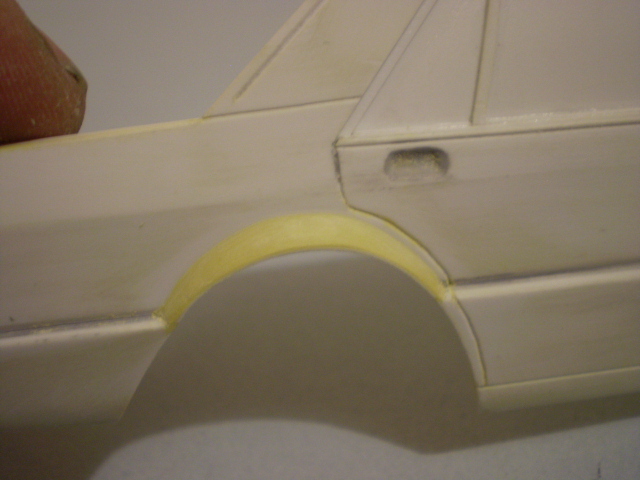

I have made the A and B pillars and the window frames and carved out the door handle reccesses.

Here is where I'm currently at.

I'll add some trims and work out where I'm going from there. I'll be joining the two halves soon and working on the bonnet, boot and rear valance. I am making this all up as I go so if you have any suggestions or questions send them my way.
So far most of the time spent on it has been waiting for the glue and putty to dry, but I'm enjoying it so much that I'm thinking about a XF ute afterwards. We'll see.
CheersSS
For our overseas members, this is a 1983 XE Ford Falcon S-Pack. There wasn't anything really special about it just a stripes and lights package. Powered by Fords reliable 4.1L (250) 6 cylinder engine.

What makes it special to me though is that there were two of them in my family, My parents Monza red version,

and my grand fathers beige one (no pics). As I grew up around these two cars they hold a special place in my world.
I started by using a picture from an XD brochure and cleaned it up in MS paint to get the basic line shape.

Then I used the scale calculator that Kane posted https://ozautobuilders.forumotion.com/t3753-scale-calculator-site
and upsized it to 1:24 scale using some measurements of the real car and used that as a basis to do the final transfer drawing onto the evergreen sheet.
I drew the line drawing twice onto some 0.4mm sheet and cut out the basic shape.

I tacked the two shapes together and did a little sanding and trimming to make sure they were both identical as possible and used a dremel to grind out the wheel arches. At this stage I also cut out the head light and tail light reccesses. After that was done it was time to scribe some lines.


The deep crease line you can see was made by running the corner of a chisel type blade through the scribed line to make it deeper and wider.
The next step is to start to put some shape on to it. The upper lightly scribed line was gently bent backwards and filled with a thin strip of evergreen to maintain its angle.


After the glue dried it was gently sanded and has kept its shape. I have also massaged the front quarter panel to give it a slight inward bend and also the bottom section was curved in as well. I added another layer of 0.4mm evergreen on the inside and on the outside bottom sections to add width and help with strength. At this stage the door lines are scribed onto the bottom section and the wheel arches are shaved out a little so I can add a strip of styrene to start the wheel arch flares.


a bit of bog


and some sanding and you have some wheel arch flares.


I have made the A and B pillars and the window frames and carved out the door handle reccesses.

Here is where I'm currently at.

I'll add some trims and work out where I'm going from there. I'll be joining the two halves soon and working on the bonnet, boot and rear valance. I am making this all up as I go so if you have any suggestions or questions send them my way.
So far most of the time spent on it has been waiting for the glue and putty to dry, but I'm enjoying it so much that I'm thinking about a XF ute afterwards. We'll see.
CheersSS

ShawnS- I Love this place

-
 Number of posts : 565
Age : 50
Location : South Australia
Registration date : 2009-12-22
 Re: XE Falcon S-Pack ** so anyway 8 years later- **
Awesome!!...............please tell me this ones going to get cast in resin 


Paul- AMCC ADDICT

-
 Number of posts : 4564
Age : 49
Location : Melbourne
Registration date : 2008-03-19
 Re: XE Falcon S-Pack ** so anyway 8 years later- **
Mate, That is bloody awesome, you have a god given talent let me tell you. it's blokes like you that make modeling fun.well done and i will be watching this with great interest.
Cheers Marshie
Cheers Marshie

 Re: XE Falcon S-Pack ** so anyway 8 years later- **
Well Bugger Me! That is looking fantastic Shawn.
Good start. and great to see someone else having
a go at this scratch building thing.
Moparsteve and I have been thinking about this.
but you have beat us there.
I got too much other stuff on the boil.
Keep up the good work.
Good start. and great to see someone else having
a go at this scratch building thing.
Moparsteve and I have been thinking about this.
but you have beat us there.
I got too much other stuff on the boil.
Keep up the good work.
 Re: XE Falcon S-Pack ** so anyway 8 years later- **
mate thats awsome, i want one already, and the xf ute 


ourcircus- I should be working on Models

-
 Number of posts : 272
Age : 71
Location : Perth W.A
Registration date : 2009-06-18
 Re: XE Falcon S-Pack ** so anyway 8 years later- **
top stuff! your attention to the little details is wicked!
don't skimp on the pics mate!
don't skimp on the pics mate!
slowlylearning- AMCC ADDICT

-
 Number of posts : 1533
Age : 33
Location : Bris
Registration date : 2008-09-28
 Re: XE Falcon S-Pack ** so anyway 8 years later- **
That's amazing Shawn , well done , will be watching this one closely .

sports850- Legend Poster

-
 Number of posts : 1065
Age : 53
Location : Red Rock NSW
Registration date : 2009-08-07
 Re: XE Falcon S-Pack ** so anyway 8 years later- **
Model engineering at its creative best - you're going great guns with this one Shawn. Worthy of a story in ModelArt magazine methinks.
One to keep an eye on!

Tezza
One to keep an eye on!

Tezza

tezza43- AMCC ADDICT

-
 Number of posts : 4318
Age : 81
Location : Mornington, Victoria
Registration date : 2008-03-21
 Re: XE Falcon S-Pack ** so anyway 8 years later- **
Got to love these scratch built cars that you guys do. You make it look so easy.
Looking great so far Shawn.
Looking great so far Shawn.

ChevyFan- I should be working on Models

-
 Number of posts : 267
Age : 48
Location : SA
Registration date : 2008-10-10
 Re: XE Falcon S-Pack ** so anyway 8 years later- **

This is really cool. Very ambitious...I look forward to seeing how you go. I assume you will cast this in resin when you are finished?
And where do you get yellow bog?
_________________
Cheers,
Bryce
https://s582.photobucket.com/home/BryceM76
https://www.facebook.com/pages/Michelmore-Rod-Kustom/162990533806679

Bryce- Moderator
-
 Number of posts : 3329
Location : Melbourne
Registration date : 2008-05-10
 Re: XE Falcon S-Pack ** so anyway 8 years later- **
Seems that this will be a great start for a new model. Find a resin caster. I would be interested in a resin copy.
Last edited by miwi on Tue 10 May 2011, 10:35 pm; edited 1 time in total

miwi- I should be working on Models

-
 Number of posts : 262
Age : 62
Location : Germany
Registration date : 2011-02-27
 Re: XE Falcon S-Pack ** so anyway 8 years later- **
Fantastic, cant wait to see more progress.
Ben
Ben
bennyg- I should be working on Models

-
 Number of posts : 178
Age : 43
Location : Roma
Registration date : 2010-09-13
 Re: XE Falcon S-Pack ** so anyway 8 years later- **
looking forward to seeing take shape
perfect lines and dimension,
this model ford also has a place in my heart.
my first car was an 302 xd wagon and i have also owned 2 xd sedans and i am currently driving my grandfather xf which was left to me in the will,has only 142000ks on the clock (which is f$%K al for the 250 crossflow. ill probably still be driving this when im 60. really hope this gets cast as i would love to build a pro street version
well done
stoongee- AMCC NEWBIE!

-
 Number of posts : 25
Age : 43
Location : central coast nsw
Registration date : 2010-09-03
 Re: XE Falcon S-Pack ** so anyway 8 years later- **
Go to the top of the class !!!
Rod
Rod

fat141- I Love this place

-
 Number of posts : 862
Age : 80
Location : mid north coast NSW
Registration date : 2009-05-11
 Re: XE Falcon S-Pack ** so anyway 8 years later- **
Bryce wrote:
This is really cool. Very ambitious...I look forward to seeing how you go. I assume you will cast this in resin when you are finished?
And where do you get yellow bog?
wow thanks for the great reception guys, it's going to take a while but I reckon I'll get there. I've given myself the rest of the year to get it done and as I'm only going to use a few kit parts there is a hell of a lot to scratchbuild.
I will be casting it but I don't know how many copies I'll be able to make. I'll cross that bridge when I get to it and just focus on getting it to that point first.
Bryce the yellow bog is Tamiya Polyester putty. I got it from bnamodelworld.com.au
thanks again guys, more updates soon.
CheersSS

ShawnS- I Love this place

-
 Number of posts : 565
Age : 50
Location : South Australia
Registration date : 2009-12-22
 Re: XE Falcon S-Pack ** so anyway 8 years later- **
Amazing work, can't wait to see more updates. I thought this type of build would only work with military vehicles but this is shaping up great.
As a previous owner of a Monza red xe S pak this will be one of the few that doesn't rust away.
Cheers Peter.
As a previous owner of a Monza red xe S pak this will be one of the few that doesn't rust away.
Cheers Peter.
grey six- I should be working on Models

-
 Number of posts : 234
Age : 68
Location : coffs harbour nsw
Registration date : 2010-06-27
 Re: XE Falcon S-Pack ** so anyway 8 years later- **
Dude..... you must be insane!! Stunning job so far, amazing. If you ever feel the urge for another scratchbuild, might I suggest a 65 Type 3 VW Squareback..... would go nicely with my real one!

allan- AMCC ADDICT

-
 Number of posts : 10406
Age : 67
Location : East Maitland
Registration date : 2008-03-31
 Re: XE Falcon S-Pack ** so anyway 8 years later- **
outstanding work 


micsmav- I Love this place

-
 Number of posts : 881
Age : 96
Location : afghanistan
Registration date : 2009-05-19
 Re: XE Falcon S-Pack ** so anyway 8 years later- **
This is fantastic!! I've been planning a similar approach to an XD in my head for a while now so I'll be watching this closely. Awesome start and great detail.
truges- I should be working on Models

-
 Number of posts : 237
Age : 55
Location : Woy Woy
Registration date : 2009-04-29
 Re: XE Falcon S-Pack ** so anyway 8 years later- **
Just found this
mate all i can say is
mate all i can say is


AJ- I should be working on Models

-
 Number of posts : 201
Age : 70
Location : Yagoona NSW
Registration date : 2010-07-12
 Re: XE Falcon S-Pack ** so anyway 8 years later- **
 thats amazing work keen to watch this build & not even a ford fan lol, great work................
con$truktive- AMCC NEWBIE!

-
 Number of posts : 30
Age : 51
Location : newcastle
Registration date : 2010-12-25
 Re: XE Falcon S-Pack ** so anyway 8 years later- **
That is unbelievable. I would love to have 10% of your patience. Way too cool. If you do cast I would be interested in one too.
Good luck with it
Good luck with it

Andrew J- I should be working on Models

-
 Number of posts : 407
Age : 42
Location : Sydney
Registration date : 2010-10-28
 Re: XE Falcon S-Pack ** so anyway 8 years later- **
Hi guys. Thanks for the encouragement. It's gonna be a long haul and I'll need all the motivation I can get. Here's a sunday arvo update.
I glued a strip of evergreen along the sides to replicate the mouldings on the real car.
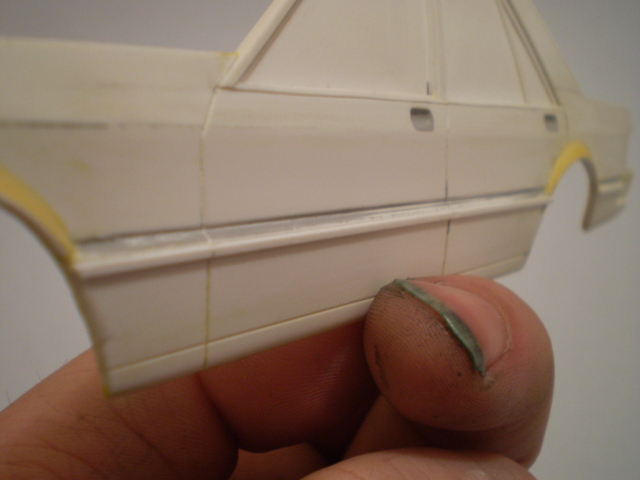
After the glue had dried on those it was time to join the two halves together. I started by drawing the length and width dimensions onto a piece of paper and sticking that onto a board.
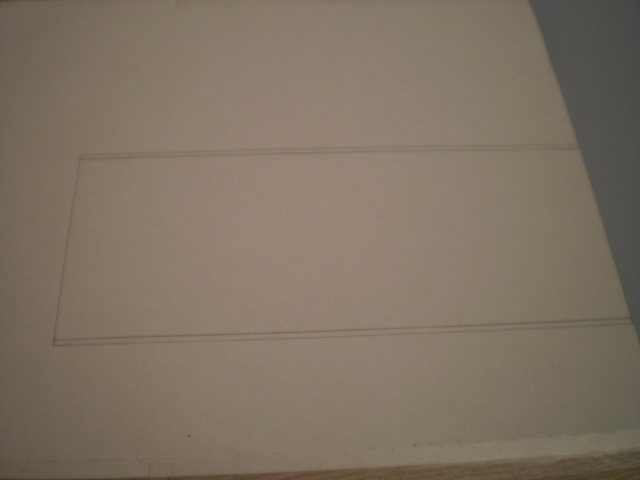
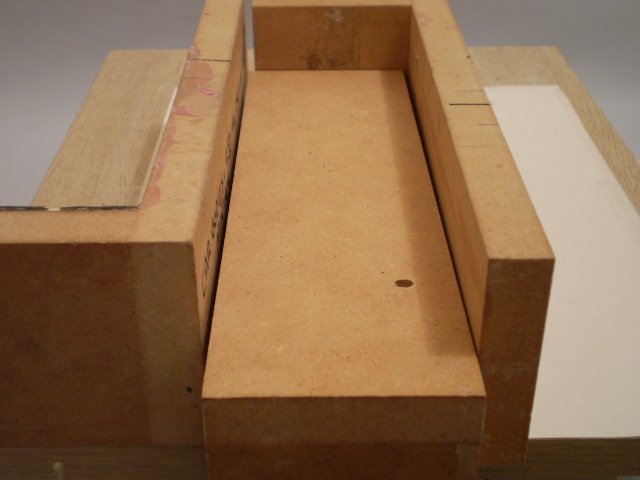
I made a jig using my mould casting box sides to make sure that when I glued the bonnet and boot on, the sides of the car were straight and even. I used the double sided tape to stick the box halves onto the board that the dimensions were on.
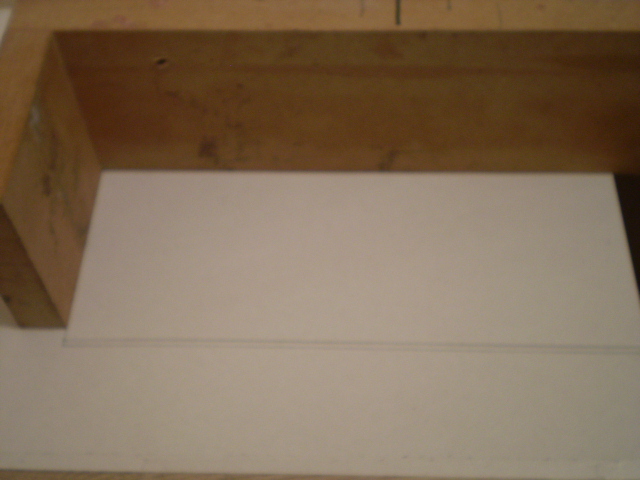
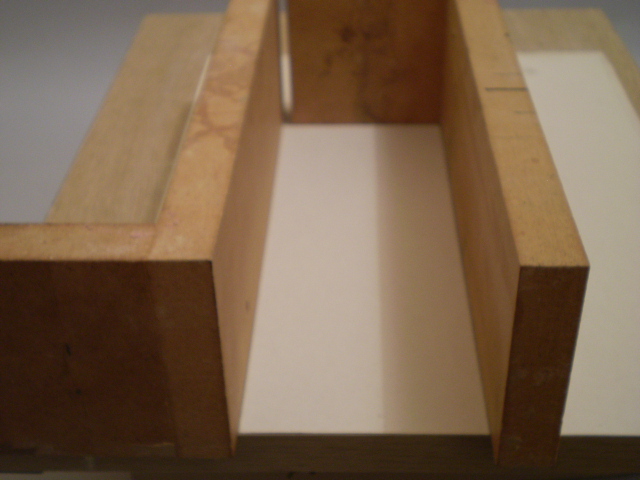
I used some Lego to get the base of the jig box to the height I required.
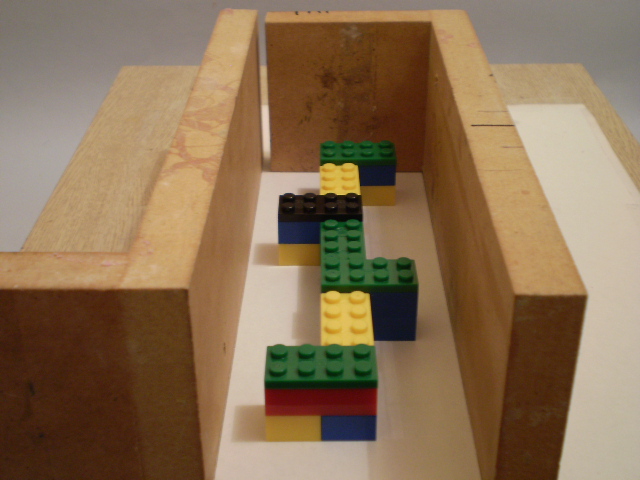
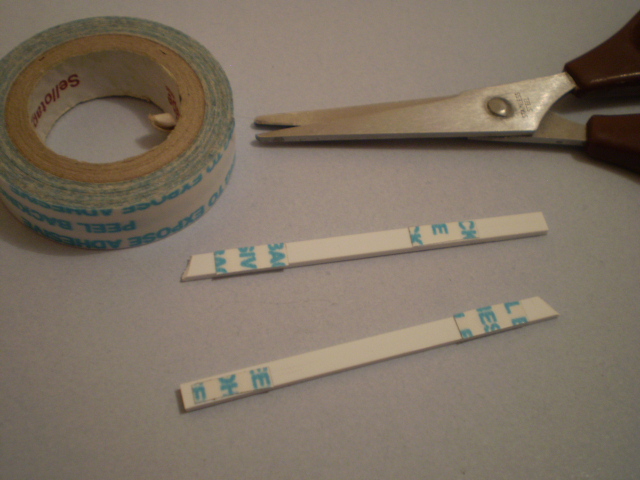
Then using thin double sided tape, I stuck a strip of styrene onto the outside of both sides of the car.

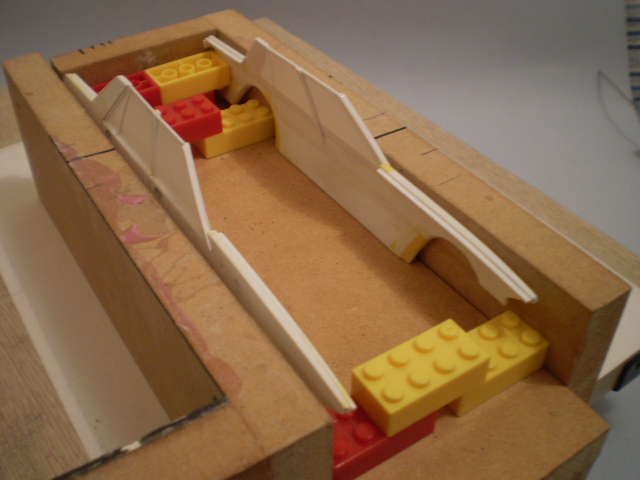
and then stuck the two halves of the model to the sides of the jig box.

I then double sided taped some more Lego onto the inside just to minimise any movement of the jig box.
Once all of that was ready to go, it was time to glue the boot and bonnet on.
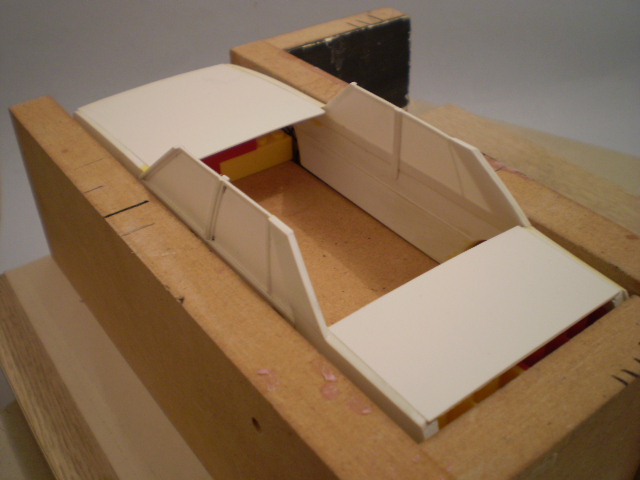
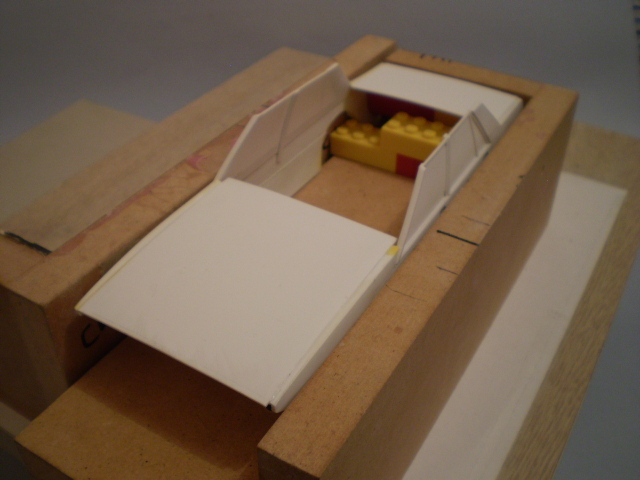
After the glue dried I carefully removed the box sides and added some bracing on the insides of the car so I can handle it without it flexing too much. I'll remove those later when it's done.
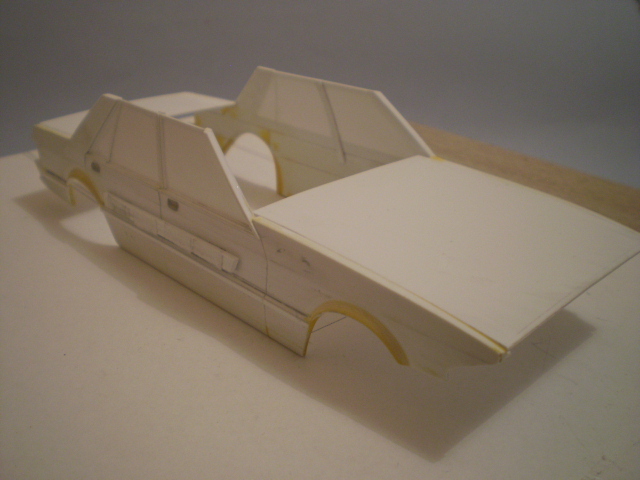
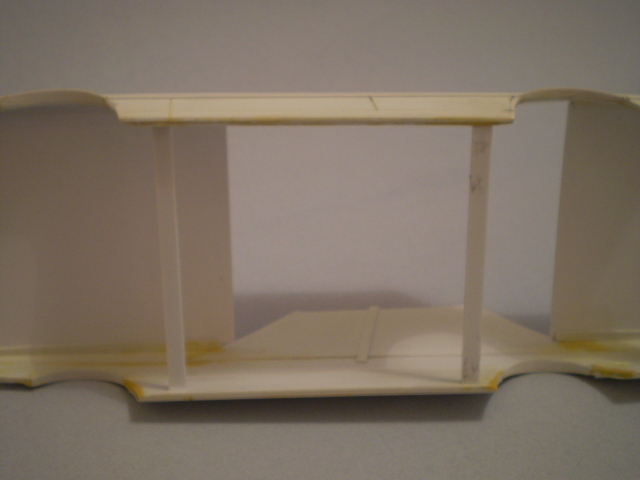
I have started work on the rear of the car first. My main aim here is to get things in place and add and remove plastic and putty as I go.
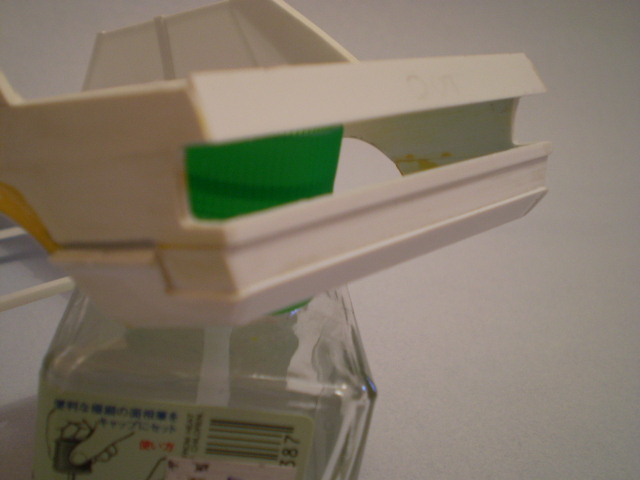
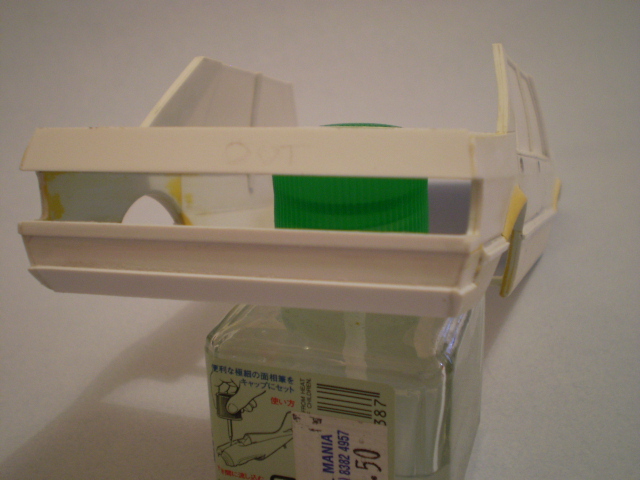
That's all so far but obviously I plan to keep plugging away at it so I'll keep you all updated as I get things done.
I have also noted a few things that may need rectifying so I'll be asking your opinions on those soon. If you see something that I might have missed please let me know.
Thanks for looking
CheersSS
I glued a strip of evergreen along the sides to replicate the mouldings on the real car.

After the glue had dried on those it was time to join the two halves together. I started by drawing the length and width dimensions onto a piece of paper and sticking that onto a board.

I made a jig using my mould casting box sides to make sure that when I glued the bonnet and boot on, the sides of the car were straight and even. I used the double sided tape to stick the box halves onto the board that the dimensions were on.


I used some Lego to get the base of the jig box to the height I required.


Then using thin double sided tape, I stuck a strip of styrene onto the outside of both sides of the car.


and then stuck the two halves of the model to the sides of the jig box.

I then double sided taped some more Lego onto the inside just to minimise any movement of the jig box.

Once all of that was ready to go, it was time to glue the boot and bonnet on.


After the glue dried I carefully removed the box sides and added some bracing on the insides of the car so I can handle it without it flexing too much. I'll remove those later when it's done.


I have started work on the rear of the car first. My main aim here is to get things in place and add and remove plastic and putty as I go.


That's all so far but obviously I plan to keep plugging away at it so I'll keep you all updated as I get things done.
I have also noted a few things that may need rectifying so I'll be asking your opinions on those soon. If you see something that I might have missed please let me know.
Thanks for looking
CheersSS

ShawnS- I Love this place

-
 Number of posts : 565
Age : 50
Location : South Australia
Registration date : 2009-12-22
 Re: XE Falcon S-Pack ** so anyway 8 years later- **
Truly I am gobsmacked Shawn. This is wonderful stuff, watching a model being scratch-built this way. This forum thing is great and more people my age should be joining in IMO. I hope you don't mind, but I am collecting your information for a future story in ModelArt Australia (with your permission of course). I reckon there will be many who would be interested to see it's not only military models that are scratch-built. Thanks for your updates - go get 'em mate.


tezza43- AMCC ADDICT

-
 Number of posts : 4318
Age : 81
Location : Mornington, Victoria
Registration date : 2008-03-21
Page 1 of 36 • 1, 2, 3 ... 18 ... 36 
 Similar topics
» XE Falcon S-Pack
» New Years Resolution.
» 1st one in 14 years
» First build for over 30 years- 65 Chev P/up DONE!
» 69 Dodge 440 6 Pack
» New Years Resolution.
» 1st one in 14 years
» First build for over 30 years- 65 Chev P/up DONE!
» 69 Dodge 440 6 Pack
Page 1 of 36
Permissions in this forum:
You cannot reply to topics in this forum