XE Falcon S-Pack ** so anyway 8 years later- **
+108
Deaf as
nosaj76
Antwon
Jerry Ol'55
Torry
blatdriver
window
MM
wizz83
frank
codea
VintageJDM
BluBlood
Johno
Dino84
Jade043
ozibimmer
frozono
Brootal
luchoteam
Michaelw
Iansmodels
Murphy51
ozmodeler
silverfox
Yugster
70cudatj
bandidomotorsport
Stuntman Mike
bluedog
cdansie
spector
Siggs
otherunicorn
The Bronze
Mustang_67
Yahshu
RetrospectKustoms
Nota
dufasdave
Tubman
hqmon
Carps
Bigdaddy0
Shunter
baZOOKa
Deadly
SPIKE426
ToranaDan
ausbuilder
DeeCee
RS2000
fanof124
Bantoft
stevegt738
Adam Clark
stump
michael
ratsmann
southy
zenrat
corrupted
Captain BF
ADAMTEP
aussie muscle
xm-221
PTEAZA
modelmaker
Geoff
gxcoupe
doorslammerfan
ProBee
HDT143
mopar68
HAMMOSZED
Tillerman
mgy125
Kane
dv8v8
Clutch
spiritman
checkmate
Alfaholic
The Goose
Bear
harley fan
Andrew J
con$truktive
AJ
truges
micsmav
allan
Chris
grey six
fat141
stoongee
bennyg
miwi
Bryce
ChevyFan
tezza43
sports850
slowlylearning
ourcircus
Shoey
Marshie
Paul
ShawnS
112 posters
Page 18 of 36
Page 18 of 36 •  1 ... 10 ... 17, 18, 19 ... 27 ... 36
 Re: XE Falcon S-Pack ** so anyway 8 years later- **
Awesome can't wait to see more Shawn.
And I am still definately interested in one if you cast them for sale as I am sure others here are.. A Ute would be on the shopping list too.
Cheers
AJ
And I am still definately interested in one if you cast them for sale as I am sure others here are.. A Ute would be on the shopping list too.
Cheers
AJ

Andrew J- I should be working on Models

-
 Number of posts : 407
Age : 42
Location : Sydney
Registration date : 2010-10-28
 Re: XE Falcon S-Pack ** so anyway 8 years later- **
ShawnS wrote:Finally, I have decided to put a Group C racing version on the back burner as I cross checked the decals on Patto's site with pics of the real things and decided that the artwork (mostly incorrect fonts) on Patto's decals isn't as good as it could be. Making a ute version is still high priority.
in past i've mentioned changed to patto that i'd like and he's been happy to accommodate them. Perhaps we need to get a few computer artists together to make up a more accurate decal sheet artwork?
anyone?
 Re: XE Falcon S-Pack ** so anyway 8 years later- **
Woohoo I'm back into it. Well not quite full on like before but it's all coming back to me slowly. Over the last couple of weeks I've been tweaking a few things here and there, mostly making the interior fit the 2nd version of the body cast.
One new thing that I have done is make the bracing under the bonnet. It's not fully detailed like it's 1:1 counterpart but it's enough to make it look right. Here is how I did it.
First thing to do was to remove the bonnet from the body. I just scribed the panel lines until she popped out.

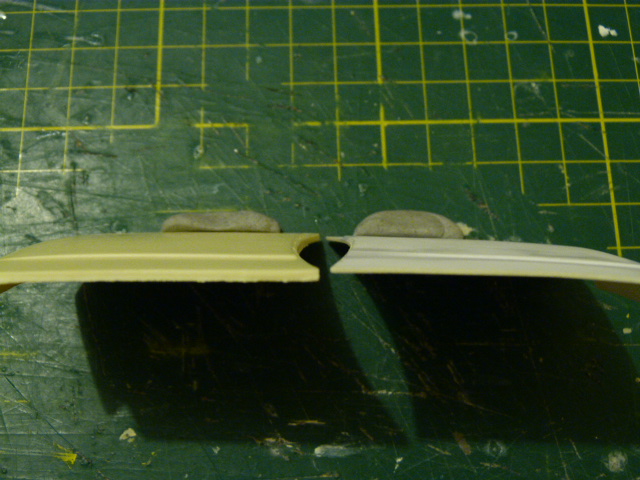
Then I made a new bonnet the same way I made it the first time. You can see how thick the resin part is compared to the remade version.
I cut out a section of evergreen sheet that is slightly smaller than the overall size of the bonnet.

Then after checking my reference pics I drew the pattern that I needed to cut out.

Then I cut out the required areas and sanded the edges smooth.
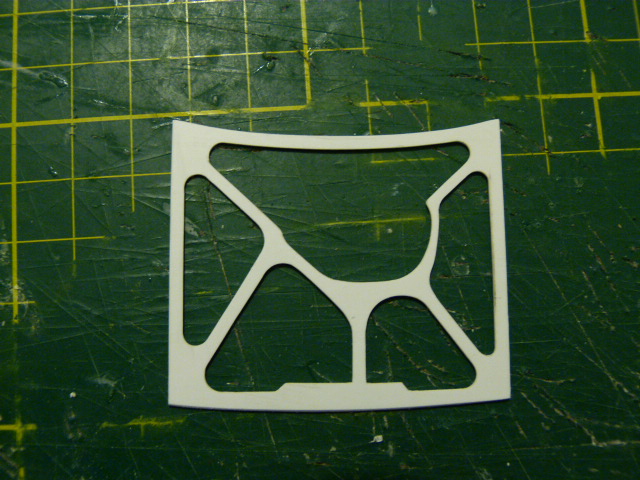
I glued it to a bit of very thin evergreen sheet and cut out the centres leaving a small flange around the cut outs.
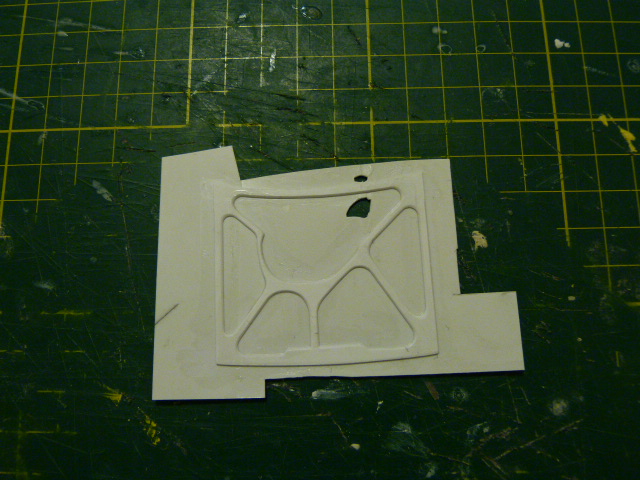

I glued that to the bonnet and added extra bracing with very thin evergreen sections.

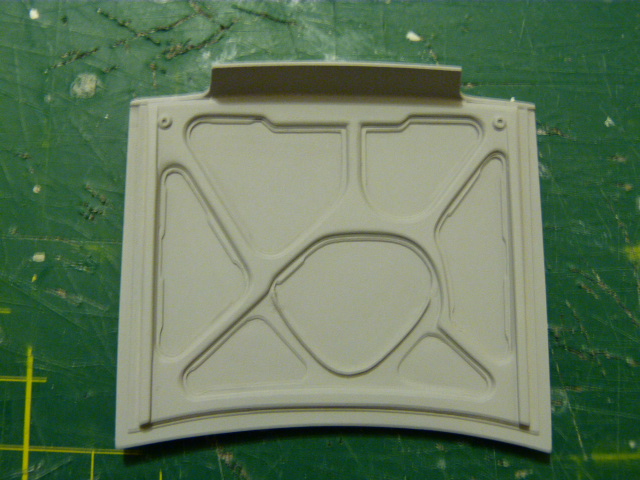
Here is the final result with a few extra details like raised areas on the sides and some lumps in the front corners and after a coat of primer.

That's it for the moment. It's good to get that out of the way as it took me a while to figure out how I would do it as the 1:1 XE Falcon bonnet has a lot of extra lumps and bumps and a shed load of slots cut into the bracing. It had a lot of detail that I just couldn't replicate so I didn't even try. I'm happy with how it is as it won't be a focus puller as once the bonnet is open all eyes will be on the engine.
Thanks guys.
CheersSS
One new thing that I have done is make the bracing under the bonnet. It's not fully detailed like it's 1:1 counterpart but it's enough to make it look right. Here is how I did it.
First thing to do was to remove the bonnet from the body. I just scribed the panel lines until she popped out.

Then I made a new bonnet the same way I made it the first time. You can see how thick the resin part is compared to the remade version.

I cut out a section of evergreen sheet that is slightly smaller than the overall size of the bonnet.

Then after checking my reference pics I drew the pattern that I needed to cut out.

Then I cut out the required areas and sanded the edges smooth.

I glued it to a bit of very thin evergreen sheet and cut out the centres leaving a small flange around the cut outs.


I glued that to the bonnet and added extra bracing with very thin evergreen sections.

Here is the final result with a few extra details like raised areas on the sides and some lumps in the front corners and after a coat of primer.


That's it for the moment. It's good to get that out of the way as it took me a while to figure out how I would do it as the 1:1 XE Falcon bonnet has a lot of extra lumps and bumps and a shed load of slots cut into the bracing. It had a lot of detail that I just couldn't replicate so I didn't even try. I'm happy with how it is as it won't be a focus puller as once the bonnet is open all eyes will be on the engine.
Thanks guys.
CheersSS

ShawnS- I Love this place

-
 Number of posts : 565
Age : 50
Location : South Australia
Registration date : 2009-12-22
 Re: XE Falcon S-Pack ** so anyway 8 years later- **
INCREADIBLE!!!!!!!!!!!!!! 


DeeCee- AMCC ADDICT

-
 Number of posts : 3772
Age : 58
Location : Launceston Tas
Registration date : 2011-08-07
 Re: XE Falcon S-Pack ** so anyway 8 years later- **
That's a cool way of doing it, nice work.

Kane- AMCC ADDICT

-
 Number of posts : 1505
Age : 48
Location : Rainsville (Sydney)...
Registration date : 2009-01-12
 Re: XE Falcon S-Pack ** so anyway 8 years later- **
As always you break it down into such simple logical steps and the result is fantastic. 

mgy125- AMCC ADDICT

-
 Number of posts : 1679
Age : 88
Location : Moldovia
Registration date : 2010-06-24
 Re: XE Falcon S-Pack ** so anyway 8 years later- **
That's AWESOME 


allan- AMCC ADDICT

-
 Number of posts : 10406
Age : 67
Location : East Maitland
Registration date : 2008-03-31
 Re: XE Falcon S-Pack ** so anyway 8 years later- **
Wicked job mate!!

Adam Clark- Legend Poster

-
 Number of posts : 1063
Age : 27
Location : Launceston
Registration date : 2011-07-11
 Re: XE Falcon S-Pack ** so anyway 8 years later- **
 Shawn, that is unreal!!! Man, that's better than ant kit bonnet bracing I've ever seen. Good to see you back into it!!
RetrospectKustoms- AMCC ADDICT

-
 Number of posts : 2475
Age : 44
Location : Barossa Valley, So Aus
Registration date : 2011-12-14
 Re: XE Falcon S-Pack ** so anyway 8 years later- **
i've never seen so much effort put into the underside of any panel.
 Re: XE Falcon S-Pack ** so anyway 8 years later- **
Just sensational workmanship, it is a showcase of your building skills.
 Re: XE Falcon S-Pack ** so anyway 8 years later- **
Thanks fellas. Hope you all had a good easter. Just a quick one today. I finally got off my arse and cast the interior tub yesterday. I glued the sides on to the tub and filled any gaps that were present, shot it with some primer and decided it was good to go for casting.
The original part after the final coat of primer.

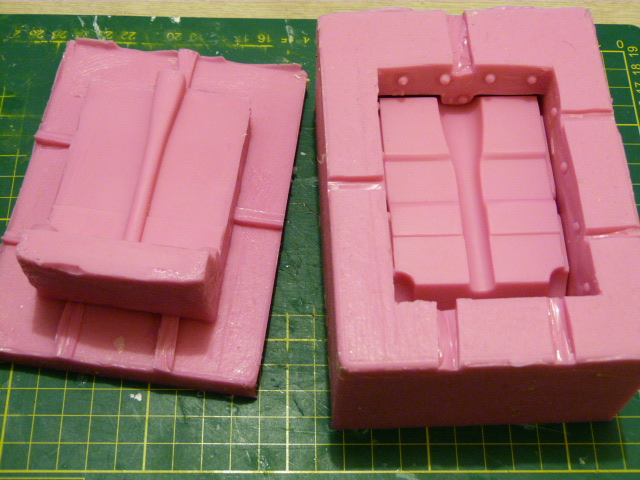
Because I needed both the top and the bottom of the tub to be as I made it, I decided on a 2 piece squish mould. Here is the finished mould after a fair bit of fart arseing about.
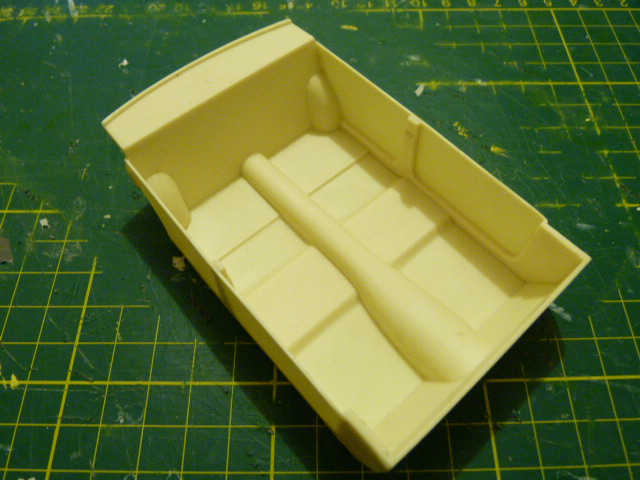
The final product.
Casting things isn't all beer and skittles. Sometimes you have to sacrifice the original part to get a good casting. The mould I made was pretty low fuss but it was tricky to remove the master and the inherent weakness in the plastic joints meant that when I removed the master, the weak joints cracked and snapped off.
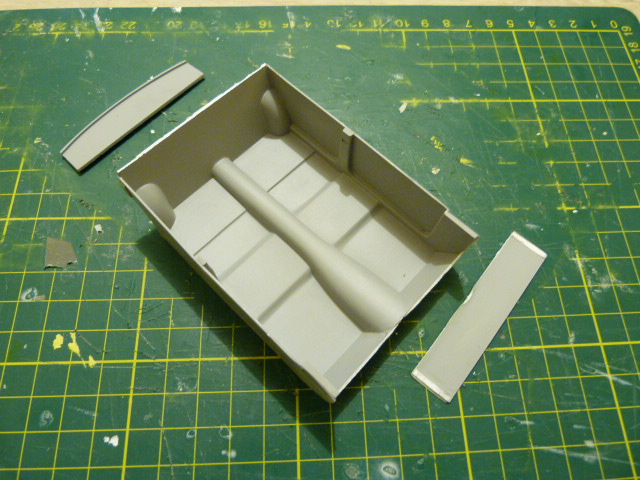
No real big deal it just means in the future if I have to remould it, I'l have to spend some time fixing it. The resin part came out fairly trouble free though and after some light clean up it was good to use.
That's it for now. Time to start work on the engine bay.
CheersSS
The original part after the final coat of primer.

Because I needed both the top and the bottom of the tub to be as I made it, I decided on a 2 piece squish mould. Here is the finished mould after a fair bit of fart arseing about.

The final product.

Casting things isn't all beer and skittles. Sometimes you have to sacrifice the original part to get a good casting. The mould I made was pretty low fuss but it was tricky to remove the master and the inherent weakness in the plastic joints meant that when I removed the master, the weak joints cracked and snapped off.

No real big deal it just means in the future if I have to remould it, I'l have to spend some time fixing it. The resin part came out fairly trouble free though and after some light clean up it was good to use.
That's it for now. Time to start work on the engine bay.
CheersSS

ShawnS- I Love this place

-
 Number of posts : 565
Age : 50
Location : South Australia
Registration date : 2009-12-22

Paul- AMCC ADDICT

-
 Number of posts : 4564
Age : 49
Location : Melbourne
Registration date : 2008-03-19

allan- AMCC ADDICT

-
 Number of posts : 10406
Age : 67
Location : East Maitland
Registration date : 2008-03-31
bennyg- I should be working on Models

-
 Number of posts : 178
Age : 43
Location : Roma
Registration date : 2010-09-13
 Re: XE Falcon S-Pack ** so anyway 8 years later- **
Once again, Great work Shawn, flawless. 


RetrospectKustoms- AMCC ADDICT

-
 Number of posts : 2475
Age : 44
Location : Barossa Valley, So Aus
Registration date : 2011-12-14
 Re: XE Falcon S-Pack ** so anyway 8 years later- **
nice looking mold. (is the key to a good part, right?)
 Re: XE Falcon S-Pack ** so anyway 8 years later- **
Well it's been a while so I thought I had better give youse an update. Over the last few weeks I have been making bits and pieces for the whole front end. But before I start the engine bay I first need to give the engine a home. That means making the chassis rails, the cross members and the engine and trans mounts.
I had planned to use the original front chassis section but after some dodgy cutting and shutting it didn't look so flash so I decided to make new front chassis rails.
The original Mustang rails weren't all that straight to start with but my extra work on them really stuffed them up.

Cut the bastards off and make some new ones from thick evergreen strips.
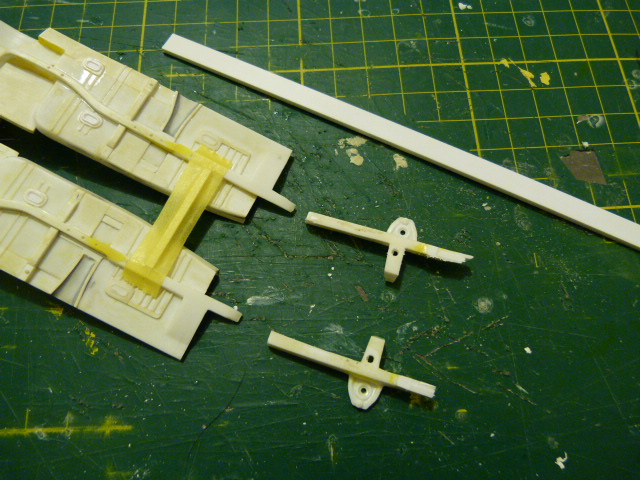
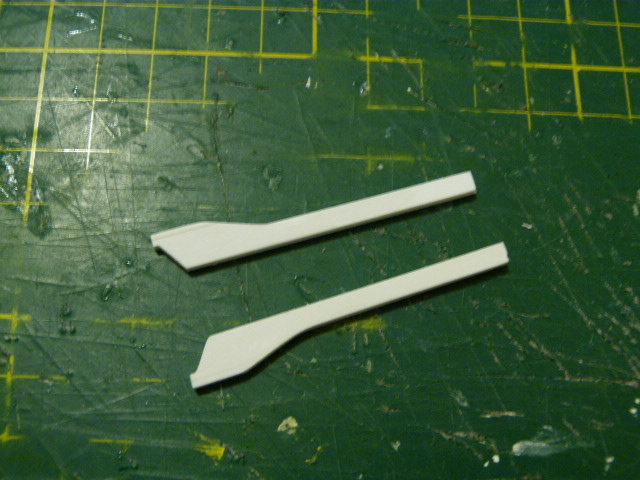
Once they were sorted I made the trans mount from the same thick strip.

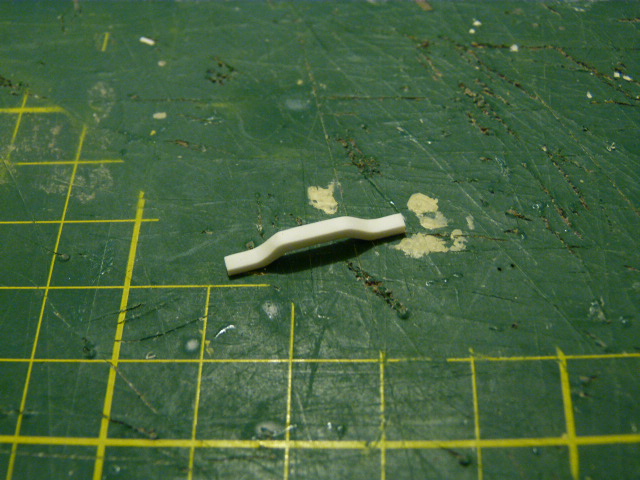
All done and detailed with T2M bold heads.
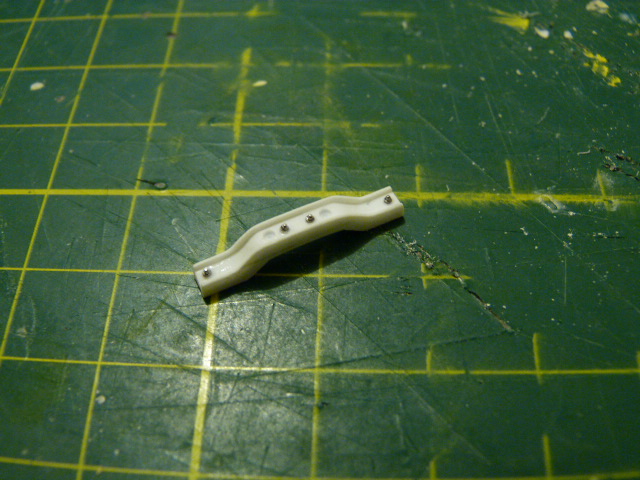
I made the engine crossmember from many different evergreen sections. I started with some thin stuff cut to shape.
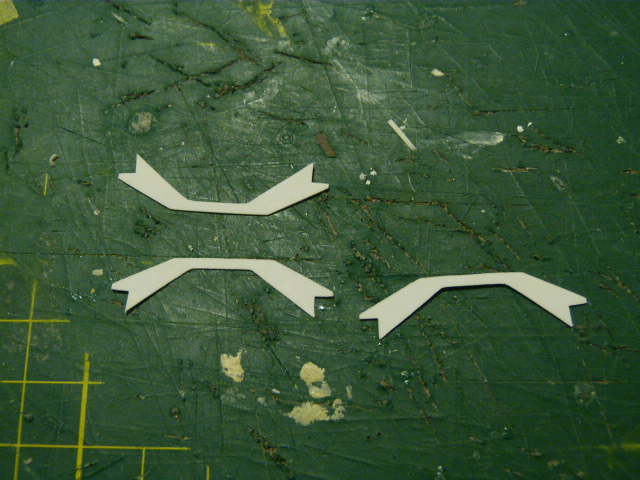
I forgot to take pics of the rest of the crossmember construction sequence so here it is in place on the chassis. The trans mount is glued into place at his stage too.
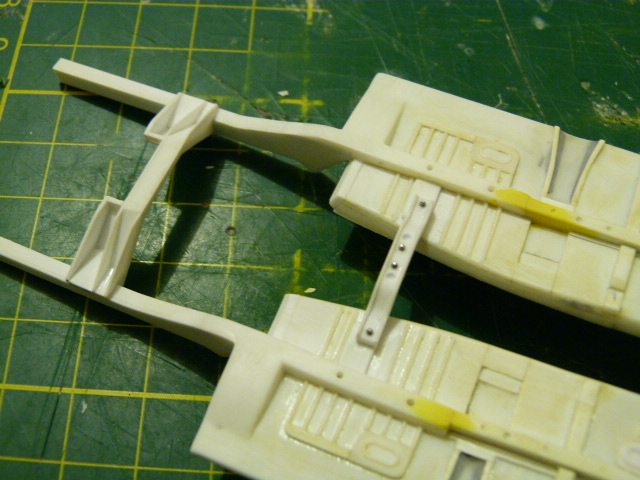
I made the front radiator mount crossmember too. This won't be glued in place until I am happy with where everything else is.
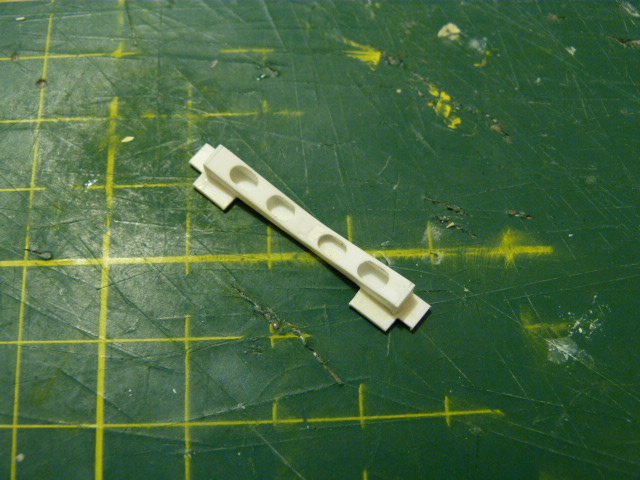
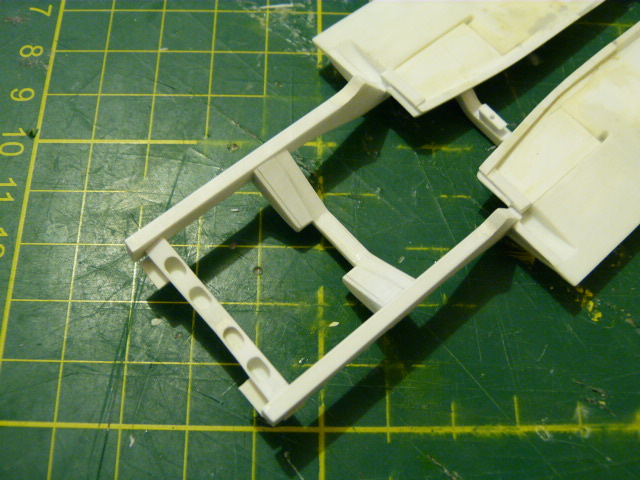
To make the engine mounts I started with evergreen angle strip that was cut to shape then I drilled some holes for the T2M boltheads. The bolt heads have a shaft on them and I will use those shafts to help mount the bracket to the engine.
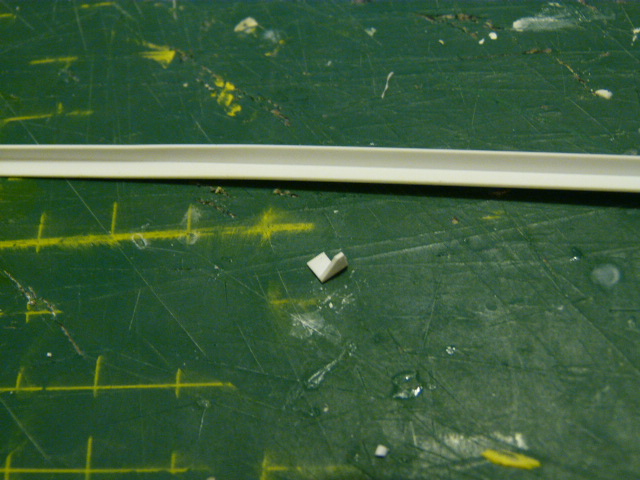
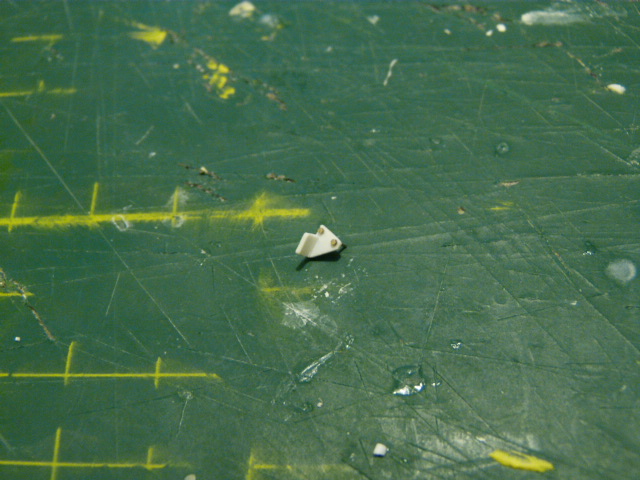
It was just a matter of adding more small styrene sections to increase the detail.
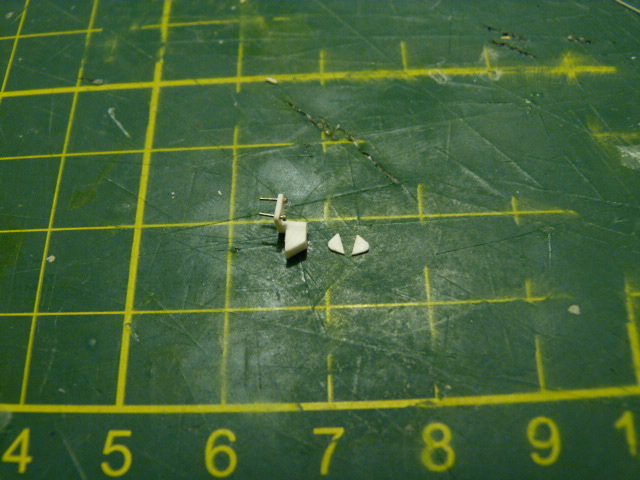
I added a couple more boltheads to the sides and made a mounting bracket for the chassis rails.
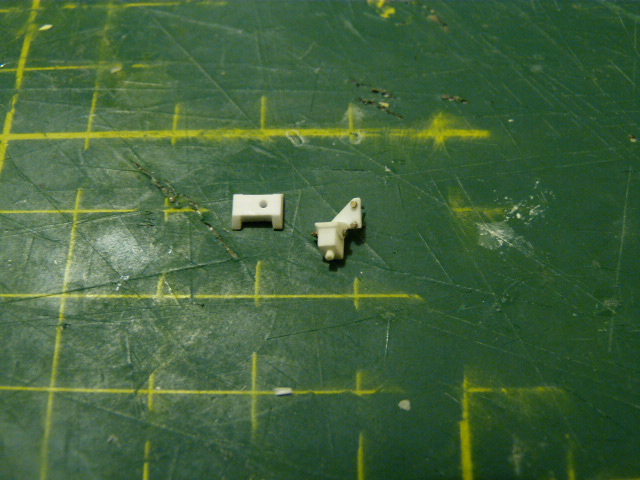
This is what it looks like mounted in place.

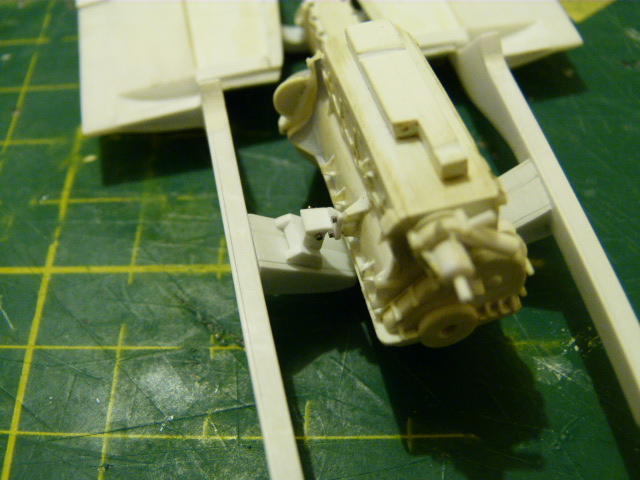
Obviously I repeated that for both sides.
I have started work on the firewall and on the sides of the engine bay itself but as it's not near completion yet I will hold off showing you. It's a tricky area to do because I can't finish one thing without starting another. There are still plenty of things left to do so stay tuned.
CheersSS
I had planned to use the original front chassis section but after some dodgy cutting and shutting it didn't look so flash so I decided to make new front chassis rails.
The original Mustang rails weren't all that straight to start with but my extra work on them really stuffed them up.

Cut the bastards off and make some new ones from thick evergreen strips.


Once they were sorted I made the trans mount from the same thick strip.


All done and detailed with T2M bold heads.

I made the engine crossmember from many different evergreen sections. I started with some thin stuff cut to shape.

I forgot to take pics of the rest of the crossmember construction sequence so here it is in place on the chassis. The trans mount is glued into place at his stage too.

I made the front radiator mount crossmember too. This won't be glued in place until I am happy with where everything else is.


To make the engine mounts I started with evergreen angle strip that was cut to shape then I drilled some holes for the T2M boltheads. The bolt heads have a shaft on them and I will use those shafts to help mount the bracket to the engine.


It was just a matter of adding more small styrene sections to increase the detail.

I added a couple more boltheads to the sides and made a mounting bracket for the chassis rails.

This is what it looks like mounted in place.


Obviously I repeated that for both sides.
I have started work on the firewall and on the sides of the engine bay itself but as it's not near completion yet I will hold off showing you. It's a tricky area to do because I can't finish one thing without starting another. There are still plenty of things left to do so stay tuned.
CheersSS

ShawnS- I Love this place

-
 Number of posts : 565
Age : 50
Location : South Australia
Registration date : 2009-12-22
 Re: XE Falcon S-Pack ** so anyway 8 years later- **
Far out. That is mindblowing how you have the patience to do something that small to that amount of detail..
Great work as always
Great work as always


Adam Clark- Legend Poster

-
 Number of posts : 1063
Age : 27
Location : Launceston
Registration date : 2011-07-11

Paul- AMCC ADDICT

-
 Number of posts : 4564
Age : 49
Location : Melbourne
Registration date : 2008-03-19
 Re: XE Falcon S-Pack ** so anyway 8 years later- **
 will all above

allan- AMCC ADDICT

-
 Number of posts : 10406
Age : 67
Location : East Maitland
Registration date : 2008-03-31
 Re: XE Falcon S-Pack ** so anyway 8 years later- **
Insane work, as usual!! Well done, you oughtta be proud of that!

RetrospectKustoms- AMCC ADDICT

-
 Number of posts : 2475
Age : 44
Location : Barossa Valley, So Aus
Registration date : 2011-12-14
 Re: XE Falcon S-Pack ** so anyway 8 years later- **
 ...all I can say after I picked myself up off the floor. Keep it up. Great stuff!
mgy125- AMCC ADDICT

-
 Number of posts : 1679
Age : 88
Location : Moldovia
Registration date : 2010-06-24
Page 18 of 36 •  1 ... 10 ... 17, 18, 19 ... 27 ... 36
 Similar topics
» XE Falcon S-Pack
» New Years Resolution.
» 1st one in 14 years
» First build for over 30 years- 65 Chev P/up DONE!
» 69 Dodge 440 6 Pack
» New Years Resolution.
» 1st one in 14 years
» First build for over 30 years- 65 Chev P/up DONE!
» 69 Dodge 440 6 Pack
Page 18 of 36
Permissions in this forum:
You cannot reply to topics in this forum
 sonofabitch, yeah incredible comes to mind


